Faux Copper Patina
by Shannon Smith
Use paper crafting products to create the look of weathered metal.
Supplies
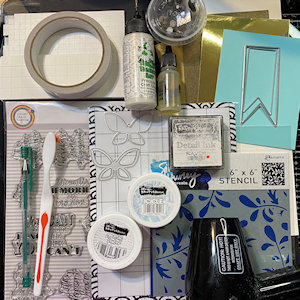
- Cardstock in Aqua/Turquoise color range
- Gel pen (Teal shade used here - Gold, Bronze, or Copper could work too)
- Clear embossing powder (Brutus Monroe Icicle used here)
- White embossing powder (Brutus Monroe Alabaster used here)
- Embossing reinker or pad (FSJ used here)
- Toothbrush
- Heat tool (Ranger Heat It used here)
- Stencil (Grand Greenery by Simon Hurley Create/Ranger used here)
- Brown water reactive ink (Grrr by Simon Hurley Create/Ranger used here)
- Spritz bottle
- Other supplies as needed to complete the project (used here: Glass mat, Brutus Monroe Stick & Stamp Mat, Icrafter foam squares, Tissue Tape, Bearly Art Glue, FSJ Gold Foil paper, Metallic brown layering weight cardstock, white A2 card base, A Pocketful of Happiness Butterfly dies, Die’sire Pennant dies)
Step-by-Step
-
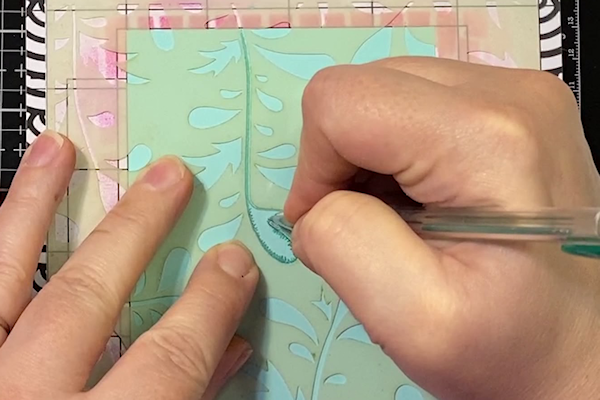
Step 1
Center aqua cardstock onto sticky mat and place stencil over the top, securing it to the mat by the overhanging parts of the stencil (or secure stencil over cardstock with your preferred method). Use a gel pen to trace the design outlines of the stencil then go around again this time creating a jagged outline. Remove stencil and heat set gel ink.
-
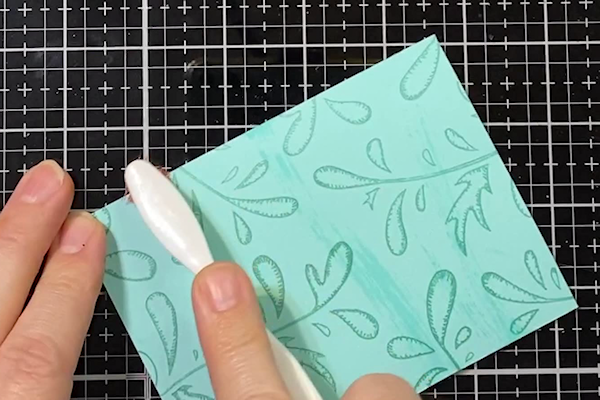
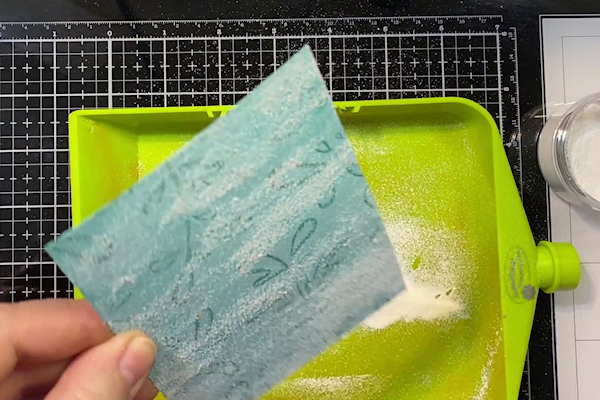
Step 2
Using the edge of an embossing ink pad or using an embossing ink reinker and a toothbrush, add strokes of embossing ink across the aqua panel leaving some areas dry.
-
Step 3
Option A
Add a very light layer of white embossing powder over the embossing ink. Brush a good portion of it off following the strokes with the toothbrush. Heat. Repeat the process again using clear embossing powder in place of the white still leaving some areas dry.
Option B
Add clear embossing powder over the embossing ink. Use a toothbrush to remove a bit of the powder using light brushstrokes. Heat. -
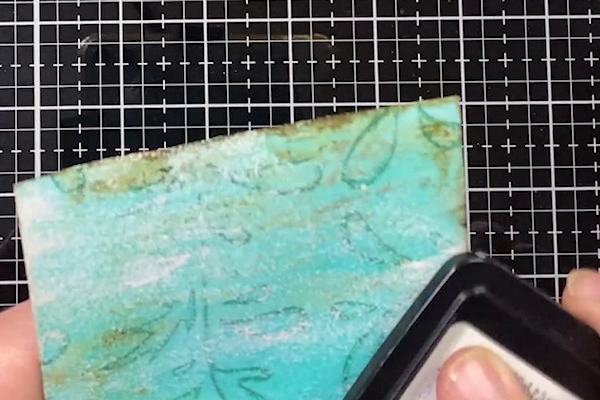
Step 4
Using brown ink and a media mat or glass mat add ink to the mat and spritz with water to create a small puddle. Smoosh the aqua panel, embossing side down into the puddle several times. Add ink directly from the pad to the edges of the panel (make sure there is no unset embossing powder residue as you don’t want to spoil your ink pad). Spritz with water to soften any hard lines. Allow to dry.
-
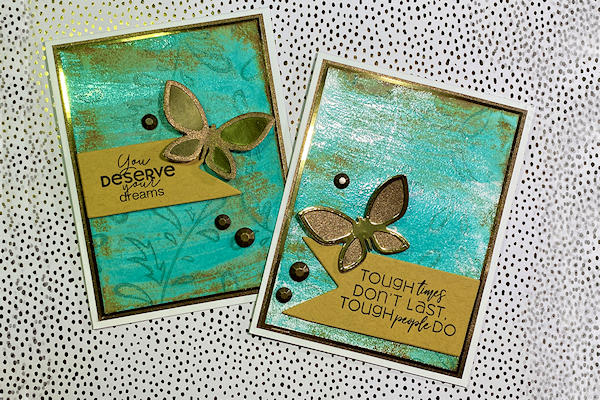
Step 5
Assemble and embellish the card as desired. For the sample, sentiments were stamped onto kraft cardstock die cuts using black ink. Butterflies were die cut and assembled. The patina panel was layered on gold foil cardstock then centered on metallic brown cardstock. Die cuts were added using foam squares.
-
Step 6
Complete the project.

Video!
Your Turn
You've seen the tutorial, now you try it! We've got a section of the gallery set aside for Faux Copper Patina. Try this technique, then upload your artwork to the gallery. Show us your creations!
***Please note - Internet Explorer/Edge is not a supported browser, and will not allow you to see the videos. Please use Chrome, Firefox or Safari to view our tutorial videos.

Questions and Comments
We'd love to get your feedback or questions. Leave your comment below.
Also, as an FYI to the tech gurus, there are no working links in the Weekly Inkling to this technique. I had to get to it through the page listing all of the past techniques.
Page 1 of 1 pages