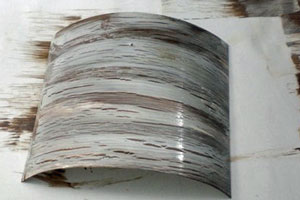
Faux Barn Board
by Sharon Field
Use white glue and a re-inker to create an interesting background.
Supplies
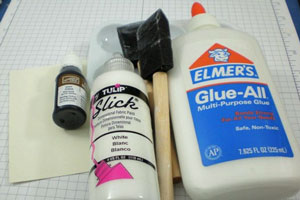
- Scrap paper to protect your work surface
- Paint tray or plastic container to mix your supplies in
- White acrylic paint
- Medium brown dye re-inker (Soft Suede used here)
- Toothpick or something to stir your ink/paint mixture with
- Two to three foam brushes
- White glue (Elmer's Glue used here - school glue will work just fine)
- Light, neutral cardstock (Very Vanilla used here)
- Heat tool
Step-by-Step
-
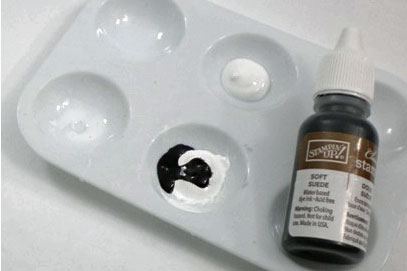
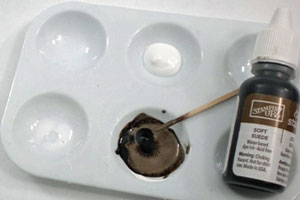
Step 1
Put a nickel size drop of white acrylic paint in your paint tray or plastic lid.
-
Add 4-5 drops of re-inker, and mix well with a toothpick.
-
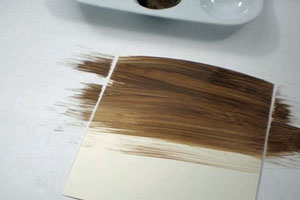
Step 2
Use a foam brush to apply the paint and re-inker mixture to the cardstock using a sweeping motion, allowing some of the base cardstock color to show through, and continuing in the same direction. The cardstock will curl because of the moisture in the mixture.
-
Step 3
Gently dry the cardstock using a pre-heated heat tool.
Pre-heating your heat tool helps prevent scorching the paint -you can also allow the cardstock to air dry.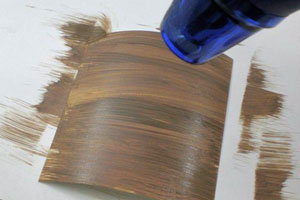
-
Step 4
Add about 1 teaspoon of glue into the paint tray, and working quickly in the same direction as the paint strokes, use a foam brush to apply a thin layer of glue to the painted cardstock.
The cardstock will have a somewhat milky appearance.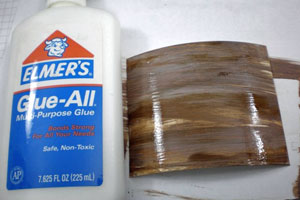
-
Allow the cardstock piece to dry just until it is tacky. You can speed it up with a heat tool if you'd prefer - just don’t let it dry completely.
-
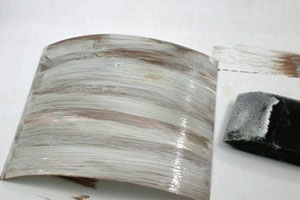
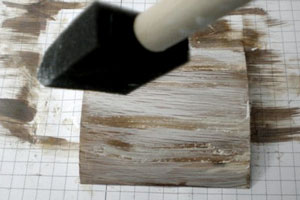
Step 5
Add about a quarter sized drop of white acrylic paint to the paint tray. Working in the same direction as the prior brush strokes, use a foam brush to add white paint to the cardstock.
-
Step 6
Be patient - if you try to apply the paint before the glue is tacky, the piece will look have a mottled look and texture.
-
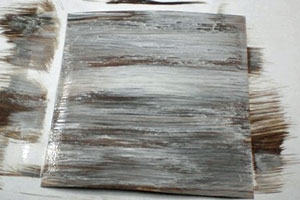
Step 7
It’s fun to watch the piece as it air-dries - you will see the paint and glue separate right before your eyes, like a mini science experiment.
-
Step 8
As it dries, add additional distressing with the pointed edge of a foam brush by lightly brushing it across the surface.
-
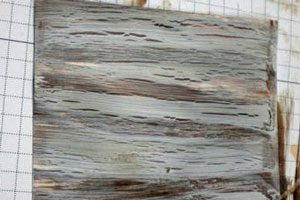
To speed up the process, use a preheated heat tool, but be careful, the paint likes to scorch!
As it dries, the cardstock will flatten out.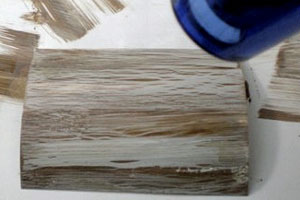
-
Step 9
The background is finished.
-
Step 10
Use the background on a finished card.

Video!
Your Turn
You've seen the tutorial, now you try it! We've got a section of the gallery set aside for Faux Barn Board. Try this technique, then upload your artwork to the gallery. Show us your creations!
***Please note - Internet Explorer/Edge is not a supported browser, and will not allow you to see the videos. Please use Chrome, Firefox or Safari to view our tutorial videos.

Questions and Comments
We'd love to get your feedback or questions. Leave your comment below.
Thank you!
merci md
Thanks
Beate tried the Holtz acrylic and did not get the same results - probably because of the more matte finish of those paints.
The slick paint that Sharon used is made by Tulip and is glossy.
Msdaiquiri: Slick paint is made by tulip and is generally found in local hobby stores around the fabric paint. It is definitely different than other products! You will achieve different results based on what paint/materials used. I found that the slick paint by tulip seemed to work the best!
Bernadette: I don't know if that combo of materials will work as I have not tried them... see my response to Msdaiquiri
Rebecca: I'm betting you cannot because that glue never really dries and it is very thick.. it is also more costly than plain old school glue. I tried to used this technique with Tombow Multi Adhesive and it did not work at all
Debbi: Not sure, sounds like it might work... hmm, great brainstorming!
Page 1 of 3 pages 1 2 3 >