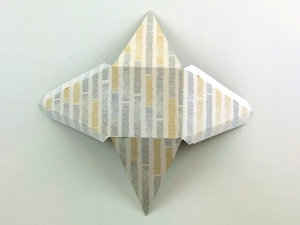
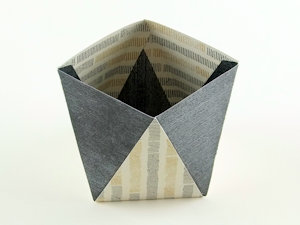
Faceted Basket
by Betty Traciak
Use a pyramid die or template to create this unique faceted treat holder.
Supplies
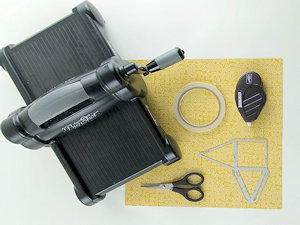
- Double-sided paper
- Pyramid Pals Thinlits by Stampin’ Up! or free downloadable template or cut file
- Die cutting machine
- Scissors
- Adhesive
- Other supplies as necessary to complete the project (SU products used here: Custom Tee stamp set, Urban Underground Specialty Designer Series Paper, Very Vanilla Cardstock, Delightful Dijon ink, Urban Underground Embellishments, Basic Black Metallic Thread,Tags and Labels Framelits. Alternate Project: Urban Underground Specialty Designer Series Paper, Urban Underground Embellishments, Lots of Labels Framelits)
Step-by-Step
-
Step 1
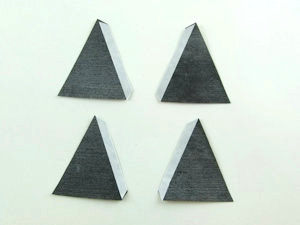
Using the Pyramid Pals die, cut two full pieces from double-sided paper. Partially die cut four triangles with flaps. Trim on score lines as necessary.
If using the free downloadable template, print two copies. Cut outside the lines to create tabs as shown in step 3.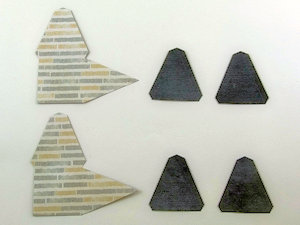
-
Step 2
Cut the right tab off two of the triangles and the left tab off the other two triangles.
-
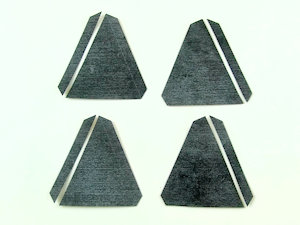
Step 3
Apply adhesive to the square of one of the full die cuts. Adhere one die cut on top of the other to form a base. (If using the printable template, this has been done for you.)
-
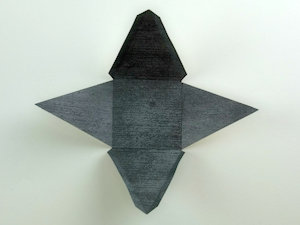
Step 4
Fold on all score lines.
-
Apply strip adhesive to the tabs.
-
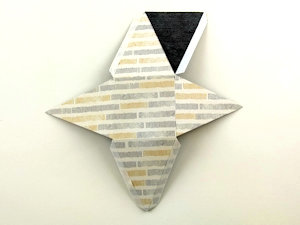
Step 5
Adhere an inverted triangle to the base.
-
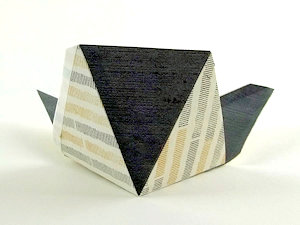
Step 6
Adhere an inverted triangle to the neighboring triangle of the base.
-
Step 7
Continue around the base adhering triangles between each section.
-
Step 8
Adhere a 3/4” X 12” handle inside the basket. Add decorations as desired to complete the project.

Video!
Variations
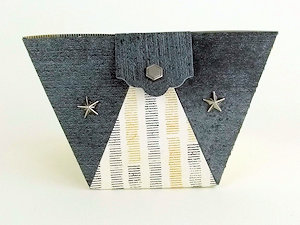
-
Omit the handle, and attach a tab from the inside of one side of the piece to the outside of the other to create a clutch.
Your Turn
You've seen the tutorial, now you try it! We've got a section of the gallery set aside for Faceted Basket. Try this technique, then upload your artwork to the gallery. Show us your creations!
***Please note - Internet Explorer/Edge is not a supported browser, and will not allow you to see the videos. Please use Chrome, Firefox or Safari to view our tutorial videos.

Questions and Comments
We'd love to get your feedback or questions. Leave your comment below.
Page 1 of 1 pages