Envelope Punch Board Tote
by Susan Campfield
Use the Envelope Punch Board to create this cute little bag in a box. Special thanks to Sam Hammond from the United Kingdom, whose project inspired this tutorial.
Supplies
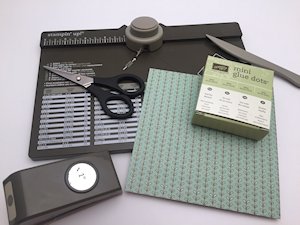
- Two Sided Patterned Paper, 6” x 6” (Stampin’ Up!® Petals & Paisleys Specialty Designer Series Paper used here)
- Envelope Punch Board
- 1” Circle Punch
- Ribbon, baker’s twine, or clip (Stampin’ Up!® 3/8” Ribbon Trio Pack used here)
- Glue Dots
- Scissors
- Stamps to embellish the box (Stampin’ Up!® Paisley Framelits Dies and Copper Foil Sheets used here)
- Treats
Step-by-Step
-
Step 1
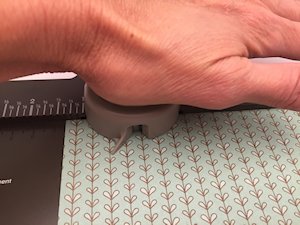
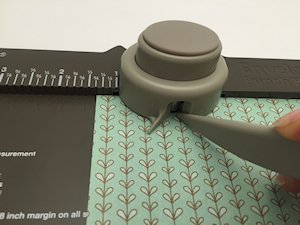
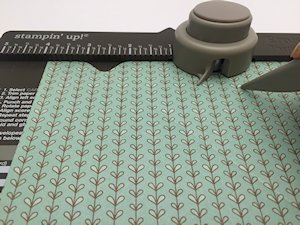
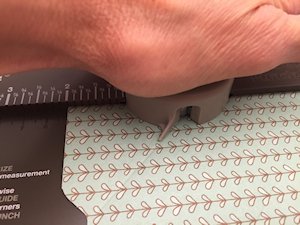
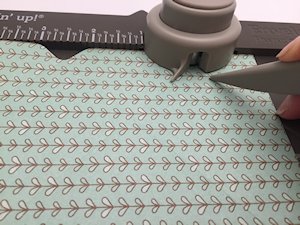
Place the 6” x 6” patterned paper in the envelope punch board. Line up the left edge to the 1 3/8” mark and punch.
-
Without moving the paper, place the tip of the scoring tool that comes with the punch board inside the opening, touching the side on the left. Press down and score along the entire length of the paper following the diagonal groove on the punch board.
-
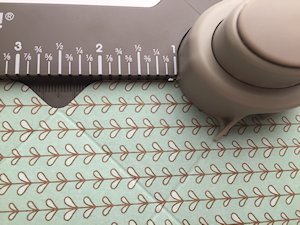
Step 2
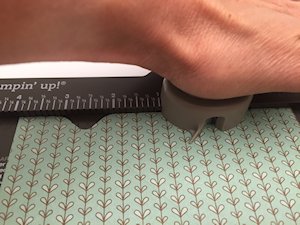
Slide the paper so the left edge is at the 4” mark and punch.
-
Without moving the paper, place the tip of the scoring tool that comes with the punch board inside the opening, touching the side on the left. Press down and score along the entire length of the paper following the diagonal groove on the punch board.
-
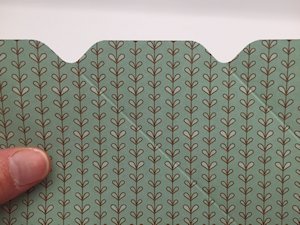
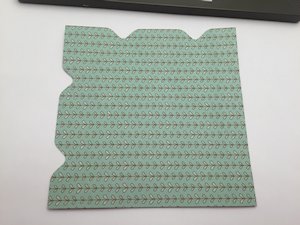
Step 3
The paper should now look like this.
-
Step 4
Rotate your paper one turn to the left. From now on, you will NOT use the ruler at the top of the punch board.
-
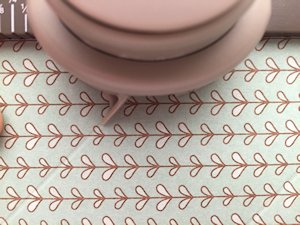
Instead, line up the score line on your paper to the pointer (also known as the score guide) on the punch board.
-
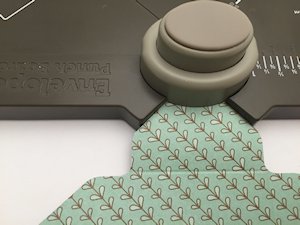
Step 5
With the pointer lined up with the score line, punch.
-
Without moving the paper, place the tip of the scoring tool that comes with the punch board inside the opening, touching the side on the left. Press down and score along the entire length of the paper following the diagonal groove on the punch board.

-
Step 6
Slide the paper to the left so that the pointer is lined up with the next score line.
-
Punch and score again.

-
Step 7
The paper should now look like this.
-
Step 8
Rotate the paper one turn to the left again. Line up the pointer with the first score. Punch and score.
-
Step 9
Slide the paper to the left until lined up with the next score line. Punch and score.

-
Rotate the paper and repeat the process. Make sure to line up the pointer with the score line – do not use the ruler.
-
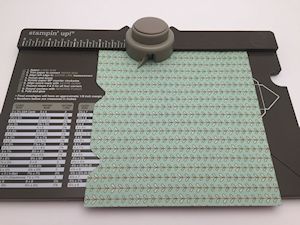
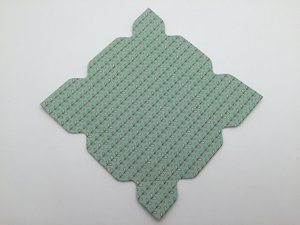
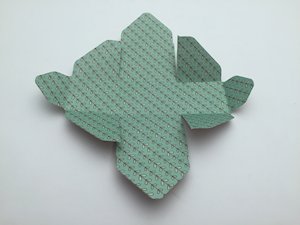
Step 10
The paper should now look like this.
-
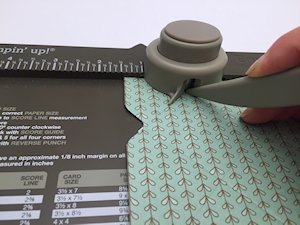
Step 11
Use the built in corner rounder on the punch board to round all of the corners.
-
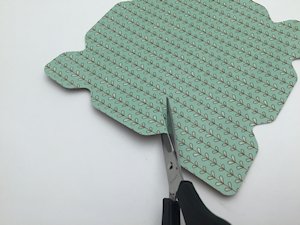
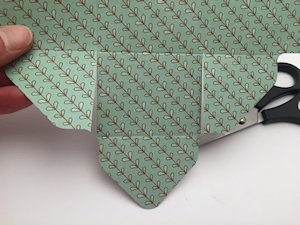
Step 12
Cut up on the score line next to the wide triangle. Stop cutting when you come to an intersecting score line.
-
Repeat cutting on the other side.
-
Step 13
Rotate the paper to the other wide triangle and repeat this process - cutting on the score lines until you meet the intersecting score line.
-
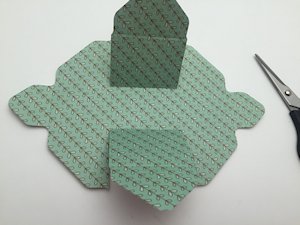
Step 14
Fold on all of the score lines.
-
Step 15
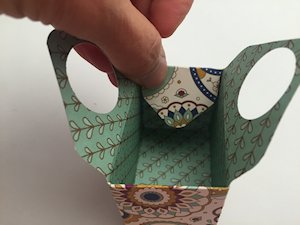
Use the 1” punch to punch out a scrap piece of paper. Place temporary glue on the back of this circle to make a template. Place the circle approximately where you would like the hole to go.

-
Line up the punch so you can see all of the white circle and punch. This will help you get the hole exactly where you want it.
Punch a hole on the other side using the same process.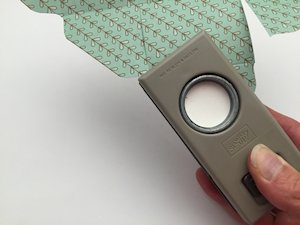
-
Step 16
Use glue dots to assemble the box. Place a glue dot on one flap. Fold it on the score line.
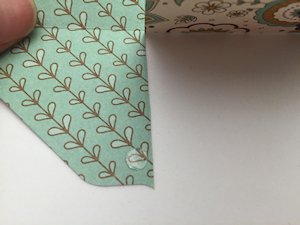
-
You will see that it will cross in front of the box. Press the glue dot to the box.
-
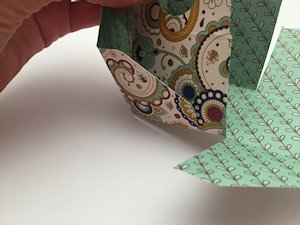
Step 17
Place another glue dot in the corner of the other flap – attach it to the other flap so that they cross over one another.
-
Repeat on the other side of the box.
-
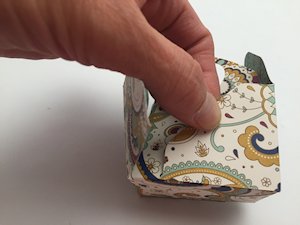
Step 18
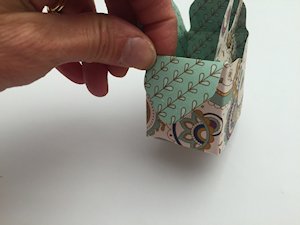
Fold the remaining tab out for a contrasting look, or tuck it in to the inside if you do not want it to show.
-
Secure with a glue dot.
-
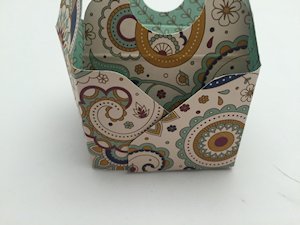
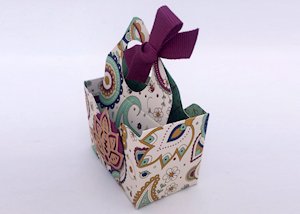
Step 19
Place the treat in the box and secure the handle with a ribbon, twine, or a clip.
-
Step 20
Decorate the front of the box.
The finished project measures 2 3/8" wide, 1 1/2" deep, 3 3/8" tall.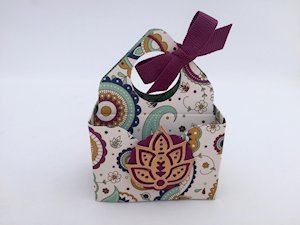
-
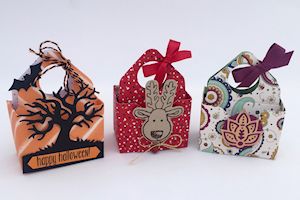
Be creative with tiny totes themed for holidays or everyday gift giving.
Video!
Your Turn
You've seen the tutorial, now you try it! We've got a section of the gallery set aside for Envelope Punch Board Tote. Try this technique, then upload your artwork to the gallery. Show us your creations!
***Please note - Internet Explorer/Edge is not a supported browser, and will not allow you to see the videos. Please use Chrome, Firefox or Safari to view our tutorial videos.

Questions and Comments
We'd love to get your feedback or questions. Leave your comment below.
Have made 2already, just need to embellish them;o)
I'm excited to hear how the 12" x 12" version came out? Maybe try doubling the measurements since you are doubling the paper size? I think 8" x 8" would be fun ti try too...
These are so very cute.
I will try (first time ;o) to put a picture in the gallery.
Once again, thank you for a great tutorial.
Page 1 of 2 pages 1 2 >