Envelope Fold Card
by Melissa Banbury
This pop-up card folds into its own envelope.
Supplies

- Cardstock (Stampin’ Up!® Basic Black and Real Red used here)
- Paper trimmer
- Scoring tool
- Double stick tape (SU! Tear and Tape used here)
- Multi-purpose liquid glue
- Other supplies as needed to complete the project (decorative papers (SU! Timeless Elegance DSP and Have a Cuppa DSP used here); ink (SU! Real Red used here); sponges; die cut images or punches (SU! Cups & Kettles and Lots of Labels used here as well as images cut with a Silhouette Cameo)
Step-by-Step
-
Step 1
Cut a card base from sturdy cardstock, measuring 6” x 10 1/8”.
Score at 2”, 2 1/8”, and 6 1/8”.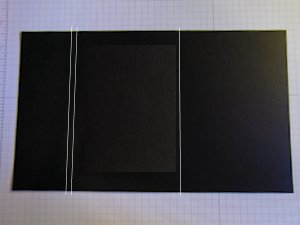
-
Step 2
Cut a second piece of cardstock (any color), to 6” x 8”.
Score in 3/8" on each 6” side.
Measure 1/2” in from the top and bottom and both score lines, and cut away with a paper trimmer or craft knife to create a frame.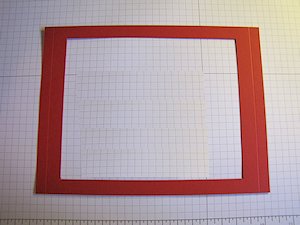
-
Step 3
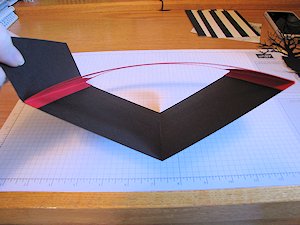
Add double stick tape to both 3/8” sections.

-
Step 4
Adhere the frame to the card base. Line up one edge of the frame with the 2-1/8” score line on the card base and the second edge of the frame with the outer edge of the card base.
-
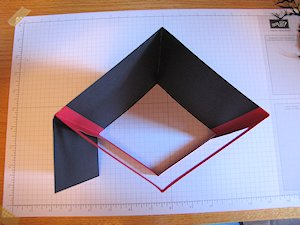
Step 5
Gently push the frame downward in the center and close the card to form an envelope shape.
-
Step 6
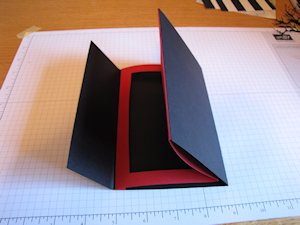
Re-open the card and push the frame outwards on the center fold to create a diamond shape.
-
Step 7
Add decorative papers along the backside of the card base and the sentiment area.
TIP:
Cut the papers 1/16” smaller than the card base to prevent bunching on the fold lines.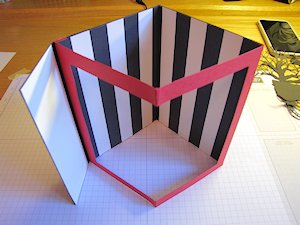
-
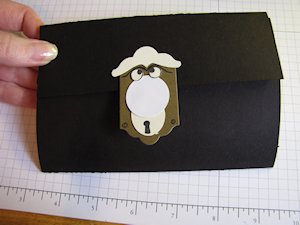
Step 8
Add a decorative image to the front of the envelope that can be used later as a tab to hold it closed.
-
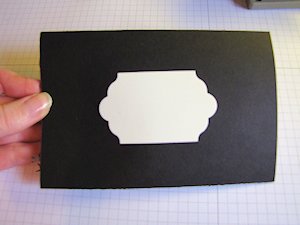
Step 9
Add a decorative tag to the back of the envelope so the receiver’s address can be added before mailing.
-
Step 10
Complete the card by using decorative dies, fussy cut stamped images, or electronically cut images to embellish the inside of your card. Embellish the frame as well as the inner card for more dimension.
Close the card and adhere the outer tab for mailing or hand delivery.
The finished card measures 4" x 6".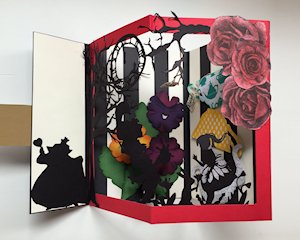
Video!
Your Turn
You've seen the tutorial, now you try it! We've got a section of the gallery set aside for Envelope Fold Card. Try this technique, then upload your artwork to the gallery. Show us your creations!
***Please note - Internet Explorer/Edge is not a supported browser, and will not allow you to see the videos. Please use Chrome, Firefox or Safari to view our tutorial videos.

Questions and Comments
We'd love to get your feedback or questions. Leave your comment below.
Tab closures interest me. Are there more specific details about making these? (e.g...velcro, magnets, re-sealable tape, etc.)
You have some good ideas about closures. I remember using these types of cards as a child, and we just stuck them closed with a matching sticker!
Page 1 of 1 pages