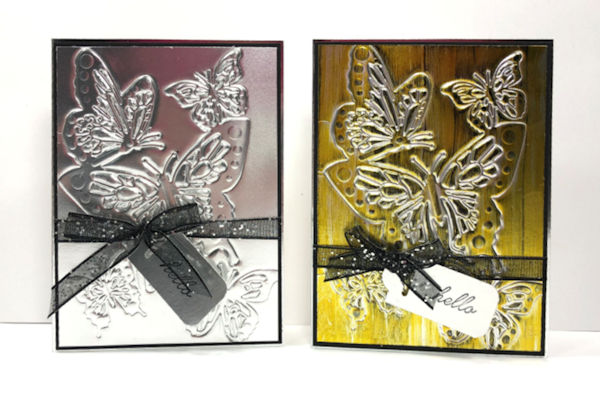
Embossing with Detailed Dies
by France Martin
Use the detailed lines of a metal die for embossing instead of cutting.
Supplies
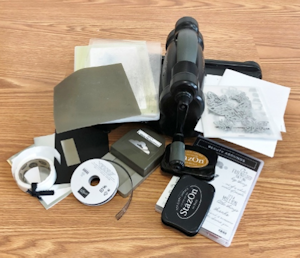
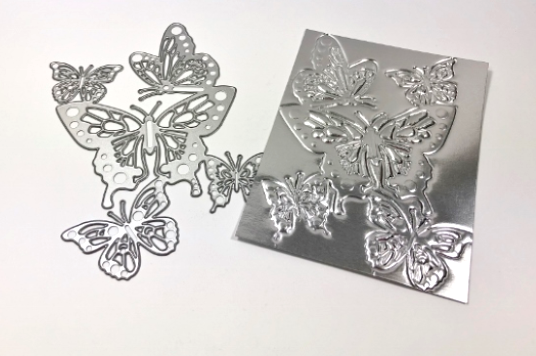
- Thin metal die (Stampin’ Up!® Butterfly Beauty die used here)
- Cardstock (SU Silver Foil cardstock used here)
- Die cutting machine
- Silicone embossing pad
- Other supplies as needed to complete the project (SU supplies used here: Silver Foil Edge Card, black cardstock, Stazon Black and Brown ink, Scalloped Tag Punch, Black Glittered Organdy ribbon, adhesive, Beauty Abounds stamp set)
Step-by-Step
-
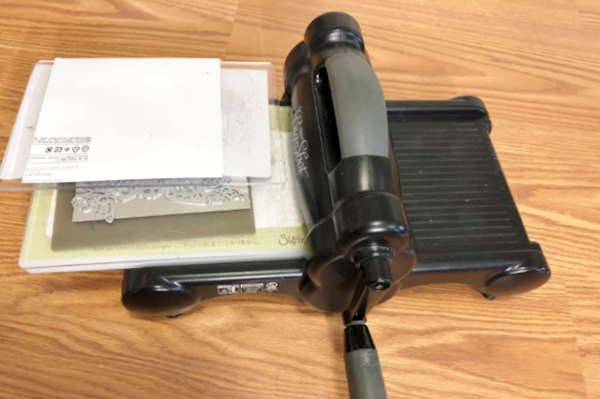
Step 1
Placement of the platform and die to emboss with the Big Shot:
Platform
Clear plate
Silicone craft sheet
Cardstock, facing up
Detailed die, cutting edge face down onto the foil)
A piece of copy paper
Clear plate
Two pieces of cardstock for shim
NOTE:
Top and bottom plates or shims may vary depending on your machine, but the technique will work with proper pressure if the italicized layers are in order. -
Step 2
Run the sandwich through your die cutting machine. The die will press into the cardstock, but the silicone pad should not allow it to cut through.
-
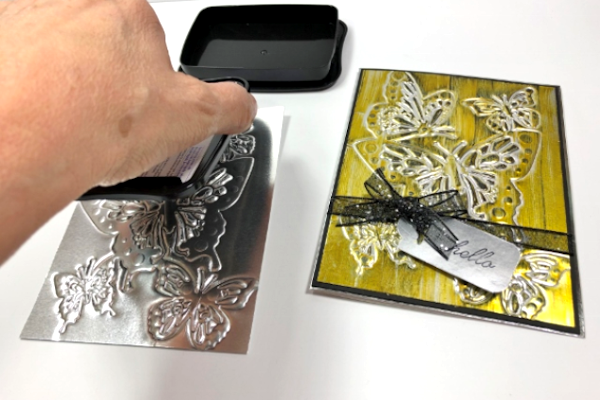
Step 3 (Optional)
Drag Stazon ink across the embossed foil. Brown and black inks were used here.
-
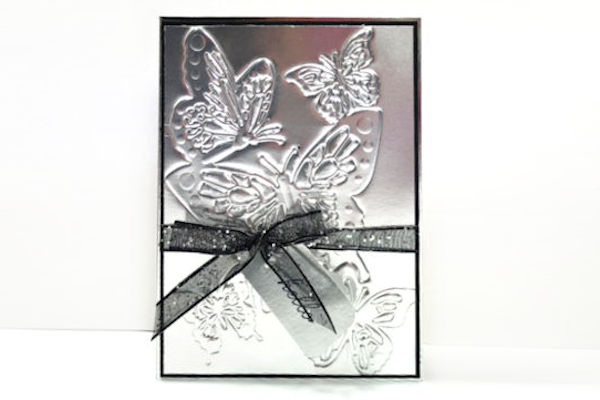
Step 4
Assemble and embellish the card as desired.
-
Step 5
Complete the project.

Video!
Your Turn
You've seen the tutorial, now you try it! We've got a section of the gallery set aside for Embossing with Detailed Dies. Try this technique, then upload your artwork to the gallery. Show us your creations!
***Please note - Internet Explorer/Edge is not a supported browser, and will not allow you to see the videos. Please use Chrome, Firefox or Safari to view our tutorial videos.

Questions and Comments
We'd love to get your feedback or questions. Leave your comment below.
it didn't cut the silver foil paper because I used the Silicone matt under.
Page 1 of 1 pages