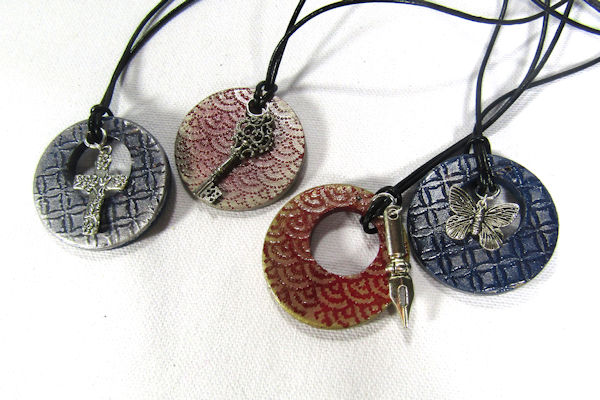
Embossed Wood Pendants
by Dina Kowal
Create a handmade pendant with a raised pattern.
Supplies
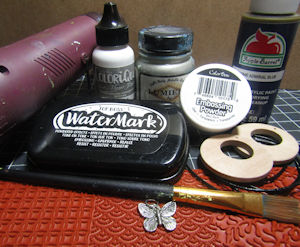
- Unfinished wood medallion, drilled with at least 1/4" hole
- Acrylic craft paint (Apple Barrel® matte and Lumiere metallic paint used here)
- Paint brush
- Clear embossing ink (Clearsnap® Top Boss WaterMark ink used here)
- Clear embossing powder (ColorBox® brand used here)
- Patterned background stamp (ColorBox® Table Cloth Molding Mat used here)
- Heat tool
- Baby wipes
- Metallic pigment ink or metallic rub (Colorbox® Silver Mini Metallic Inkpad used here)
- Clear varnish (ColorBox® Colorique Sealant used here)
- Metal charm
- Jewelry pliers
- Jump rings – 4mm and 6mm
- 36” cording (1.5mm black round leather cord used here)
Step-by-Step
-
Step 1
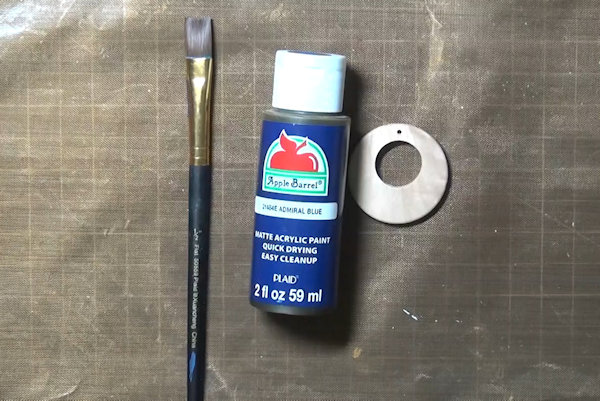
Prepare a wood medallion for use as a pendant. The one pictured was pre-drilled – other pieces may need to be drilled and sanded before painting. For ease of assembly, the hole should be at least 1/4" across.
Choose an acrylic craft paint for the base coat. -
Step 2
Give the wood piece an even coat of paint on all surfaces. Allow the paint to dry completely.
-
TIPS:
A darker color works nicely for the base coat.
For mass production, use spray paint.
Use a heat tool lightly to speed the drying process. -
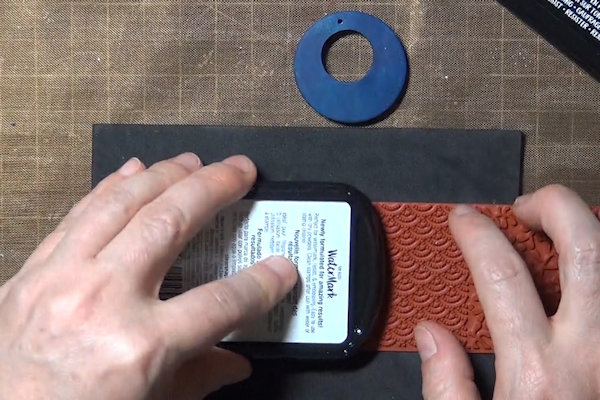
Step 3
Ink up a patterned background stamp with embossing ink.
-
Step 4
Coat the embossed image with clear embossing powder.
-
Heat set to activate the powder.
-
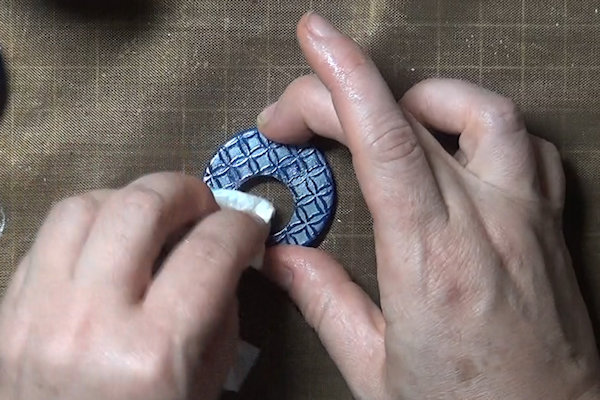
Step 5
Using your finger, rub a very small amount of lighter-colored acrylic paint onto the embossed surface. The embossed pattern is raised, and will resist the paint, allowing the base color to show through.
-
Use a baby wipe to remove any excess paint from the embossed pattern.
-
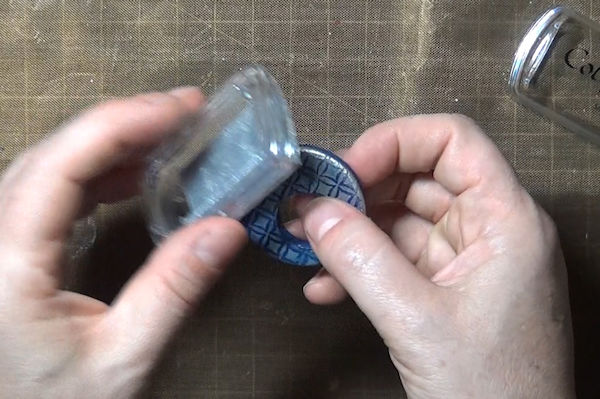
Step 6
Use a metallic ink, paint or paste to highlight the edges of the medallion. Blend as needed.
-
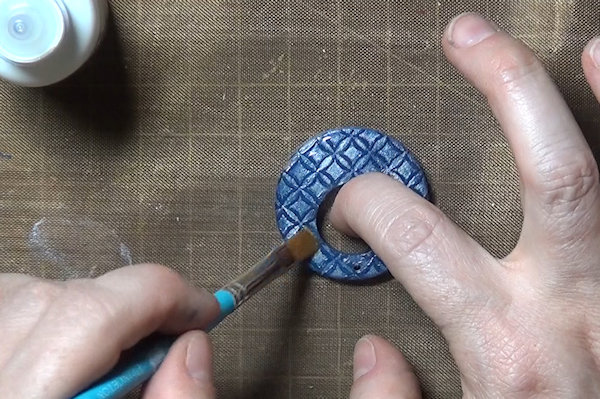
Step 7
Coat the medallion with a clear varnish or sealant on all surfaces. Allow it to dry completely.
-
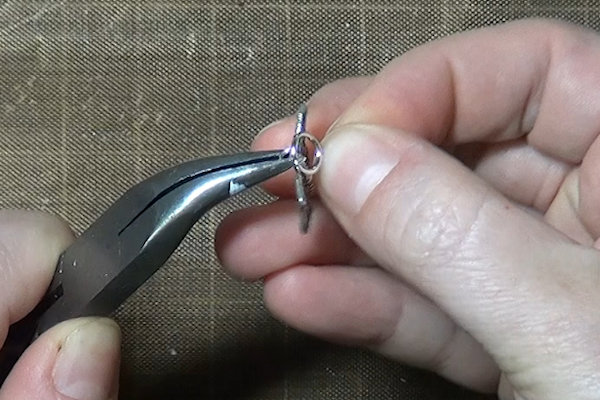
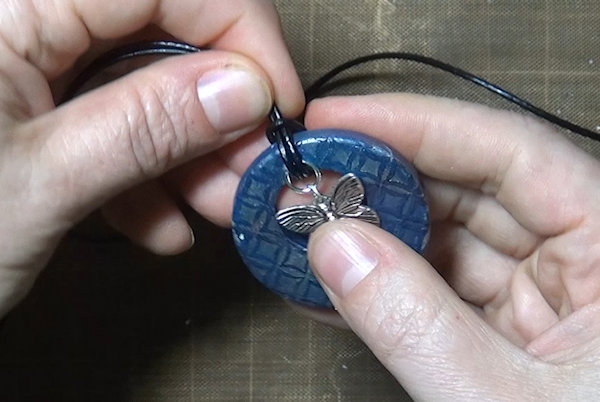
Step 8
Prepare a metal charm by adding a small (4mm) jump ring, and then a larger ring (6mm). Pliers are useful for opening the rings up and also ensuring a tight closure.
-
Ensure that the top ring will lay flat, allowing the charm to also lay flat against the wood medallion.
-
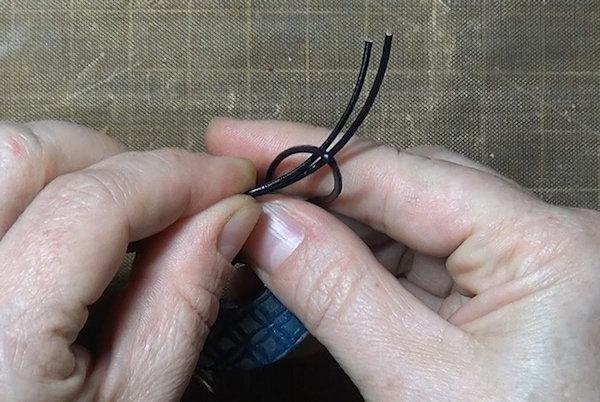
Step 9
Prepare a 36” length of cording. Find the center and fold it there. Run the center point through the top ring on the charm from front to back.
-
Insert the cording through the hole in the medallion from front to back, and pull the ends of the cord through the loop to secure the charm to the medallion with a knot.
-
Step 10
Adjust the charm and ring as needed so that it hangs flat against the medallion.
-
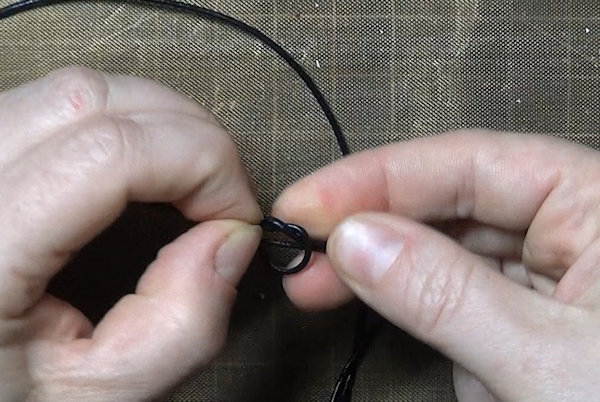
Step 11
For a fixed-length necklace, tie the ends of the cord in a knot for a closure.
-
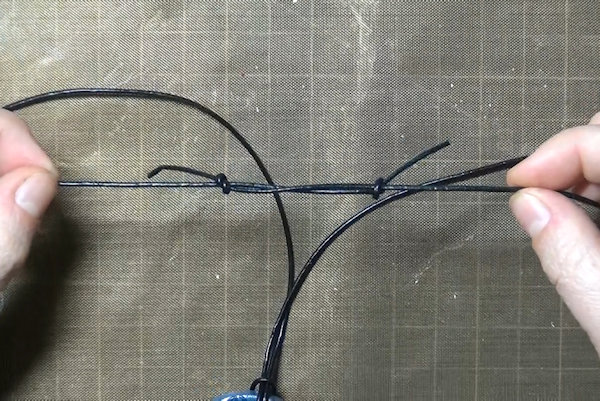
Step 12
For an adjustable length necklace, overlap the ends about 4". Wrap one end around the other side, and tie a knot, looping back, over, and through.
-
Repeat the process with the other end, tying it around the cord on the other side. (See video for clarity.)
-
Step 13
The knots will be able to slide on the cord, allowing the length to be adjusted.
-
Step 14
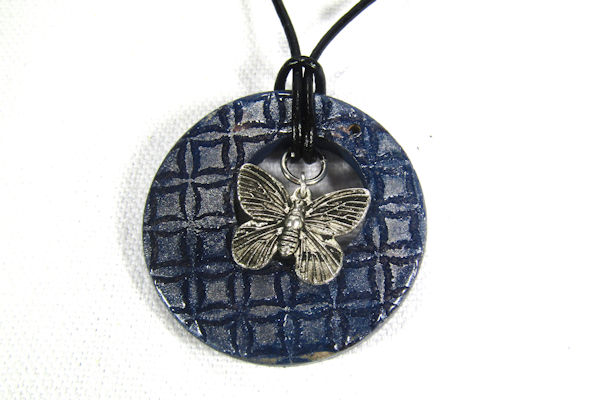
Complete the project.


Video!
Variations
-
Experiment with different color combinations and stamped patterns!
Try the embossing technique on another wood, chipboard or kraft item!
Your Turn
You've seen the tutorial, now you try it! We've got a section of the gallery set aside for Embossed Wood Pendants. Try this technique, then upload your artwork to the gallery. Show us your creations!
***Please note - Internet Explorer/Edge is not a supported browser, and will not allow you to see the videos. Please use Chrome, Firefox or Safari to view our tutorial videos.

Questions and Comments
We'd love to get your feedback or questions. Leave your comment below.
Page 1 of 1 pages