Embellished Bows
by Karen Giron
Simple bows become snazzy in a few simple steps.
Supplies

- Wide Ribbon (approximately 10-12" in length)
- A Button
- Embroidery Floss (approximately 5" in length)
- Scissors
- Mini Glue Dots
Step-by-Step
-
Step 1
Thread both ends of the embroidery floss through the back of the button, leaving a large loop behind the button.

-
Step 2
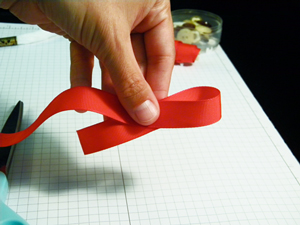
Fold about 1/3 of the ribbon backward.
-
Step 3
Repeat previous step on the opposite end of the ribbon.
-
Step 4
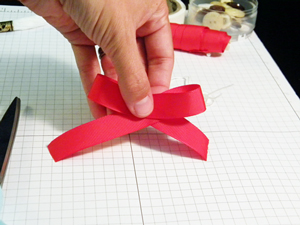
Holding the ribbon in the center, place the ribbon through the threaded button.

-
Step 5
Tie the button to the ribbon making sure to pull it extremely tight and centering the button before tying the knot.
Be sure to make any adjustments to the bow before tying the knot tight.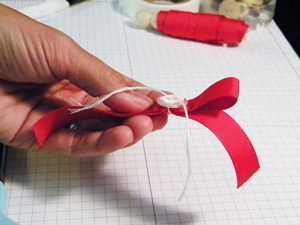
-
Step 6
Snip the ends of your ribbon. Add a different look to the bow by trimming the ends in a V shape
Add the bow to your project with a mini glue dot.
-
Step 7
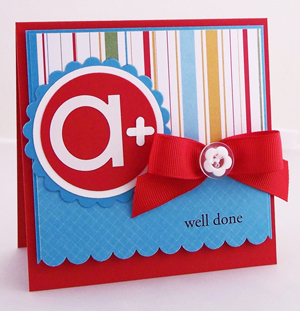
Completed card featuring an embellished bow.
Your Turn
You've seen the tutorial, now you try it! We've got a section of the gallery set aside for Embellished Bows. Try this technique, then upload your artwork to the gallery. Show us your creations!
***Please note - Internet Explorer/Edge is not a supported browser, and will not allow you to see the videos. Please use Chrome, Firefox or Safari to view our tutorial videos.

 *
*
Questions and Comments
We'd love to get your feedback or questions. Leave your comment below.
Hugs and smiles
This is too cool to miss! I'll be giving this a try soon!
Thanks a bunch!
~Bev
So simple, I am bow challenged , so this is
Effect for me. Thanks for sharing.
Craft smiles
Page 1 of 1 pages