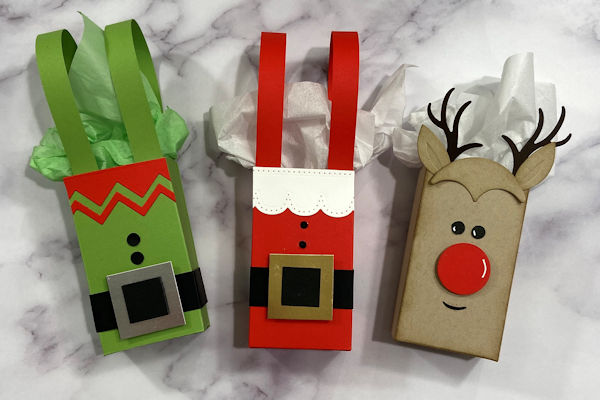
Elf Treat Box
by Jill Hilliard
Make a treat holder with a little holiday character.
Supplies
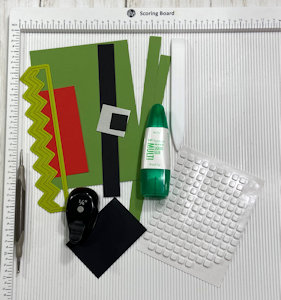
- Cardstock
- Border dies or punches (Border Basics from Spellbinders-FSJ used here)
- 1/4" circle punch
- Scoring tool
- Die-cutting machine
- Scissors
- Strong adhesive
- Bone folder
- Foam squares
Step-by-Step
-
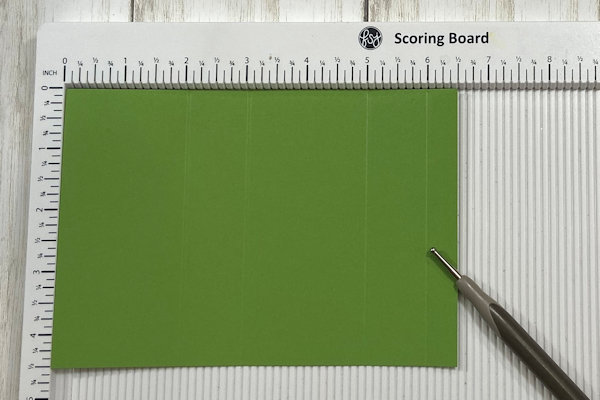
Step 1
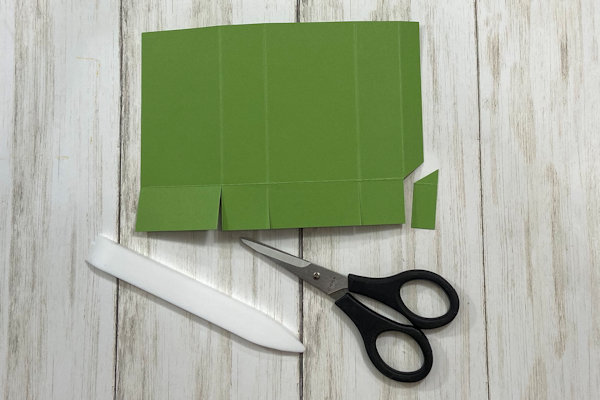
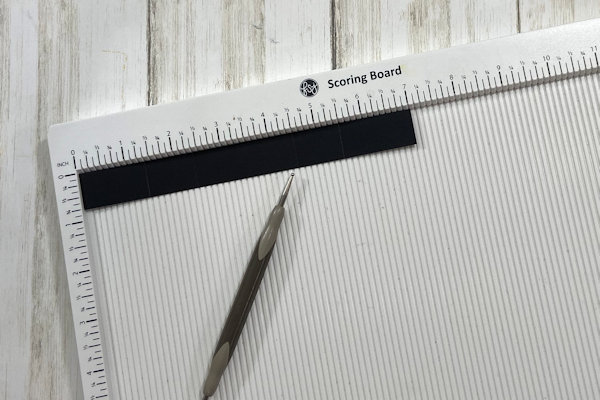
Cut cardstock to 6 1/2" x 4 1/2".
With the 6 1/2" inch side at the top of your scoring tool, score at 2", 3", 5", and 6". -
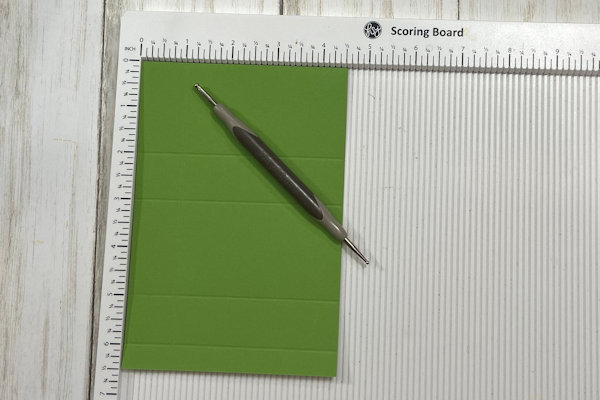
Step 2
With the 4 1/2" inch side at the top of your scoring tool, score at 1".
-
Step 3
Fold on all score lines and crease with a bone folder. Snip short score lines as shown. Cut notch out of 1/2" panel as shown.
-
Step 4
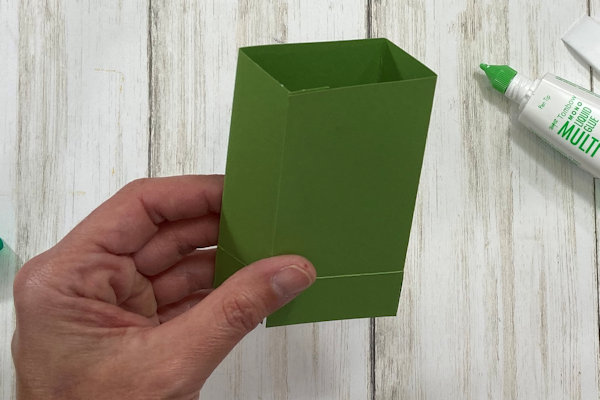
Add liquid or strong adhesive to the 1/2" tab. Close to form a box.
-
Fold in tabs at the bottom of box and secure with strong adhesive.
-
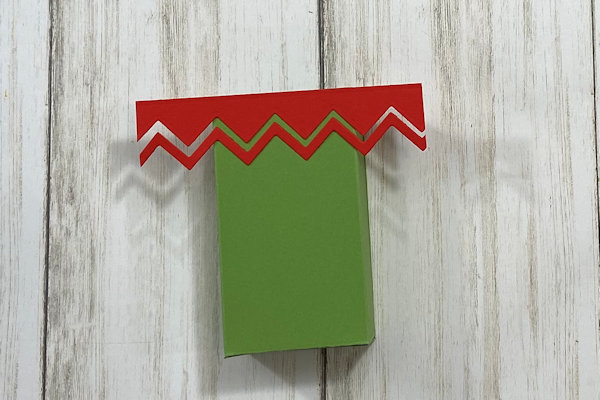
Step 5
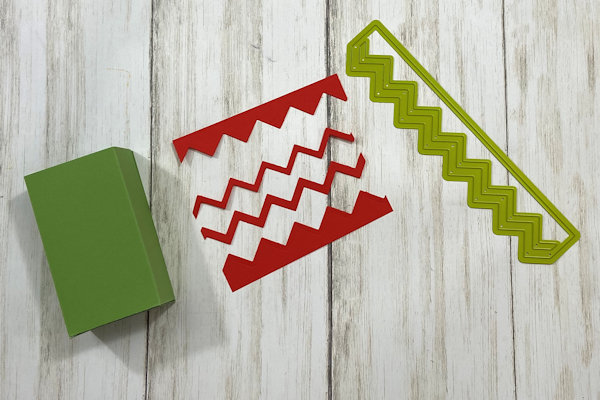
Die cut border from scrap red cardstock for a collar.
-
Adhere to the front of the box and trim edges.
-
Step 6
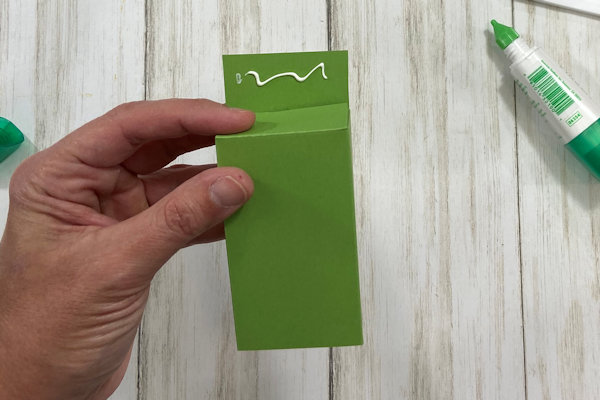
Cut black cardstock to 3/4" x 7" and score at 1 3/8", 2 3/8", 4 1/2", and 5 1/2".
-
Adhere the belt to the box, towards the bottom, with the seam in the front.
-
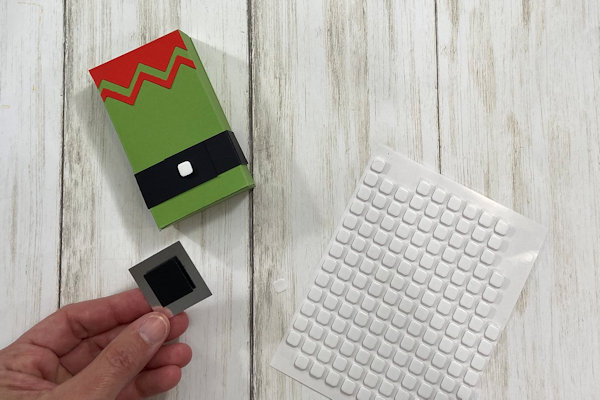
Step 7
Cut silver cardstock to 1 1/4" x 1 1/4" for the buckle.
Cut (or square punch) black cardstock to 3/4" x 3/4" for the buckle center.
Adhere to the front of the box with foam squares. -
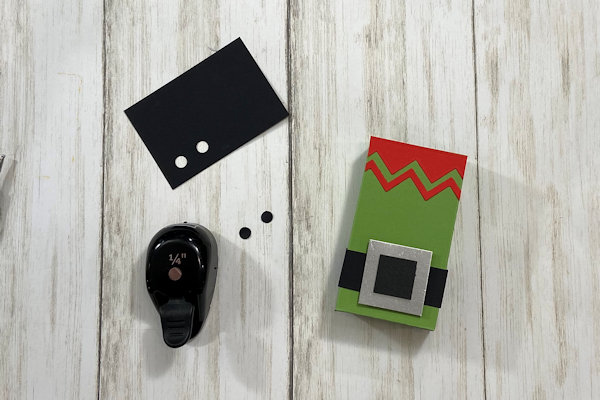
Step 8
Punch two 1/4" circles from black cardstock and adhere to the box as buttons.
-
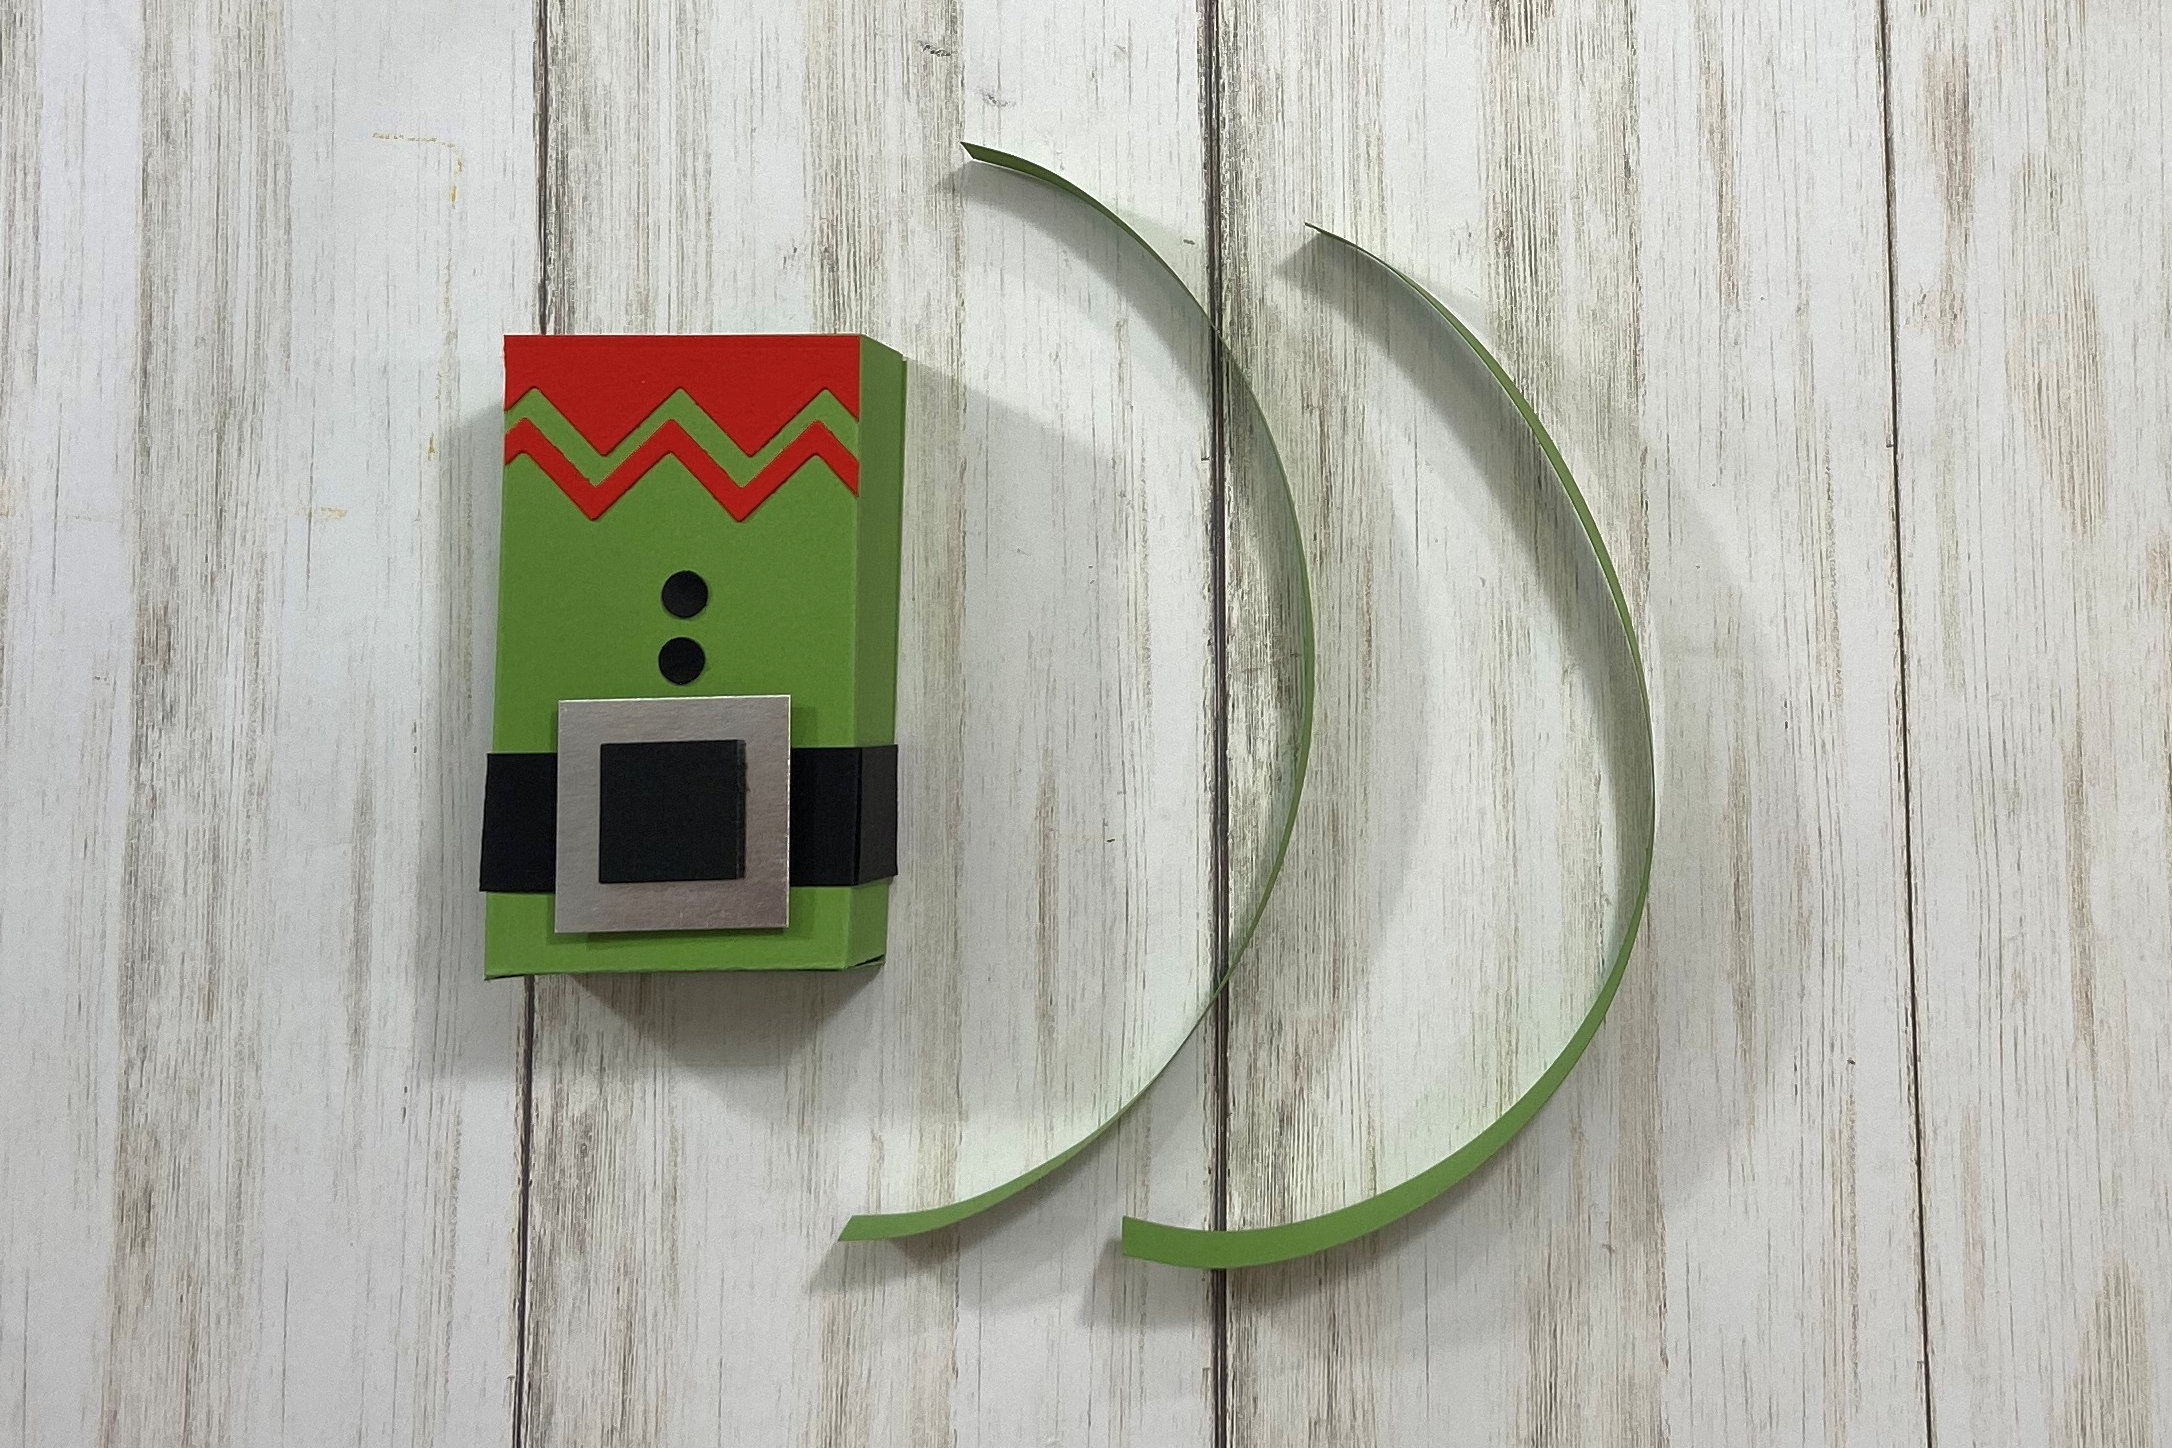
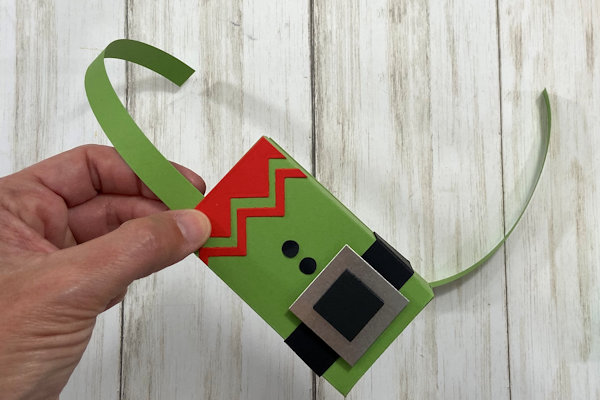
Step 9
Cut 2 pieces of green cardstock to 1/2" x 8 1/2" for the suspenders. Curl the cardstock slightly with your fingers.
-
Adhere the cardstock to the inside of your box to create the suspenders, making sure they are even.
-
Step 10
Fill the box with candy or add a small piece of tissue paper with a small gift.


Video!
Your Turn
You've seen the tutorial, now you try it! We've got a section of the gallery set aside for Elf Treat Box. Try this technique, then upload your artwork to the gallery. Show us your creations!
***Please note - Internet Explorer/Edge is not a supported browser, and will not allow you to see the videos. Please use Chrome, Firefox or Safari to view our tutorial videos.

Questions and Comments
We'd love to get your feedback or questions. Leave your comment below.
Page 1 of 1 pages