Easel Perpetual Calendar
by Betty Traciak
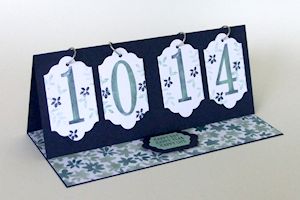
Create a mailable flip calendar that can be used for years to come.
Supplies
- Cardstock, 8 1/2” X 11” (One sheet colored, three sheets white)
- Double-sided paper (3-7/8” X 8-3/8”, optional)
- Number stamps
- Stamp positioning tool (optional – MISTI used here)
- 1/8” circle punch
- Jump rings, 15mm
- Scoring board
- Ruler
- Pencil
- Adhesive foam dots
- Other supplies as needed to complete the project
Step-by-Step
-
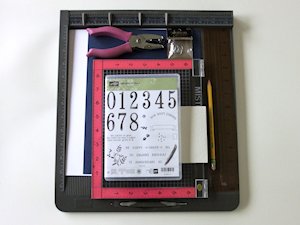
Step 1
Step 1: Cut twenty-six 1-3/4” X 3” pieces of white cardstock.
Stamp a number on each piece as follows:
0: 4 pieces
1: 4 pieces
2: 3 pieces
3: 3 pieces
4: 2 pieces
5: 2 pieces
6: 2 pieces
7: 2 pieces
8: 2 pieces
9: 2 pieces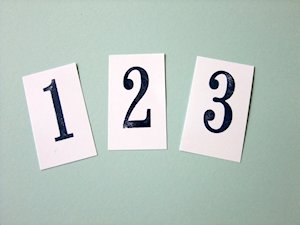
-
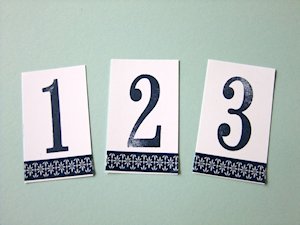
Step 2
Decorate or add additional stamping to the pieces as desired.
-
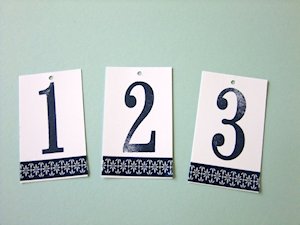
Step 3
Using a 1/8” circle punch, punch each piece near the top.
-
Step 4
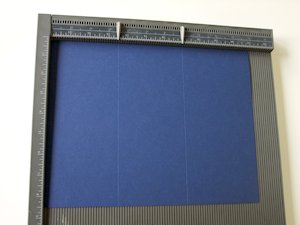
Score an 8 1/2” X 11” piece of colored cardstock at 3 1/2”and 7” on the long side.
-
Step 5
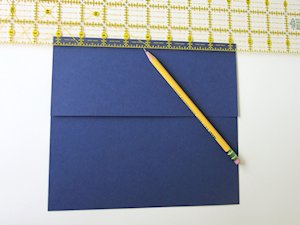
Fold on the 3 1/2” score line. Draw a light pencil line 3/8” from the folded edge.
-
Step 6
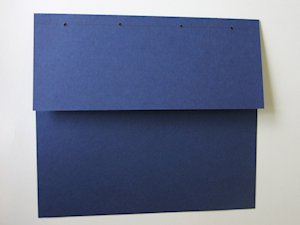
Make small marks on the pencil line at 1 1/8”, 3 1/8”, 5 3/8” and 7 3/8”. Punch a hole with the 1/8” circle punch where the lines intersect.
-
Step 7
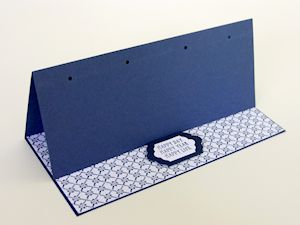
Fold on the remaining score line to form an easel. Decorate as desired. Add a raised element to the base to hold the easel in place.
-
Step 8
Sort the stamped numbered pieces into four stacks. Starting from the left:
Stack 1: 0 - 1
Stack 2: 0 - 9
Stack 3: 0 - 3
Stack 4: 0 - 9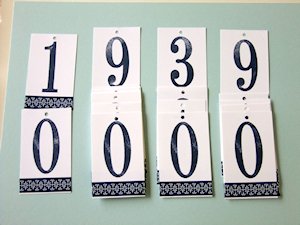
-
Step 9
Thread each stack of numbered pieces on a jump ring. Attach each stack to the easel with the jump rings.

Video!
Variations
-
Use die cut shapes in place of the 1 3/4” X 3” rectangles of cardstock. Sponge two or more colors on the number stamps. Add background stamping to numbered pieces.
Your Turn
You've seen the tutorial, now you try it! We've got a section of the gallery set aside for Easel Perpetual Calendar. Try this technique, then upload your artwork to the gallery. Show us your creations!
***Please note - Internet Explorer/Edge is not a supported browser, and will not allow you to see the videos. Please use Chrome, Firefox or Safari to view our tutorial videos.

Questions and Comments
We'd love to get your feedback or questions. Leave your comment below.
Ich habe immer so viel vor, nur die Zeit rennt immer davon.
hi, hi,
Liebe gr��e Beate
Ich habe immer so viel vor, nur die Zeit rennt immer davon.
hi, hi,
Liebe gr��e Beate
I wonder about laminating the numbers, since they'd be touched quite a bit, and maybe adhering the base to chipboard (which could first be wrapped).
Page 1 of 1 pages