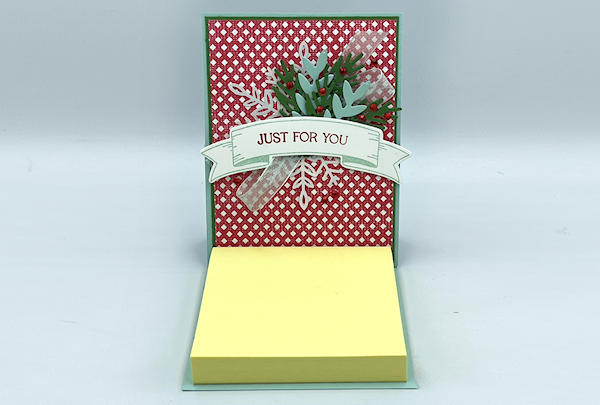
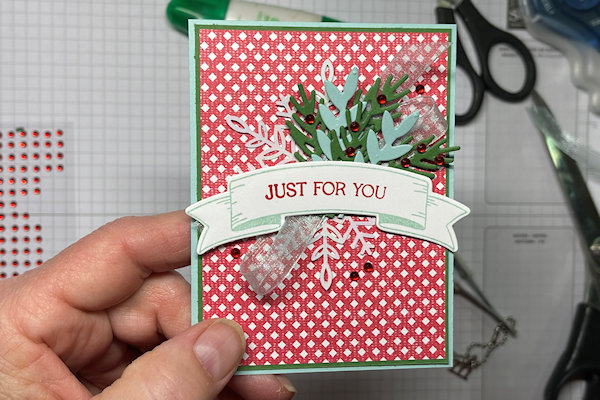
Easel Note Holder
by Mary Deatherage
Make a decorative cover for a sticky note pad.
Supplies
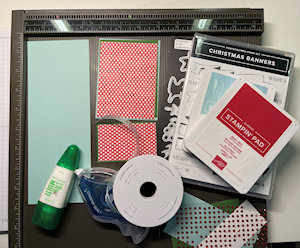
- Cardstock (Stampin' Up!® Pool Party (base & easel), Garden Green (mats) and Basic White (sentiment) cardstock used here)
- Patterned paper (SU Sweetest Christmas DSP used here)
- Score Tool
- Bone Folder
- Adhesive (SU Stampin’ Seal)
- Liquid Glue
- 3" sticky notes
- Other supplies as needed to complete the project (SU products used here: Christmas Banners bundle, Pool Party and Real Red ink, Red Rhinestones, Pool Party 3/8” Sheer Ribbon, Wonderful Snowflake embellishment)
Step-by-Step
-
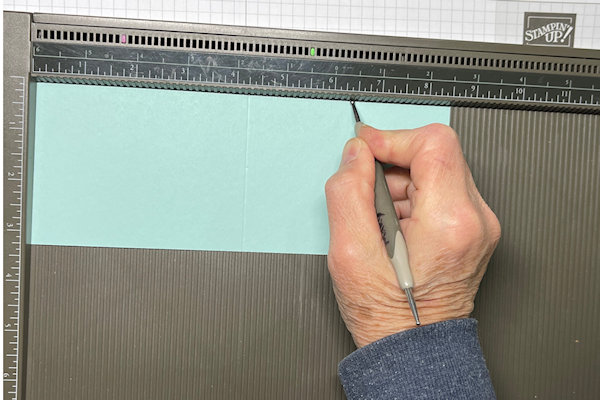
Step 1
Prepare cardstock for the project base:
3 1/4" x 8 1/2", scored at 4 1/4" and 6 3/8” (base)
3 1/4" x 4 1/4" (easel panel)
Score the 3 1/4" x 8 1/2" card base at 4 1/4" and 6 3/8” along the long side. -
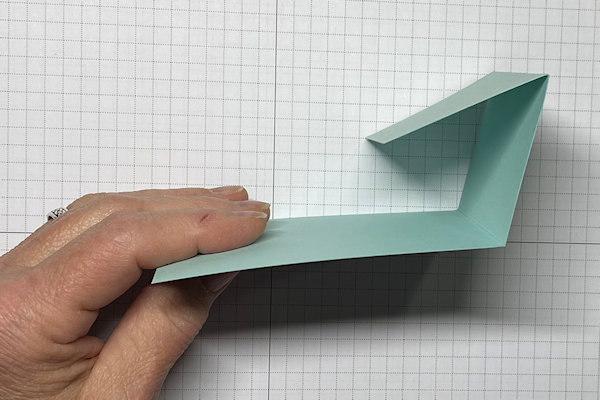
Step 2
Fold both score lines in the same direction to create the easel base.
-
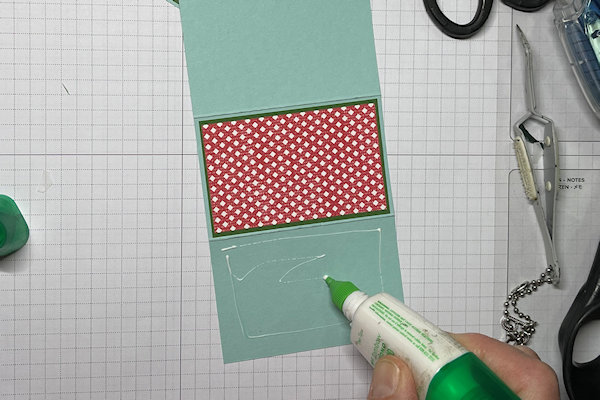
Step 3
Prepare the layering panels for the project:
Coordinating cardstock mats:
for easel panel: 3 1/8" x 4 1/8"
for “back” of easel panel: 2” x 3 1/8”
Patterned Paper:
for easel panel: 3” x 4”
for “back” of easel panel: 1 7/8” x 3”
Layer the 1 7/8” x 3” piece of patterned paper onto the 2” x 3 1/8” piece of coordinating color cardstock (mat), and adhere to the middle small panel of the base as shown (between mountain folds).
-
Step 4
Use adhesive to layer the 3” x 4” piece of patterned paper onto the 3 1/8” x 4 1/8” piece of coordinating color cardstock (mat). Decorate the matted panel as desired and adhere the completed panel to the 3 1/4" x 4 1/4" cardstock easel panel.
-
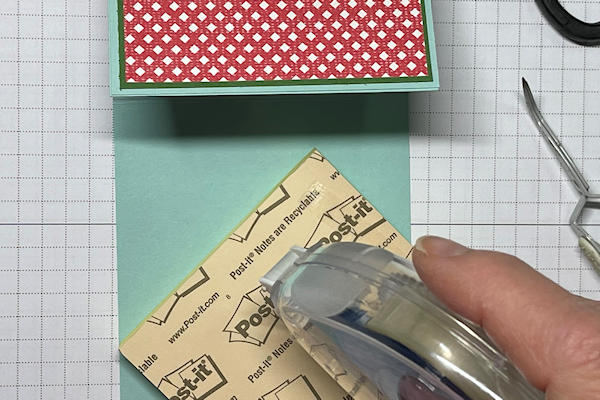
Step 5
Adhere the easel panel to the smaller scored end of the card front, lining up bottom edges, with adhesive only where shown.
-
Step 6
Use a strong adhesive to adhere a sticky note pad into place inside the open card.
-
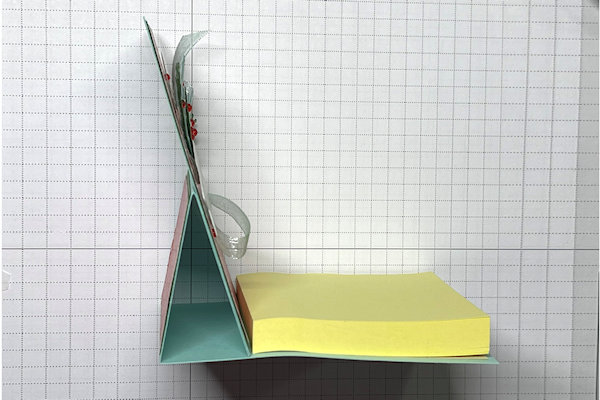
The project can fold flat for gift-giving. Open and tuck the card front behind the sticky notes for display.
-
Step 7
Complete the project.

Video!
Your Turn
You've seen the tutorial, now you try it! We've got a section of the gallery set aside for Easel Note Holder. Try this technique, then upload your artwork to the gallery. Show us your creations!
***Please note - Internet Explorer/Edge is not a supported browser, and will not allow you to see the videos. Please use Chrome, Firefox or Safari to view our tutorial videos.

Questions and Comments
We'd love to get your feedback or questions. Leave your comment below.
Page 1 of 1 pages