DVD Tin Scrapbook

by Julie Buhler

Turn a simple DVD tin into a mini scrapbook.

Supplies

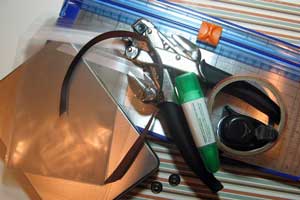
  • DVD Tin (purchased from Effectuality.com)

  • One sheet of 12" x 12" Patterned Paper

  • Ten Clear Envelopes

  • Cutting/Scoring Tool

  • Two Jumbo Eyelets

  • Crop-a-Dile™

  • 10" Length of ribbon

  • Corner Rounder (large)

  • Sticky Strip™

  • Tombow Glue™

Step-by-Step

  1. Step 1

    Cut the patterned paper into two pieces, one measuring 5 1/4" x 7 1/4", the other measuring 5 1/4" x 8 1/2".

    Keep the scraps for decorating later on.
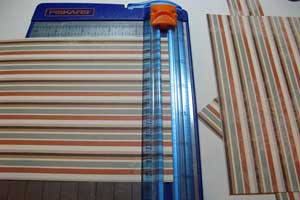
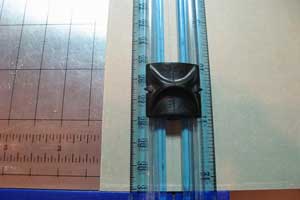
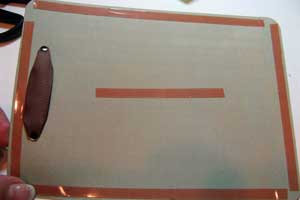
  2. Step 2

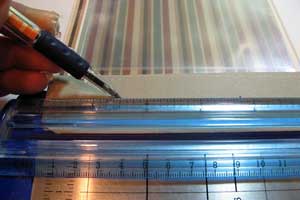
    Score the 5 1/4" x 8 1/2" piece of patterned paper at 1 1/4" on the short side.

  3. Step 3

    Use the corner rounder to round every corner of both pieces of patterned paper.

    Make sure the flap is folded over while rounding the corners of the scored paper piece.

  4. Step 4

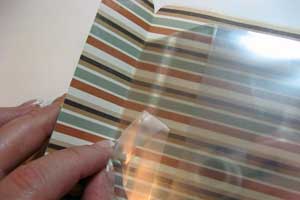
    Line clear envelopes up, making sure bottom edges are aligned.

    Remove adhesive backing and adhere envelopes to one another, leaving the adhesive backing on the final envelope.
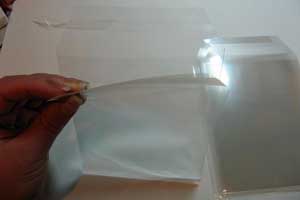
  5. Step 5

    Center the envelope booklet under the flap of the 5 1/4" x 8 1/2" piece of patterned paper. Remove the adhesive backing from the final envelope. Fold the flap down to adhere the envelope booklet to the patterned paper flap.

    image
  6. Step 6

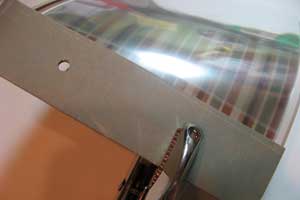
    Measure and mark 2 1/2" from each side of the flap.

  7. Step 7

    Use the 3/16" hole punch on a Crop-a-Dile™ to punch holes on the marked spots.
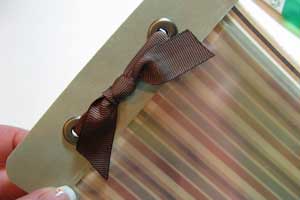
  8. Step 8

    Place jumbo eyelets into the punched holes and use the Crop-a-Dile™ to set them.

    This will ensure the pages will stay in the book.

  9. Step 9

    Thread ribbon through the eyelets and tie.

  10. Step 10

    Add Sticky Strip™ or other strong adhesive to the back side of the finished booklet

  11. Step 11

    Adhere it to the deepest part of the tin.

    Use Sticky Strip™ or Tombow Glue™ to adhere more patterned paper pieces to the inside of the tin.
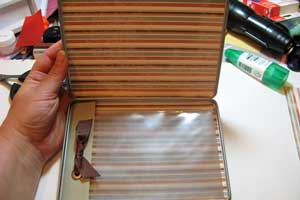
  12. Step 12

    Finish your tin!

    Decorate the front and fill your pages. Finished, the paper for the front should measure 5 3/16" X 7 1/4".

    You can use this little booklet as a special photo album, or you can create 4 1/4" x 5 1/2" size scrapbook pages to fill the pages.
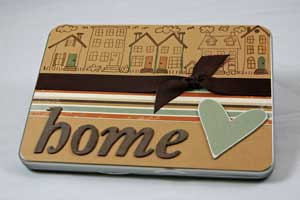
Video!

Your Turn

You've seen the tutorial, now you try it! We've got a section of the gallery set aside for DVD Tin Scrapbook. Try this technique, then upload your artwork to the gallery. Show us your creations!

***Please note - Internet Explorer/Edge is not a supported browser, and will not allow you to see the videos. Please use Chrome, Firefox or Safari to view our tutorial videos.

Questions and Comments

We'd love to get your feedback or questions. Leave your comment below.

This is simply adorable. It's on my list of things to make. Thank you for the detailed directions.
Maricar  |  Wed Sep 10, 2008 at 8:10 AM
Can you tell me good source for the clear envelopes? This is such a neat project!
Sue Young  |  Wed Sep 10, 2008 at 8:19 AM
Would you give a source for the clear envelopes used in this project? Thanks for the idea...I have some DVD tins from another project and this is a great use for them.
Lori McB  |  Wed Sep 10, 2008 at 8:20 AM
My clear envelopes are from Stampin'Up!
reneejul1  |  Wed Sep 10, 2008 at 8:24 AM
Cool but tin pricey especially shipping & handling. I'm going to check out the plastic DVD cases at Wal-mart and work around that.
Carolyn Smith  |  Wed Sep 10, 2008 at 8:27 AM
Thanks for the tutorial, I have some DVD tins that's dying to be altered =)
catherine  |  Wed Sep 10, 2008 at 8:41 AM
with clear envelopes, you guys can purchase it at Michaels for $2.99 for 30
catherine  |  Wed Sep 10, 2008 at 8:41 AM
What a fun project! Thank you so much for taking the time to do such a great tutorial!
Anita  |  Wed Sep 10, 2008 at 8:44 AM
Oh Julie ~ I just love it! I don't have the tin but I do have a "box" that an AOL CD can in a while back! I'm trying this for sure!
Hugs,
Joani
Joani McDonald  |  Wed Sep 10, 2008 at 10:06 AM
You can also use small tins that you purchase for a gift card. ie: I bought some at Lowes after Christmas for .10 cents each.
jennifer canal  |  Wed Sep 10, 2008 at 10:52 AM
Yay, Julie! This is such a great project -- so glad to see the tutorial on SCS! smile
Christina Fischer (cmf1216)  |  Wed Sep 10, 2008 at 11:02 AM
clearbags.com is a great and reasonable source for clear envelopes in every size you can imagine.
Carol Gustafson  |  Wed Sep 10, 2008 at 11:19 AM
Julie this is FAB! I just rushed down to buy the tins and they are great. Thanks for the scoop. My 10 for 10 groups are going to be making awesome Christmas albums, thanks to you.
layne  |  Wed Sep 10, 2008 at 12:45 PM
keeping in mind, that Christmas is coming, this is a great project... thanks for the nice workshop and sharing the idea!
Antje  |  Wed Sep 10, 2008 at 1:08 PM
Thanks for sharing! This is a fantastic idea!!
KarenRI  |  Wed Sep 10, 2008 at 3:35 PM
Where did you find the clear envelopes at Wal-mart? I didn't see them!
sugastamper  |  Wed Sep 10, 2008 at 5:26 PM
This looks like a fun project. Thanks for sharing it with us
Denise  |  Wed Sep 10, 2008 at 6:57 PM
great tutorial Julie!! thanks smile
Dawn  |  Thu Sep 11, 2008 at 3:14 AM
What a great idea - I know what my nieces are getting for Christmas this year!
Cheryl Pierce  |  Thu Sep 11, 2008 at 4:54 AM
CUTE CUTE CUTE!!!!!! Did I say CUTE?!?!?!? This is an adorable project. So many different ways to decorate it. Thanks for the great idea!!
sharon  |  Thu Sep 11, 2008 at 5:18 AM

Page 1 of 2 pages  1 2 >

You need to be logged in to comment

GET OUR NEWSLETTER


Splitcoaststampers's privacy policy