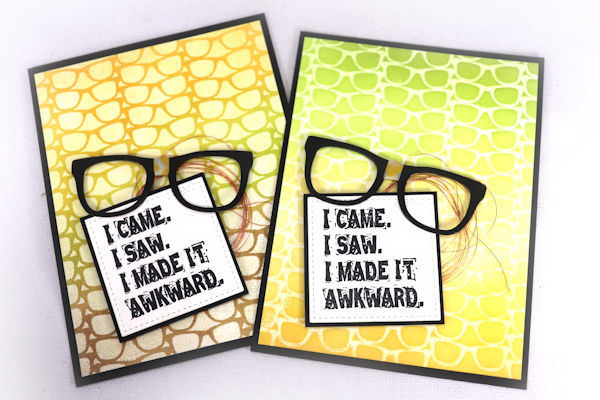
Double Stencil Resist
by Dina Kowal
Use embossing ink to create two resist backgrounds with a stencil.
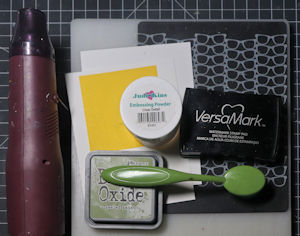
Supplies
- Cardstock or watercolor paper, 2 card-sized panels (140# Fabriano Studio Hot Press watercolor paper used here)
- Stencil (A Colorful Life Designs 020156 Glasses used here)
- Versamark or other embossing/pigment ink
- Tape
- Sticky note
- Die cutting machine
- Embossing pad
- Clear embossing powder
- Heat tool
- Coloring medium and applicator (Distress Oxide inks and Taylored Expression blender brushes used here)
- Paper towel
- Other supplies as needed to complete the project (Impression Obsession supplies used here: CL1028 Real Adult clear set, DIE481 Large Glasses, DIE967 Stitched Square Frame; copper thread, foam tape)
Step-by-Step
-
Step 1
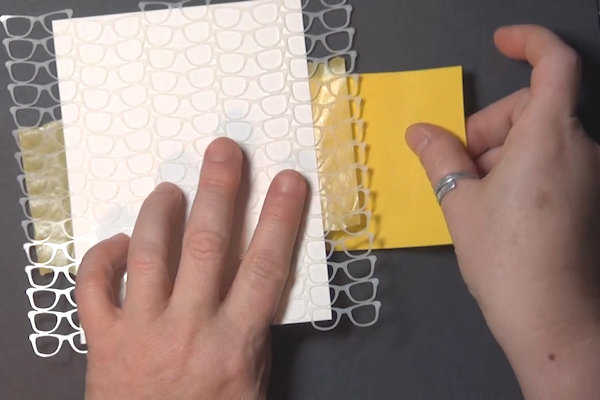
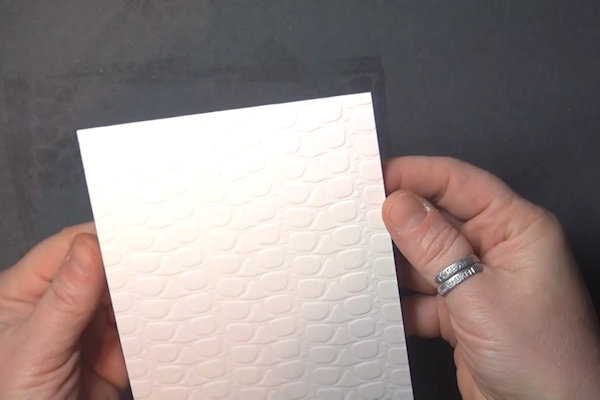
Secure a cardstock panel to the back of a stencil with washi tape.
-
TIP:
Attach a sticky note to the back of the card panel - this gives you a clean place to hold on to keep the panel in place while inking. -
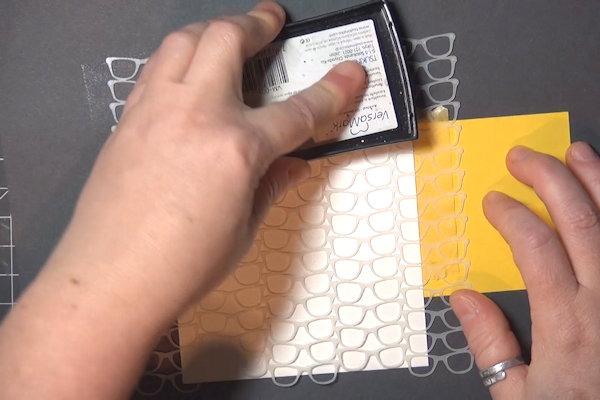
Step 2
Press a Versamark or other embossing pad through the stencil, coating the stencil with ink as well as inking the design onto the cardstock.
-
Step 3
Prepare a sandwich for your die cutting machine, laying down a rubber/silicon embossing mat, plain cardstock, and the stencil with the inked side down. Lay a cutting plate over the top and adjust with shims as needed for your die cutting machine.
-
The stencil will create an imprint into the cardstock as well as transferring the embossing ink.
-
Step 4
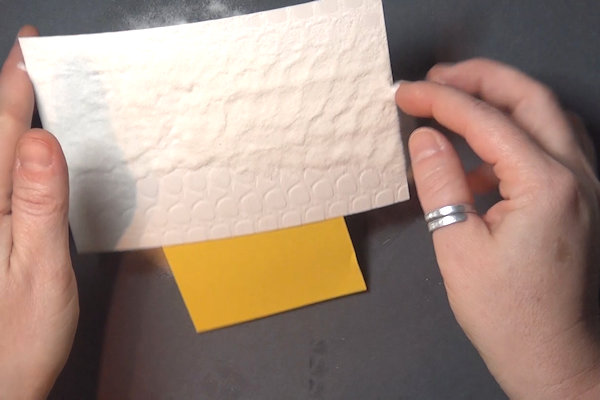
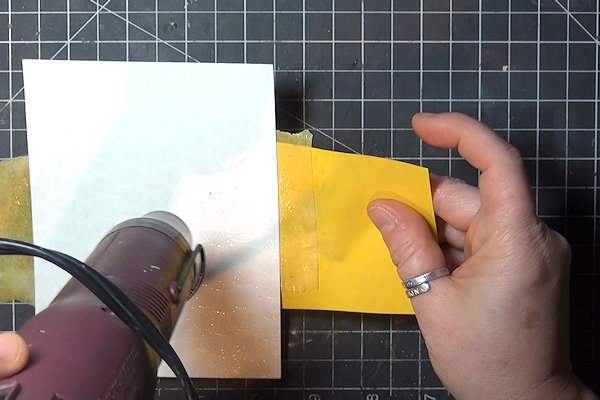
Apply clear embossing powder to the panel and heat to activate it.
-
Step 5
Apply embossing powder to the inked panel from Step 2 and heat to activate it.
-
Step 6
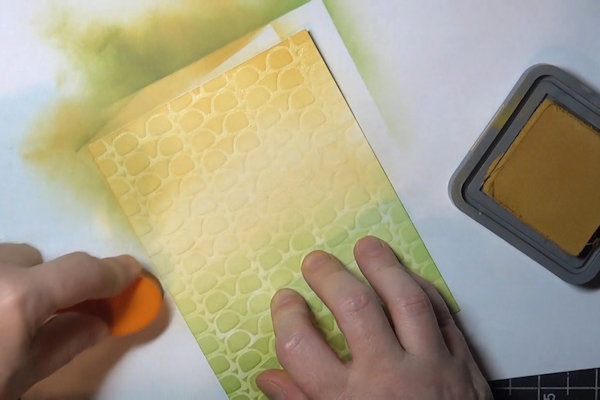
Apply a wet coloring medium over the panels (markers, watercolor, ink, mists). The embossed stencil pattern will resist the medium.
-
Use a paper towel to buff any excess coloring medium off of the embossed areas.
-
Step 7
Use the panels to complete cards or other projects.


Video!
Your Turn
You've seen the tutorial, now you try it! We've got a section of the gallery set aside for Double Stencil Resist. Try this technique, then upload your artwork to the gallery. Show us your creations!
***Please note - Internet Explorer/Edge is not a supported browser, and will not allow you to see the videos. Please use Chrome, Firefox or Safari to view our tutorial videos.

Questions and Comments
We'd love to get your feedback or questions. Leave your comment below.
Page 1 of 1 pages