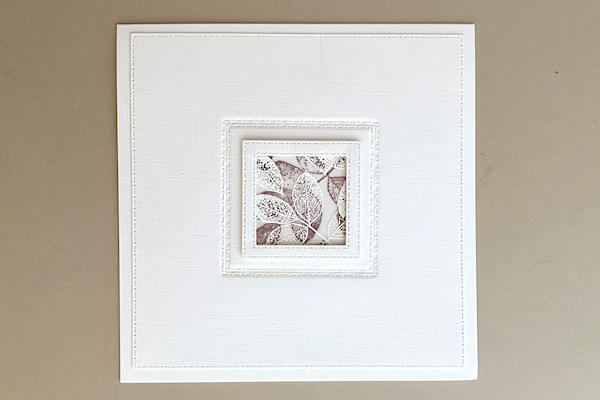
Double Stamped Vellum
by Chrissie Stokes
Stamp on both sides of a vellum sheet for a unique background effect.
Supplies
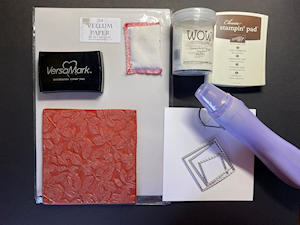
- Vellum sheet
- Background stamp (Impression Obsession Rose Leaves background stamp
- Versamark or other embossing ink
- Anti-static bag
- Heat gun
- Embossing powder (WOW Opaque White embossing powder used here)
- Colored ink (Stampin’ Up!® ink pad in Early Espresso used here)
- Other supplies as needed to complete the card (used here: Linen textured cardstock from Papermill Direct, Presscut double stitched square nesting dies, foam tape)
Step-by-Step
-
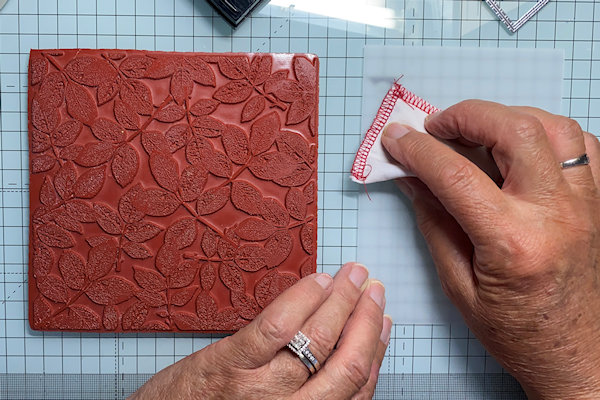
Step 1
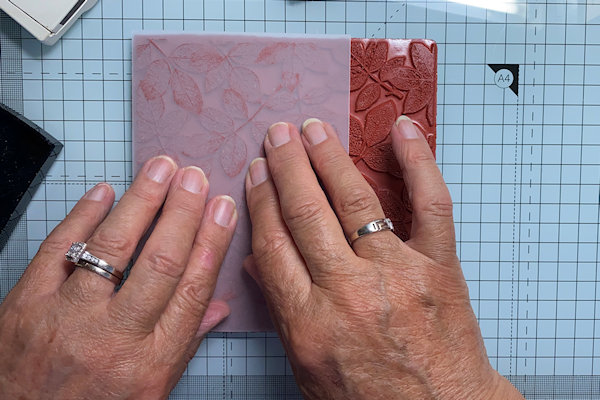
Place a background stamp on your work surface.
Wipe a sheet of vellum with an anti-static bag. -
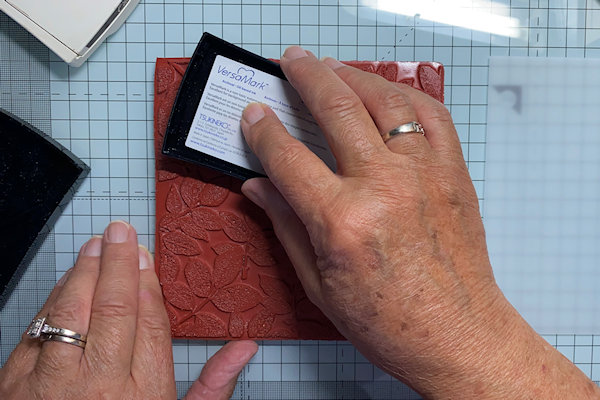
Step 2
Ink the stamp with Versamark ink.
-
Place the vellum over the background stamp. Gently rub over the vellum to ensure all areas are inked.
-
Step 3
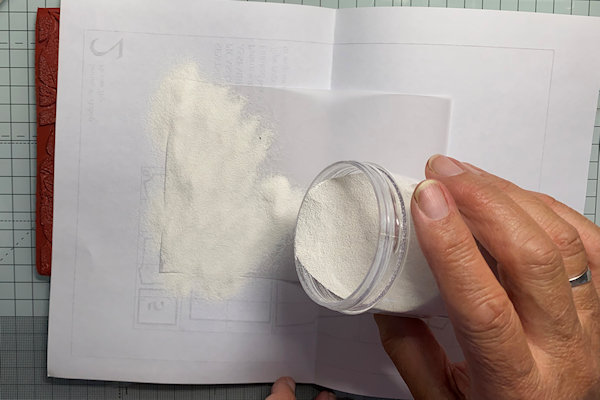
Remove, sprinkle with white embossing powder and heat set.
-
-
Step 4
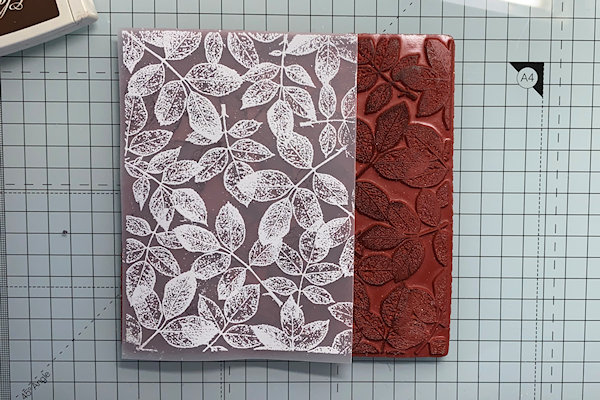
Ink the stamp once more using a water-based dye ink in the colour of your choice. Turn over the vellum and stamp on the reverse side.
-
TIP:
A piece of scrap paper placed over the vellum will allow you to rub smoothly over all areas easily. (The embossed areas might cause drag and so result in a smudged stamping.) -
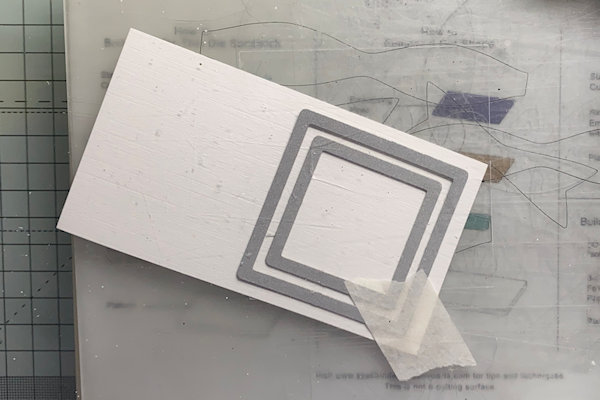
Step 5 (Optional)
Die cut a frame using 2 square dies (one slightly larger than the other) and either mount onto foam tape or cut several to make a stack to add definition.
-
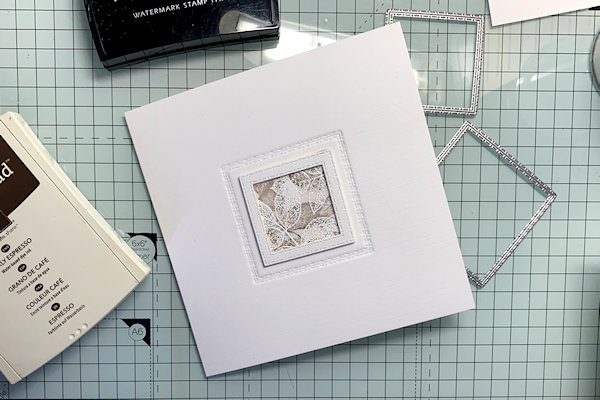
Step 6
6. Choose an area of the vellum which looks pleasing through the frame, cut out a square, and adhere to the back of it. (White embossed side uppermost.)
-
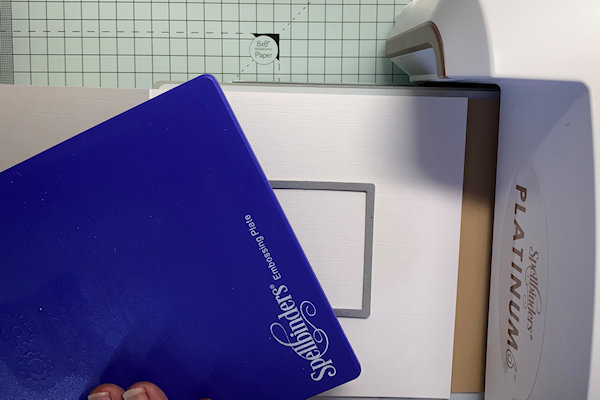
Step 7 (Optional)
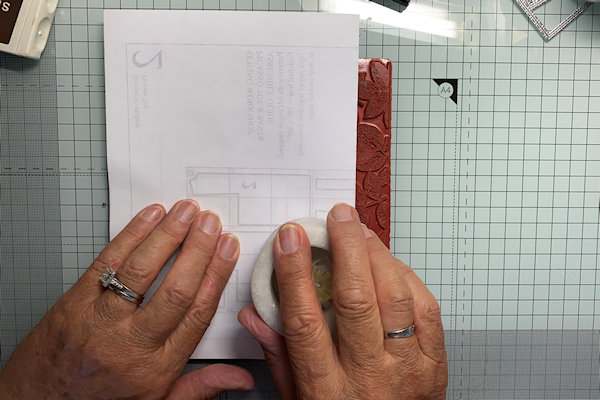
If desired a larger square can be dry embossed into the card front or front panel using a rubber mat and the sandwich for embossing for your particular machine.
-
-
Step 8
Complete the project.


Video!
Your Turn
You've seen the tutorial, now you try it! We've got a section of the gallery set aside for Double Stamped Vellum. Try this technique, then upload your artwork to the gallery. Show us your creations!
***Please note - Internet Explorer/Edge is not a supported browser, and will not allow you to see the videos. Please use Chrome, Firefox or Safari to view our tutorial videos.

Questions and Comments
We'd love to get your feedback or questions. Leave your comment below.
Thank you for sharing it. Great vid too! Margot
Lauren
Page 1 of 2 pages 1 2 >