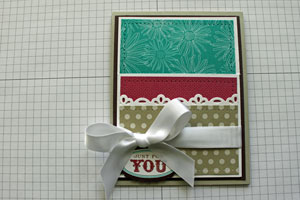
Double Pocket Card

by Beate Johns

Two score lines turn a cardstock strip into a double pocket card.

Supplies
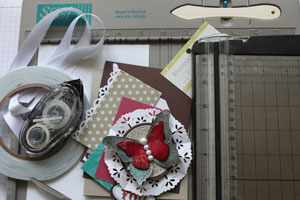
  • One 5" x 11 1/4" piece of cardstock for pocket base
  • One 4" x 5 1/4" piece of cardstock
  • One 4 1/4" x 11" piece of cardstock, folded in half for your card base
  • Three 3 1/2" wide pieces of patterned paper (optional)
  • Scor-Pal™, or other scoring tool
  • Scor-Tape™, or other strong adhesive
  • Paper Cutter
  • Ribbon and other Embellishments
  • Additional Cardstock, patterned paper and stamped images to decorate your card

Step-by-Step

  1. Step 1

    Line your cardstock edge up with the 1/2" score groove and score at 4 1/4".

    Hint:
    If you are not using the Scor-Pal™, score at 3 3/4".
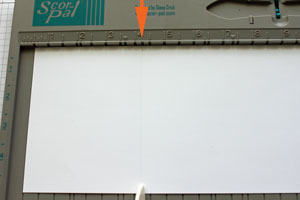
  2. Step 2

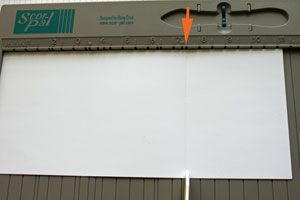
    Line the cardstock up with the edge of your Scor-Pal™ and score at 7 1/2".
  3. Step 3

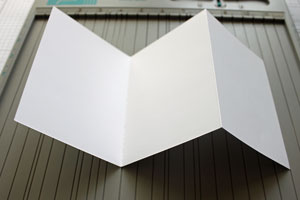
    Prefold your score lines mountain valley style.
  4. Step 4

    Unfold your cardstock and line it up with at 1 7/8" on your paper cutter. Cut from the top of your cardstock down to your first score line.
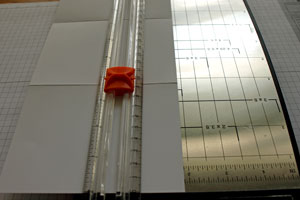
  5. Line your first score line up with your cutting groove and cut the first score line down to your cut.
  6. Step 5

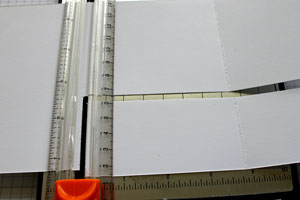
    Line up the bottom of your card edge with 2 3/4" (or the top edge with 7/8") and cut from the top to the first score line.
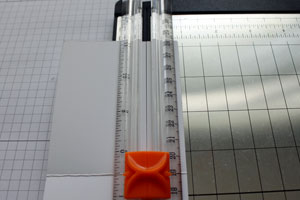
  7. Line up the left score line with the cutter groove and cut from the top to where your paper is cut.
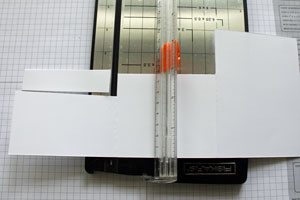
  8. Step 6

    Fold your pocket base back up. It should look like this now.
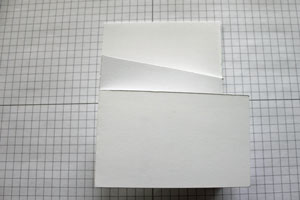
  9. Step 7

    Adhere your 3 1/2" wide strips of patterned paper to each fold.
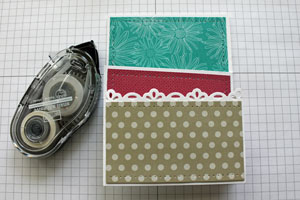
  10. Step 8

    Unfold your first pocket and add Scor-Tape™ or other strong adhesive to the side and bottom of the pocket top.
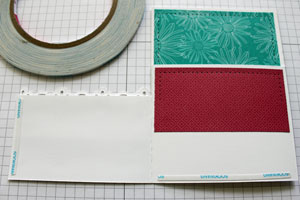
  11. Take the tape liner off, fold pocket top back and adhere to pocket base.
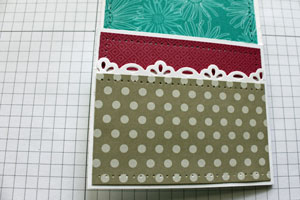
  12. Step 9

    Unfold the middle and add Scor-Tape™ on the bottom and side.
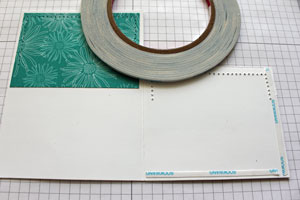
  13. Take tape liner off and fold pocket top over.
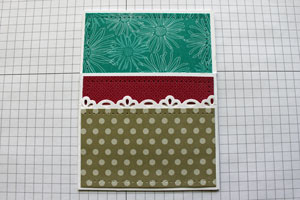
  14. Step 10

    Adhere your pocket base to your 4" x 5 1/4" piece of cardstock.
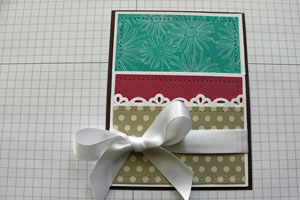
  15. Tape everything to your card base.

  16. Step 11

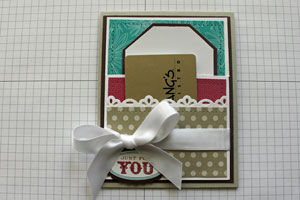
    Create a tag to fit your top pocket.
    Mine measures 2 7/8" x 4".

    You can use the second pocket for a gift card.
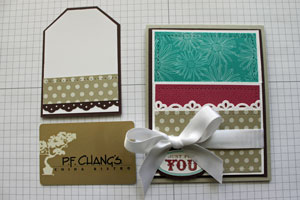
  17. Step 12

    If you want to add additional images, leave your gift card and tag in the card. Then add dimensionals to hold your image.
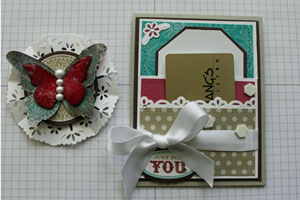
  18. Place your image over the dimensionals and tape down.
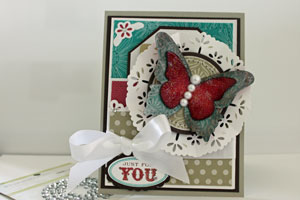
Video!

Your Turn

You've seen the tutorial, now you try it! We've got a section of the gallery set aside for Double Pocket Card. Try this technique, then upload your artwork to the gallery. Show us your creations!

***Please note - Internet Explorer/Edge is not a supported browser, and will not allow you to see the videos. Please use Chrome, Firefox or Safari to view our tutorial videos.

Questions and Comments

We'd love to get your feedback or questions. Leave your comment below.

Thanks, Beate, for your video tutorials. They're great. Love this card! Btw, feel free to send it to me 'cause I'd LOVE to receive a P.F.Changs gift card. wink
PamelaK  |  Thu Sep 3, 2009 at 7:31 PM
thanks Beate. you come up with the most awesome cards and ideas! Love your layering!
Bev Dahl  |  Thu Sep 3, 2009 at 7:40 PM
This is a fascinating card - fun to make and fun to give. I love your tutorials - "a video is worth a thousand words!" grin What brand of dimensionals do you use? Do they come with the paper already peeled off? That would be great.
Thanks ~
Sally
Sally Downes  |  Thu Sep 3, 2009 at 7:44 PM
Can I just say again how much I like and appreciate having the video tutorial along with the written instructions? Love this card. Thank you for showing this.
Vivian  |  Thu Sep 3, 2009 at 7:47 PM
So, I love your videos Bea and you have such a cool name! These are wonderful cards and I am so happy that you make it so easy to make them!
Siobhan  |  Thu Sep 3, 2009 at 9:17 PM
Oooooh, I wanna try this one!
Thank you bunches!
TexasGrammy  |  Thu Sep 3, 2009 at 9:31 PM
Could you send me the http:// link for the video again? Thanks!
Karen Hanim  |  Thu Sep 3, 2009 at 11:05 PM
I loved this card so much I had to try it. Beate you give great direction, but I following takes some trial and error...but it 90% done now. You are the best! Thanks!
Deebi27  |  Thu Sep 3, 2009 at 11:27 PM
Thank you for a great video. You make it very clear how to make a pocket card. Your finished card is gorgeous.
Eveline.
Eveline van Heijst  |  Fri Sep 4, 2009 at 2:09 AM
Hi Karen,

Sure thing. The video link is

http://www.youtube.com/watch?v=CPgv4Ofb_g0

Sally, the dimensionals I use are from Stampin' Up!. They come on a sheet of hundred. One side still has a paper backing, but I think it comes off pretty.

Hugs and smiles
Beate  |  Fri Sep 4, 2009 at 4:15 AM
B-
What brand name is the eyelet border punch sold under?
Cyndi  |  Fri Sep 4, 2009 at 8:06 AM
Love the tutorial but I couldn't see the video. All I got is a big, white box with a red X in it. Is that my PC or yours?? This is the best site ever. So simple to understand and I"m a very simple person. Thks.
Linda  |  Fri Sep 4, 2009 at 9:49 AM
This is a great card Beate! I look forward to your tutorials every week. Fabulous. Can't wait to try this one out.
Jen  |  Fri Sep 4, 2009 at 10:49 AM
Love the butterfly's too. Tell us everything about it!!
Kathy  |  Fri Sep 4, 2009 at 12:52 PM
Love your tutorial of the double pocket card
instructions were great! Thanks
Carol A Purkhiser  |  Fri Sep 4, 2009 at 1:17 PM
I love this!! Thank you!
eskahle  |  Fri Sep 4, 2009 at 1:54 PM
What a fun card. So pretty. Thanks for the tutorial. I'll be trying this one for sure.
Sandy  |  Fri Sep 4, 2009 at 4:00 PM
Was going to pass this one by since I've got 2 double pocket card patterns already....but took a peek anyway and pretty soon I was neck deep in it!! Love it!!! What brand-name is the decorative paper? Thanks again for another homerun!!
Pam Roundy  |  Fri Sep 4, 2009 at 8:24 PM
Nice! Thanks Beate! I just finished mine, and will put it in the gallery momentarily!
Shelli  |  Sat Sep 5, 2009 at 2:31 PM
Your card is SO cute and so nice of you to share. I'm just new at this so very much enjoy new idea's Thank You
Nellie Welch  |  Sat Sep 5, 2009 at 3:58 PM

Page 1 of 2 pages  1 2 >

You need to be logged in to comment

GET OUR NEWSLETTER


Splitcoaststampers's privacy policy