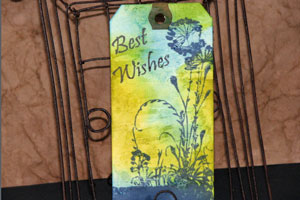
Distressed Glue
by Roni Johnson
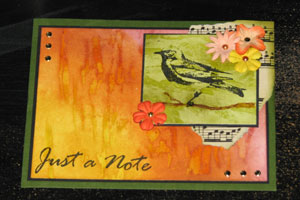
Sponge over dried glue to create a unique background.
Supplies

- Tacky Glue®, or other clear drying glue
- Dye inks (Ranger distress inks used here)
- Blending tool or sponges
- Cardstock, tag or other paper
Step-by-Step
-
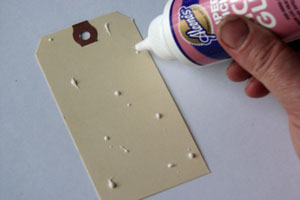
Step 1
Apply several drops of glue to the cardstock/tag in various areas.
-
Step 2
Smear the glue with your finger.
You can do so in side to side motions or in a variety of directions. Let the glue dry completely before moving to the next step.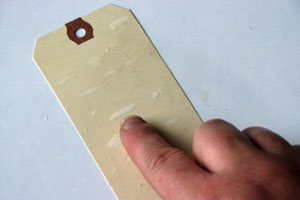
-
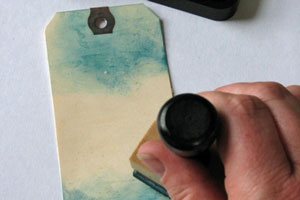
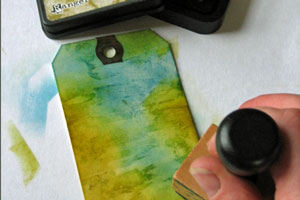
Step 3
After the glue has dried, apply one or more dye inks using the blending tool or sponge. You will notice immediately how the inks highlight the glue, yielding a grungy, distressed feel.
-
-
Step 4
Finish stamping the project as desired.
Video!
Variations
-
-Apply a layer of distress inks to the cardstock before Step 1. This will add a new layer of color below the glue.
-Use Glossy Accents™ sparingly in place of the Aleene’s Tacky Glue®. This will add an amazing shine to the finished “distressed” areas.
-Go monochromatic for a dramatic look.
-Apply the glue diagonally or in other patterns for a funky new look.
Your Turn
You've seen the tutorial, now you try it! We've got a section of the gallery set aside for Distressed Glue. Try this technique, then upload your artwork to the gallery. Show us your creations!
***Please note - Internet Explorer/Edge is not a supported browser, and will not allow you to see the videos. Please use Chrome, Firefox or Safari to view our tutorial videos.

Questions and Comments
We'd love to get your feedback or questions. Leave your comment below.
Card is gorgeous!!!!
Annette
Beautiful!!
Bonnie
Page 1 of 2 pages 1 2 >