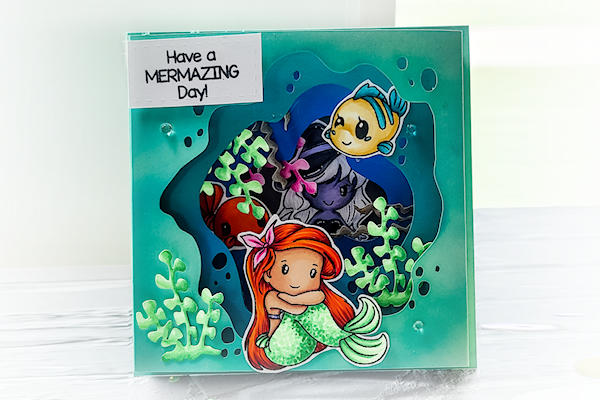
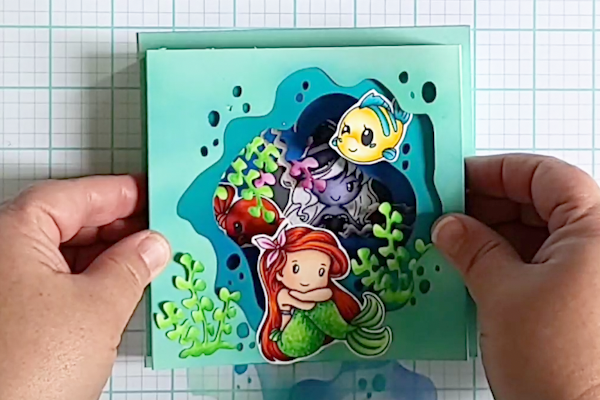
Diorama Full Card
by Cristena Bagne
Make a card with a dimensional diorama on the front. Technique by Irina Blount.
Supplies
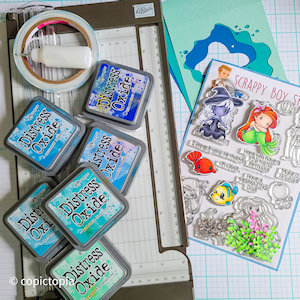
- Cardstock (Stampin’ Up!® Pool Party Cardstock with Grey, Teal, and Navy Blue cardstock used here)
- Shape dies of different sizes or Copictopia Cave SVG Cut File
- Stamps (Scrappy Boy Stamps Mermazing Clear Stamp Set used here)
- Adhesive (SU Tear Tape used here)
- Scissors
- Scoring tool/ bone folder
- Decorations of your choice
- Other supplies as needed to complete the project (used here: Copic markers, Distress Oxide Inks, blending brushes, Tweezers, Silhouette cutting machine)
Step-by-Step
-
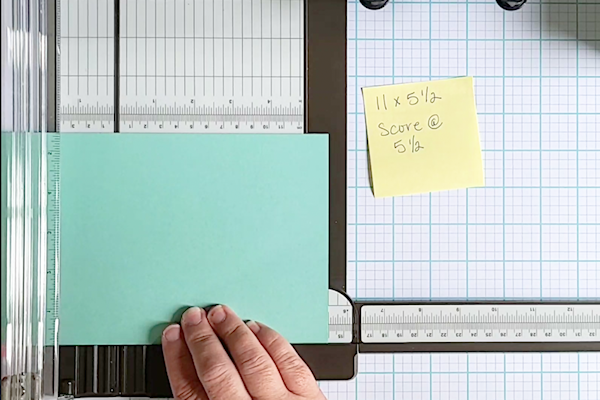
Step 1
Prepare layering pieces:
Cardstock for base:
(1) 8" x 5" – Score on 8” side at 1/2", 1 1/2", 6 1/2", 7 1/2"
(1) 11" x 5 1/2" - Score on 11” side at 5 1/2"
Cardstock for inside panel of diorama:
(1) 5" x 5"
Cardstock for middle layer of diorama:
(1) 6" x 5" – Score on 6” side at 1/2" , 5 1/2"
Cardstock for front of diorama:
(1) 6 1/2" x 5" – Score on 6 1/2” side at 3/4" and 5 3/4" -
After you have cut all your cardstock for the project, score everything and burnish all your score marks.
-
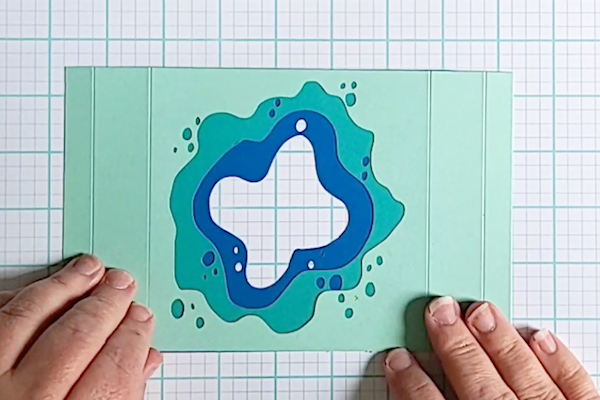
Step 2
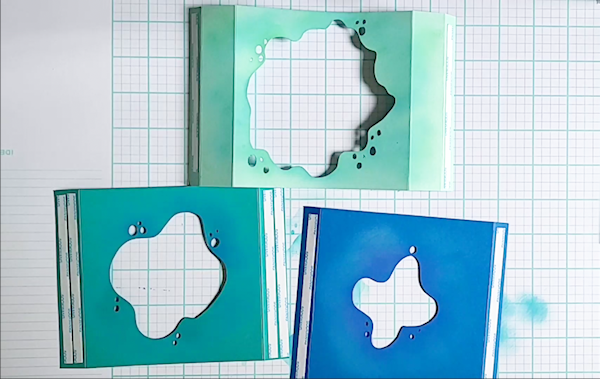
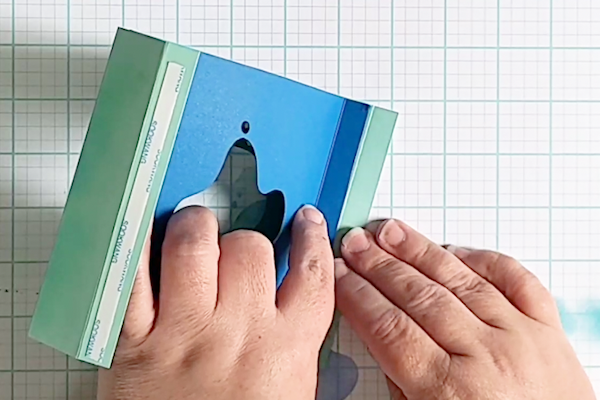
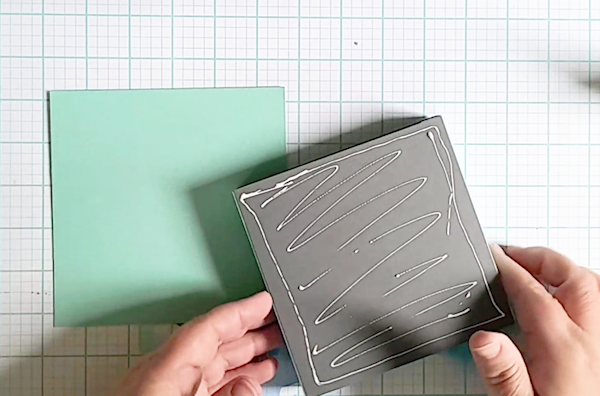
In the center of the 8" x 5" , 6 1/2" x 5", and 6" x 5" pieces of cardstock use either the Copictopia Cave SVG Cut File or 3 nested shaped dies of different sizes to cut out the center bit of the cardstock. They should line up like the photo.
-
Step 3
Place score tape on the front outer edges of the 8" x 5" , 6 1/2" x 5", and 6" x 5" pieces of cardstock, as seen in photo.
-
Step 4
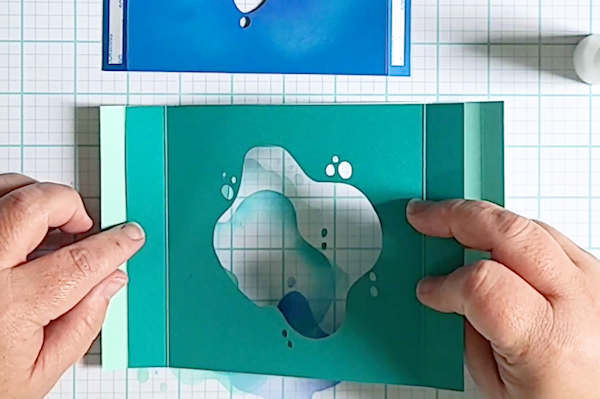
Layer your 8" x 5", 6 1/2" x 5", and 6" x 5" pieces of cardstock together. Starting with the middle piece, remove the tear tape paper on the left side and adhere the end of the 6 1/2" x 5" cardstock the left, backside of the 8" x 5" cardstock closest to the 1/2" score line as shown in the photo.
TIP:
Use liquid glue over the top of the tear tape to still have wiggle room to get the cardstock where you want it. -
Step 5
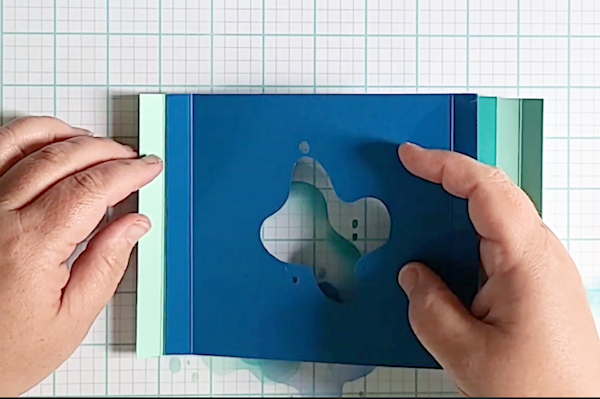
Repeat step 4, adhering the 6" x 5" piece of cardstock to the 6 1/2" x 5" piece of cardstock as seen in the photo. (Yes, lay it right over the top of the 6 1/2" x 5" piece of cardstock.)
-
Step 6
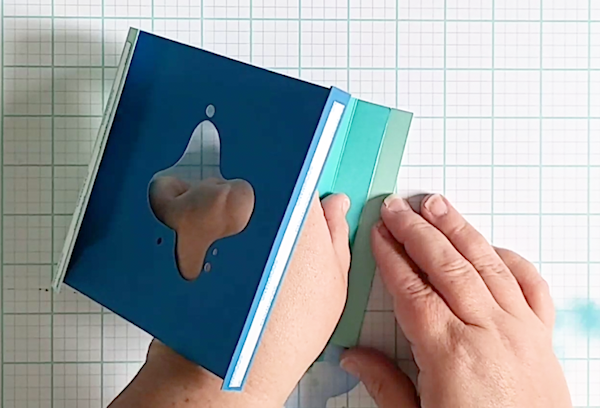
Repeat step 4 and 5 but on the right side of the card, as seen in the photos.
-
-
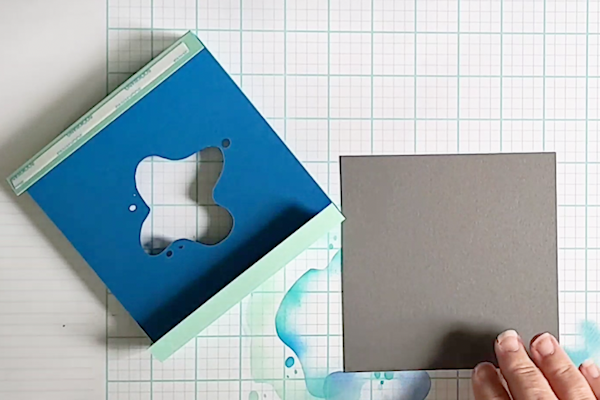
Step 7
Take the tear tape off the 8" x 5" piece of cardstock and adhere your diorama box to the 5" x 5" piece of cardstock, creating the box.
-
-
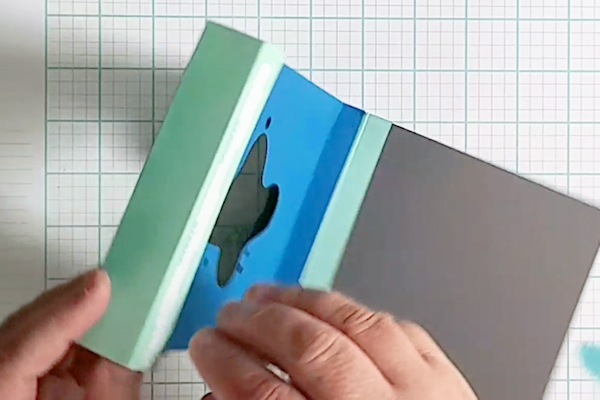
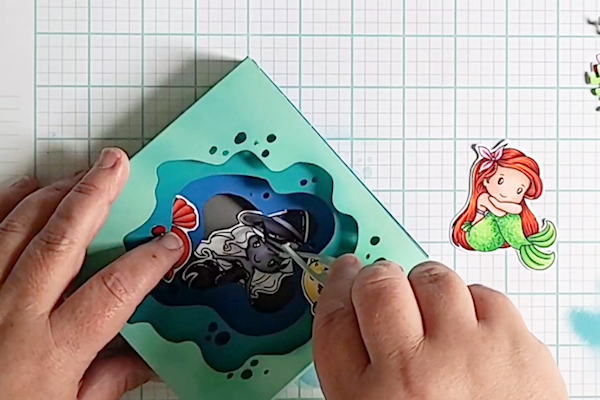
Step 8
Decorate the diorama and card front as desired.
-
Step 9
Using liquid glue on the backside of the diorama box, adhere to the 11" x 5 1/2" card base.
-
-
Step 10
You are all finished! Congratulations on a wonderful card!

Video!
Your Turn
You've seen the tutorial, now you try it! We've got a section of the gallery set aside for Diorama Full Card. Try this technique, then upload your artwork to the gallery. Show us your creations!
***Please note - Internet Explorer/Edge is not a supported browser, and will not allow you to see the videos. Please use Chrome, Firefox or Safari to view our tutorial videos.

Questions and Comments
We'd love to get your feedback or questions. Leave your comment below.
Page 1 of 1 pages