Diorama Card
by Diana Gibbs
Create scenes in a fun 3D card.
Supplies
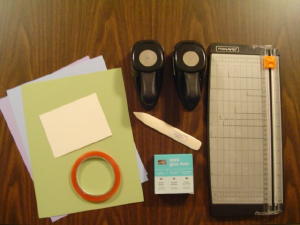
- 3 Colors cardstock (Certainly Celery, Bashful Blue and Almost Amethyst used here)
- Sticky Strip™
- Glue dots
- Paper trimmer with scoring blade (or bone folder)
- Watercolor Paper
- 1 3/8" circle punch
- 1 1/4" circle punch
Step-by-Step
-
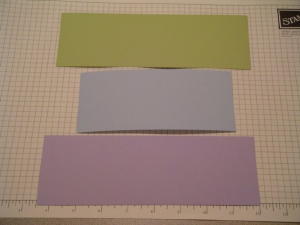
Step 1
Cut two pieces of cardstock to 8.5 x 3" (Almost Amethyst and Certainly Celery here) for front and back covers.
Cut one piece of cardstock(Bashful Blue here) to 6.5 x 3" for the middle panel.
-
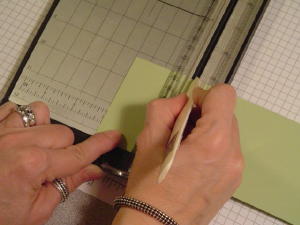
Step 2
Score front and back covers at 2" from each short side.
-
Step 3
Score middle panel 1" from each short side.
-
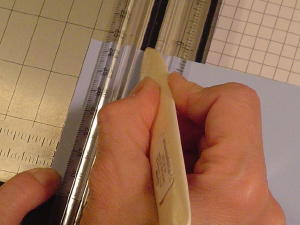
Step 4
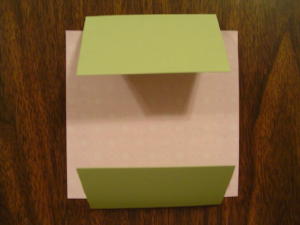
Fold cover scores toward you and mask the center with a Post-It® Note.
-
Step 5
Keep edges flat, and stamp cover sides with a background stamp. Reverse and stamp the cover, too.

-
Step 6
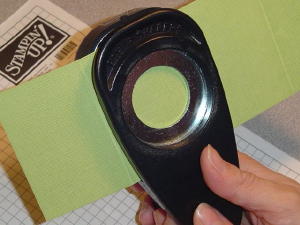
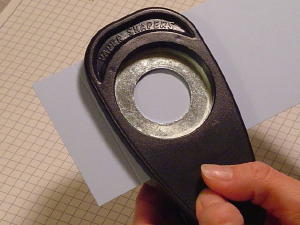
Line up the 1 3/8" circle punch with the score line on the left side of the cover, making sure the cardstock is at the bottom of the punch. Punch circle.
-
Step 7
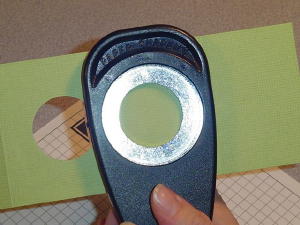
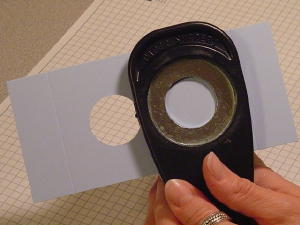
Repeat step 6 on the right side.
-
Step 8
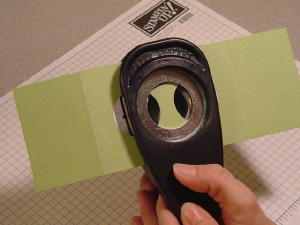
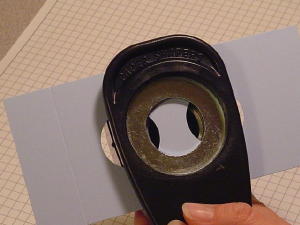
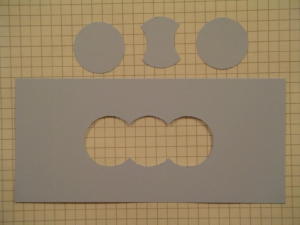
Now punch a circle between the two holes to create an opening.
-
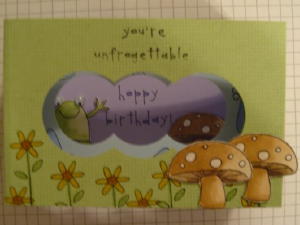
Step 9
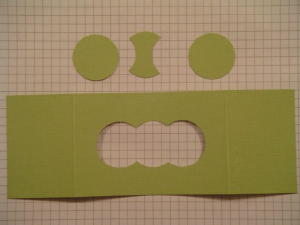
This is what the cover should look like. Decorate cover as desired.
-
Step 10
Repeat step 6 using 1 1/4" circle punch on the middle panel (Bashful Blue).
-
Step 11
Repeat step 7 using 1 1/4" circle punch.
-
Step 12
Repeat step 8 using 1 1/4" circle punch.
-
Step 13
This is what the middle panel should look like. Decorate middle panel as desired.
-
Step 14
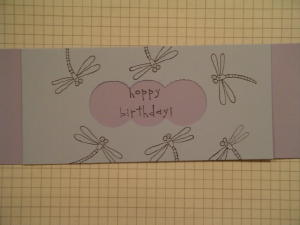
Lay middle panel over back panel, and center greeting or picture in the opening.
-
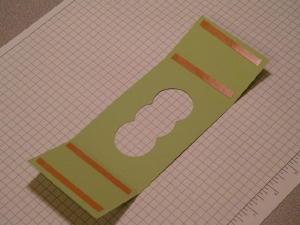
Step 15
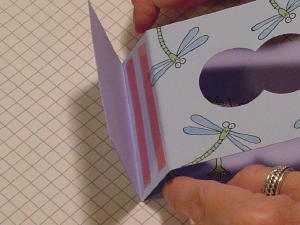
Attach Sticky Strip™ to the middle panel on both front edges as pictured.
-
Step 16
Remove red liner from tape.
Align card edges and score lines to adhere back and middle panels together on both sides.
-
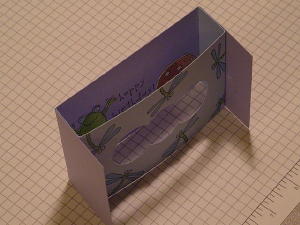
Step 17
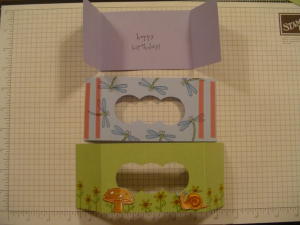
It should look like this.
-
Step 18
Apply Sticky Strip™ to back edges of cover.
-
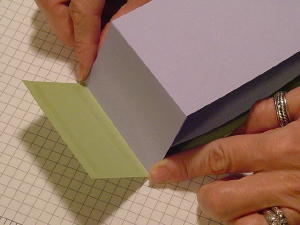
Step 19
Attach back cover (with middle panel attached) to front cover as in step 16.
-
Step 19
Attach back cover (with middle panel attached) to front cover as in step 16.
-
Step 20
Finish card by stamping images with Stazon® on watercolor paper or neutral cardstock. Color as desired, trim and attach to front cover with glue dots.
Your Turn
You've seen the tutorial, now you try it! We've got a section of the gallery set aside for Diorama Card. Try this technique, then upload your artwork to the gallery. Show us your creations!
***Please note - Internet Explorer/Edge is not a supported browser, and will not allow you to see the videos. Please use Chrome, Firefox or Safari to view our tutorial videos.

Questions and Comments
We'd love to get your feedback or questions. Leave your comment below.
Thanks!
Thanks for letting me know. I fixed the tutorial.
Hugs and smiles
"The size that is on the tutorial fits in a #10 envelope, or the open ended envelope that SU! sells. You just have to be careful not too have too much 3-d sticking out on them...if you do, I suggest using a #10."
Thank you.
You can write your personal message on the back of the card... just make sure that your pen won't show through to the front.
You could also attach this Diorama to a folded card base as well. Hope that helps!
Melissa
Page 1 of 1 pages