Die Cut Gate Fold
by Dina Kowal
Use border dies or nesting shapes to create unique gate fold openings.
Supplies
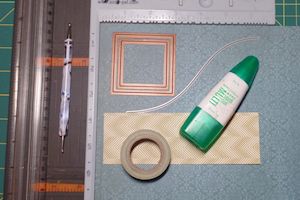
- Cardstock
- Border die (Impression Obsession Hill Landscape Layers DIE343 used here)
- Nesting shape dies (Spellbinders squares used here)
- Washi tape
- Coordinating patterned paper
- Scoring tool
- Die cutting machine
- Trimmer
- Adhesive
- Other supplies as needed to complete the card (Simon Says Stamp "Happy Every Day" set (retired), Impression Obsession Party Kisses C8441, The Cat's Pajamas retired set, Quickutz banner die, Copic markers)
Step-by-Step
-
Step 1
Trim cardstock to 5 1/2" x 11” or 12”.
Score at 3 3/4" and 8”.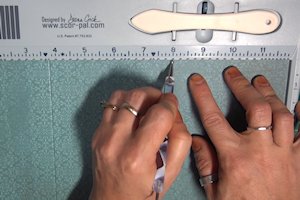
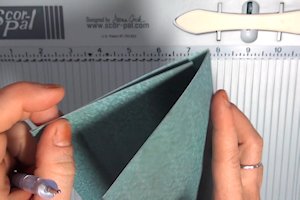
-
Fold in on the score lines.
-
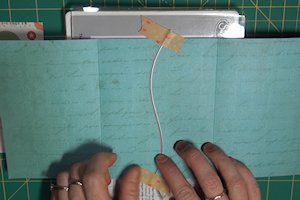
Step 2
Open the folded card on your die cutting platform. Center a single-lined border die, and tape it into place with the cutting surface up.
-
Step 3
Trim a piece of decorative paper to 4” x 5 1/4". Center it in the card opening and tape it into place.
-
Close in the sides of the card front and die cut the card.
-
Step 4
After cutting, your card base will have a decorative cut opening that matches up perfectly.
NOTE:
if your cardstock is heavier weight, you may need to remove the paper inside and take a second run, or cut one flap at a time.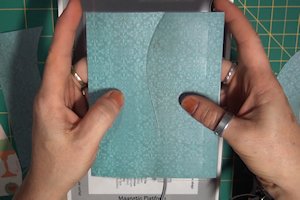
-
Step 5
You will also have 2 layering pieces for the card front, with edges that match the card opening. These can be aligned with the cut edges or the folds.
-
TIP:
Alternatively, the cut flaps of the card can be used for layering, on the outside or inside of the card flaps. They may need to be trimmed slightly.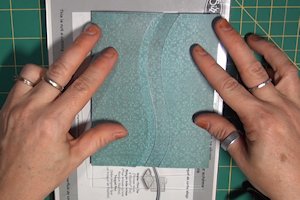
-
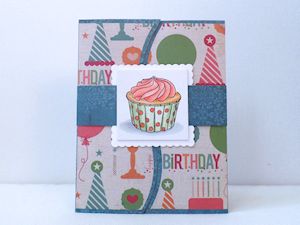
Step 6
Create a focal piece for the card front. Remember to use adhesive on only one side of the back of the focal panel if it will cross over the cut line. A belly band was created for the sample card.

-
Assemble and complete the project.
-
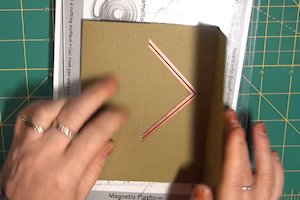
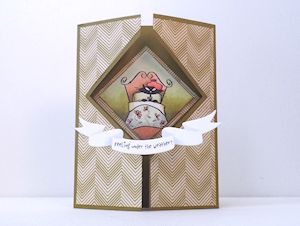
Step 7
To die cut a shaped opening in a gate fold card, trim cardstock to 5 1/2" x 8 1/2".
Score at 2 1/8” and 6 3/8”. (Your scoring board may have a mark at these measurements.) Fold on the score lines.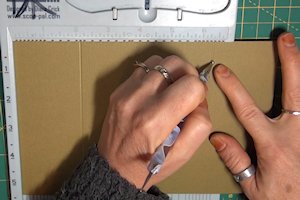
-
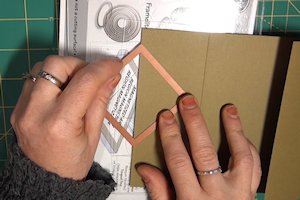
Step 8
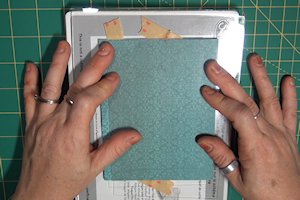
To position the cutting die, line up the center line with one cut side of the opening. Tape the die in place with the cutting surface against the inside of the card.
-
Step 9
Fold in the flap, and fold the opposite flap over the die.
-
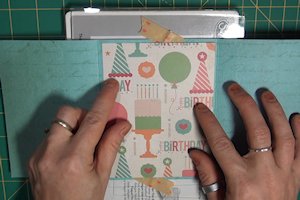
Center a piece of decorative paper over the card front and tape it into place.
Die cut.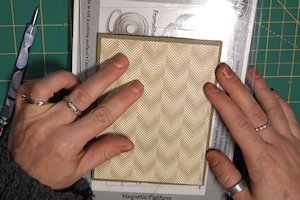
-
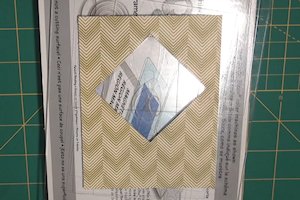
Step 10
After cutting, your card base will have a shaped opening that matches up perfectly at the center line.

-
You will also have a decorative panel that frames the opening.
-
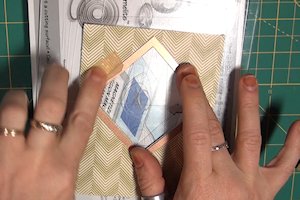
Step 11 (Optional)
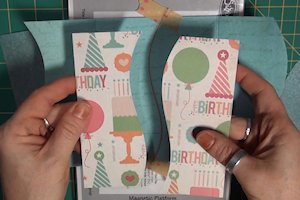
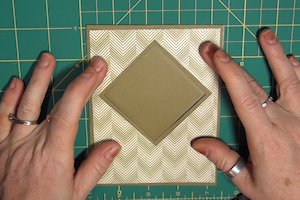
Before cutting a center line in the decorative panel, center a nesting die around the opening and cut.
-
This will create a larger window that frames the opening in the base.
-
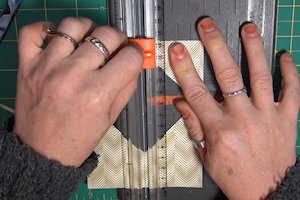
Step 12
Use a trimmer to cut the decorative panel along the center line.
-
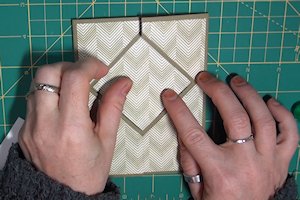
Step 13
The first window cut can be used as a layer inside the card. Use the cut opening to place it in the center.
-
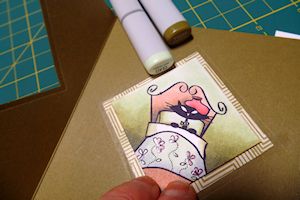
Step 14
Create a focal piece for the center. Line the inside of the card if desired.
-
Assemble and complete the project.
Video!
Your Turn
You've seen the tutorial, now you try it! We've got a section of the gallery set aside for Die Cut Gate Fold. Try this technique, then upload your artwork to the gallery. Show us your creations!
***Please note - Internet Explorer/Edge is not a supported browser, and will not allow you to see the videos. Please use Chrome, Firefox or Safari to view our tutorial videos.

Questions and Comments
We'd love to get your feedback or questions. Leave your comment below.
Page 1 of 1 pages