Designer Gift Clutch
by Deb Valder
Create a classy gift presentation with pretty papers.

Supplies
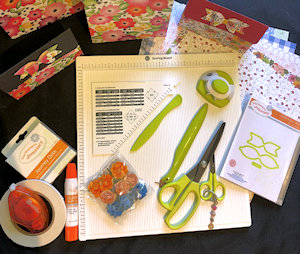
- Cardstock (Fun Stampers Journey® Good Life Prints, Rustic Rose and Whip Cream cardstock used here)
- Scoring board
- Corner rounder
- Crease tool
- Scissors
- Mini Velcro® dot or other closure
- Adhesive (FSJ White Liner Tape, Mini Glue Dots, Craft Glue, and Tape Runner used here)
- Other supplies as needed to complete the project (FSJ products used here: die cutting machine, Doily die, Mini Create a Bow die, Cottage Flowers, adhesive pearls)
Step-by-Step
-
Step 1
Cut cardstock for the base to 6” x 10 1/2”.
Score with the long side on top at 4 1/2” and 6”. Crease the folds. -
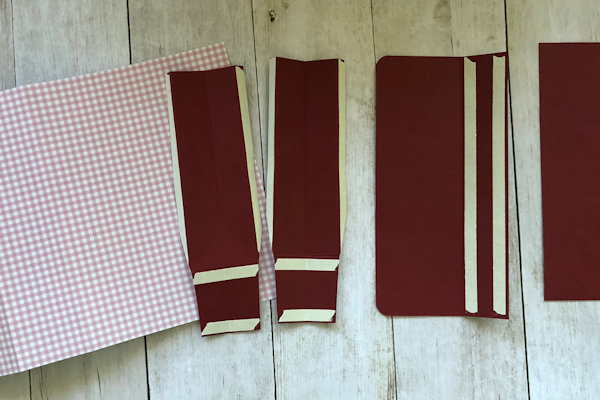
Step 2
Cut two side pieces to 2” x 6”.
Score with the short side on top at 1/4”, 1”, and 1 3/4”.
Turn the pieces. With the long side on top, score at 4 1/2”.
Cut away the 1/4" area on either side below the score line, and cut in at a slight angle above and below the score. -
Step 3
Cut a top flap to 3” x 6”.
Score with the short side on top at 1”.
Round the corners on the longer side. -
Step 4
Add double-sided tape to the two side panels and the top flap.
-
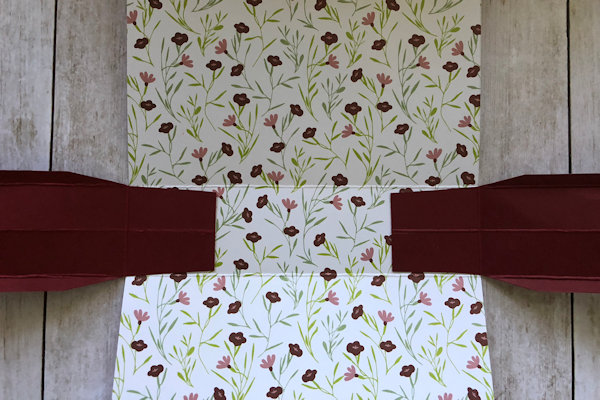
Step 5
Adhere the two side panels to the inside of the clutch base, making sure the fold is even with the outer edge of the clutch base.
Line the bottom with a piece of cardstock cut to 1 1/2” x 6”. -
Step 6
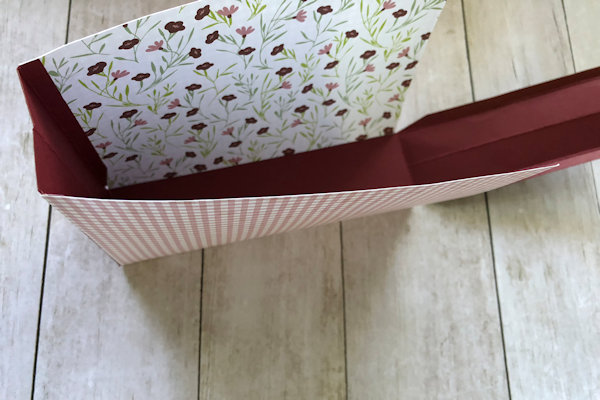
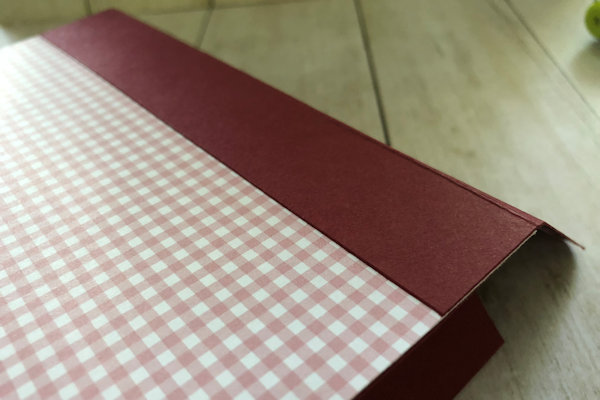
Fold up and adhere the sides making sure the clutch base and the side panels are even at the top.
-
Step 7
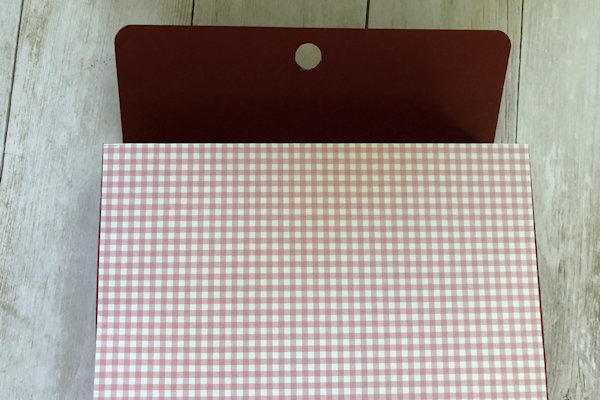
Adhere the shorter side top flap to the back of the clutch.
-
Step 8
Add a mini Velcro dot to the middle front top flap and close to adhere the other side to the clutch.
-
Step 9
Decorate as desired to complete the project.


Video!
Variations
-
6 x 12 Bag
BASE – cut (2) at 6” x 12” and score both pieces on the bottom at 3”
SIDES - Cut (2) - 4” x 12” and score with the short side on top at 1/2”, 2” and 3 1/2” – TURN and with the long side on top score at 3”
TOP FLAP – Cut (1) 3” x 6” and score with the short side on top at 1”
12 x 12 Bag
BASE – (2) at pieces of 12” x 12” and score both pieces on the bottom at 3”
SIDES - Cut (2) - 4” x 12” and score with the short side on top at 1/2”, 2” and 3 1/2” – TURN and with the long side on top score at 3”
TOP FLAP – Cut (1) 3” x 12” and score with the short side on top at 1”

Your Turn
You've seen the tutorial, now you try it! We've got a section of the gallery set aside for Designer Gift Clutch. Try this technique, then upload your artwork to the gallery. Show us your creations!
***Please note - Internet Explorer/Edge is not a supported browser, and will not allow you to see the videos. Please use Chrome, Firefox or Safari to view our tutorial videos.

Questions and Comments
We'd love to get your feedback or questions. Leave your comment below.
BINGO gifts with stamps included and staff holiday gifts.
I'm going to get busy. Thank you so much.
Page 1 of 1 pages