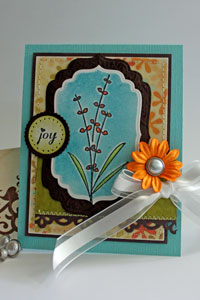
Crayon Resist

by Beate Johns

This is a cool and easy technique to add a highlight to your image. And your kids never use the white crayons anyway.

Supplies
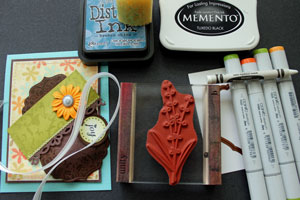
  • Neutral Cardstock, glossy or matte
  • White Crayon (works with other colors as well)
  • Dye ink
  • Black Ink
  • Stamps, Unity's Gratitude = Joy used here
  • Coloring medium, Copics used here (optional)
  • Sponges, or Brayer
  • Paper Towel

Step-by-Step

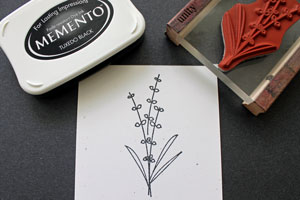
  1. Step 1

    Stamp an image in black or other dark ink.
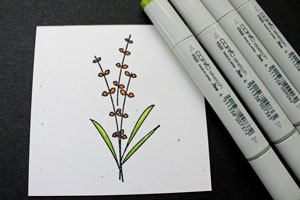
  2. Step 2 (Optional)

    Color image with as desired.

    (Copic Markers YG23, YG25, YR65, YR68 used here)
  3. Step 3

    Trim image to finished size.

    (Label Four Nestabilities were used here.)
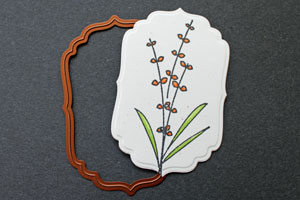
  4. Step 4

    Apply white crayon to any area that should remain white.
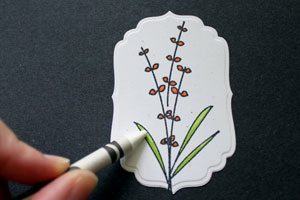
  5. If you colored your image, apply crayon over all colored areas. It will keep the ink off.
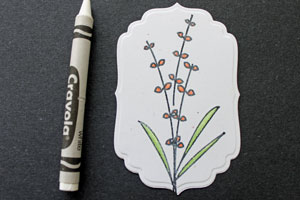
  6. Step 5

    Start sponging over your image with dye ink.
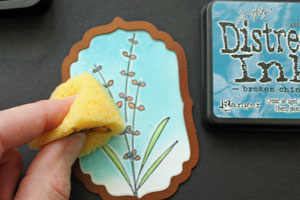
  7. Continue to sponge color until the entire piece of cardstock is covered.
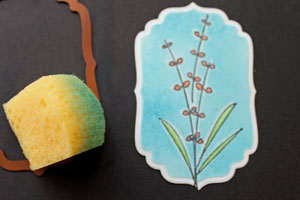
  8. Step 6

    Take a paper towel and buff image.
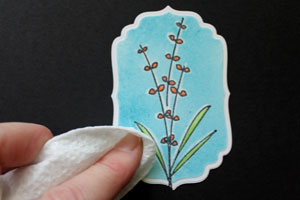
  9. It will take the ink off your crayon marks.
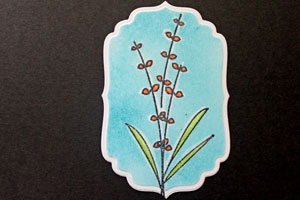
  10. Step 7

    Finish your card.

Video!

Variations

    Try watercolor
    Use a watercolor brush and re-inkers instead of the brayer. Works best on regular (not glossy) paper.

    Rub it
    Use a stamp or other rough surface to make a crayon "rubbing" on your paper, instead of stamping with ink.

    Crumple it
    Crumple your paper then smooth it back out before Step 5.

    More crayons
    Try other crayon colors (lighter colors tend to give the best effect) or combine colors.

Your Turn

You've seen the tutorial, now you try it! We've got a section of the gallery set aside for Crayon Resist. Try this technique, then upload your artwork to the gallery. Show us your creations!

***Please note - Internet Explorer/Edge is not a supported browser, and will not allow you to see the videos. Please use Chrome, Firefox or Safari to view our tutorial videos.

Questions and Comments

We'd love to get your feedback or questions. Leave your comment below.

This is a great idea! I love it, and can't wait to try it! Thank you for sharing, now I have to send my daughter to bed so I can borrow her crayons!
GRKIDDO  |  Thu Mar 27, 2008 at 4:51 PM
Very nice, I remember doing something similar with crayon & water paints when I was a young girl, love the technique!!
Cyndi  |  Tue Apr 8, 2008 at 5:42 AM
splendid ideas
akkina van steen  |  Wed Jan 14, 2009 at 11:34 PM
This could also work with those clear crayons that come in Easter egg dye kids.
Diana  |  Wed Oct 14, 2009 at 12:01 PM
Gran trabajo y gran tutorial. Los videos son super bueno.
Marimer  |  Wed Oct 14, 2009 at 3:04 PM
Great idea, can't wait to try it out. Jean
Jean Barber  |  Wed Oct 14, 2009 at 4:13 PM
this is so cool. Love it!!
Sue  |  Thu Oct 15, 2009 at 11:21 AM
Will stampin up marker work on this. I love the wonderful idea.
jn  |  Thu Nov 5, 2009 at 10:47 PM
Hi Jn,

Yes, Stampin' Up! Markers will work. Any waterbased ink will work.

Hugs and smiles
beate  |  Fri Nov 6, 2009 at 5:38 AM
coptic markers are not water based, they are alcohol based, but I'm sure any other marker or probally any media (acrylic, color penicl, as well as pigment/dye/other alcohol ink.would work if you cover it with the crayon.
Somewhere I read that if you stamp any ink on (usually black like above) on vellum & then try to use alcohol ink (copic markers, ranger etc...), that the black will smear even if you let it dry for a while or even try heat it. They said they always had to do the fill in color on the back of the vellum. They had not been able to find a ink pad (no matter what type such as pigment, dye, fabric or even permanent like above) that wouldn 't do this. Has any here experienced this issue?
Angel  |  Wed Jan 20, 2010 at 6:27 PM
beate , that is so cool .. and with 7 grandkids taken a white crayon .will be no biggy ... also running the larger die cut piece through dry embosser and you inked that up .. thats out of this world .. your amazing . you inspire me like mad .. peace be with you ..anne
ANNE MARIE  |  Mon Aug 30, 2010 at 7:13 PM
Love this technique! Thanks
Suz h  |  Wed Apr 25, 2012 at 5:28 AM
Too cool! I love this idea. And it looks really easy for "technique-challenged" crafters like me. ;o)
Darlene Bishop  |  Wed Apr 25, 2012 at 6:10 AM
I dug out all those broken pieces of white crayons from the grandkids box so now I'm ready to try your neat technique. Thank you once again for another fun idea.
Mary Ann Huntington  |  Thu Apr 26, 2012 at 12:31 PM
Great effect !!
Helen Dunn  |  Fri Apr 27, 2012 at 12:45 AM
So cool ..hadnt used a white crayon, to do any resist in a long time ..And with copics, I had no idea you could do this ..And Beate your right it is a very cool look .. TFS ... Hugs Anne
Anne M Sweeney  |  Fri Apr 27, 2012 at 10:37 PM
Beate,
The expert at making things look easy. I see tecniques done, but when I really want to do something I check SCS.
Thank you,
Blessings,
Carole
Carole Robb Bisson  |  Fri Apr 19, 2013 at 8:05 AM
I see this technique numerous places on Pinterest. They keep mentioning using a cheap white crayon as it is waxier. I already own Crayola brand . What difference do you think it would make using one or the other? Also saw this technique used on texture embossing folders by using the crayon sideways, then sponging or brayering ink on top.
Chris  |  Tue Nov 4, 2014 at 12:51 PM
Thank you for this idea which has endless of possibilities, and a real wow factor for cards, and I can not wait to show my card making friends. brilliant technique happy crafting
JANET SABIN  |  Thu May 14, 2015 at 4:27 PM

Page 1 of 1 pages

You need to be logged in to comment

GET OUR NEWSLETTER


Splitcoaststampers's privacy policy