Contact Paper Masking
by Deb Valder
Die cut adhesive shelf liner to create a reverse mask.

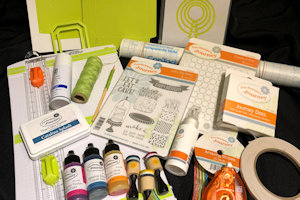
Supplies
- Repositionable adhesive shelf paper (Con-Tact® brand used here)
- Open shape die (Fun Stampers Journey Uplift die set used here)
- Coloring medium (FSJ Liquid Color used here – Catalina Splash, Watermelon Fusion, Lemon Drop) and applicator (FSJ Small Dauber Dowels used here)
- Background stamps (optional – FSJ Create-a-Dot used here)
- Ink for stamping (optional)
- Other supplies as needed to complete the project (used here: FSJ Card Carrier die, Let’s Eat Cake stamp set, Lemongrass Thread, Amazing Stripes Ribbon, Whip Cream, Lemon Drop, Watermelon Fusion and Catalina Splash cardstock, die cutting machine, trimmer, skewer, hairspray, crease tool, adhesive)
Step-by-Step
-
Step 1
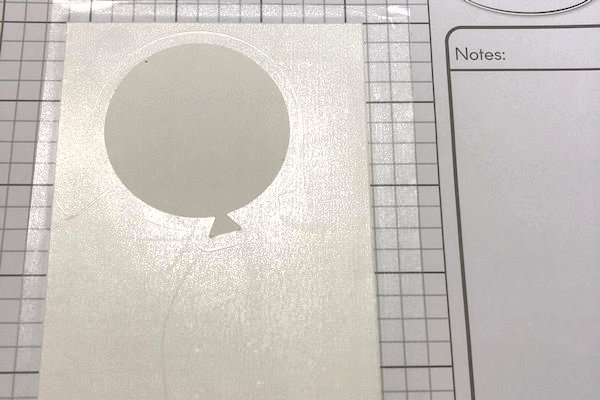
Cut a piece of repositionable adhesive shelf paper slightly larger than your cardstock panel. Die cut the shape you will be using for your reverse mask, taking care to position it where you will want that shape on the card.
-
Step 2
Remove the paper backing and lay the adhesive sheet over the cardstock panel.
-
Step 3
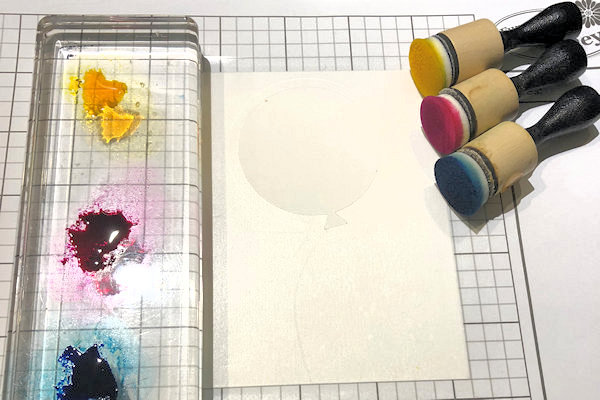
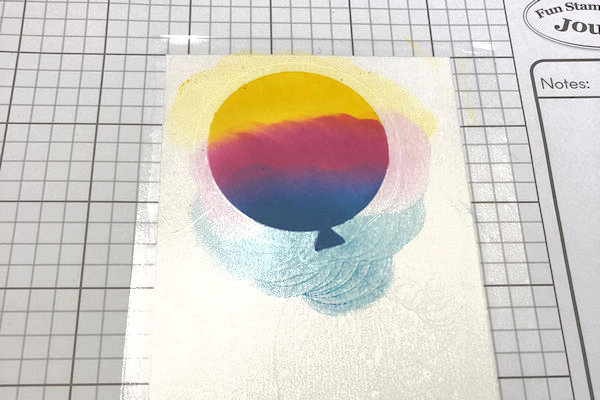
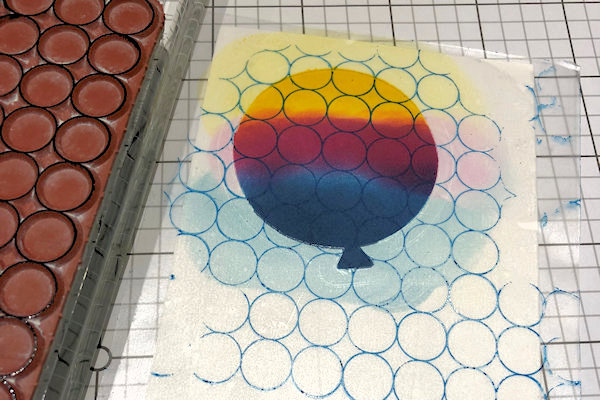
Apply a coloring medium to the open area created by the die cut (FSJ Liquid Color used here).
-
Sponged inks or pastels can also be used. Take care with wet media as it may seep under the edge of the mask.
-
Step 4
With the mask still in place, ink up a background stamp and stamp in the open area.
NOTE:
Be careful not to touch the adhesive paper, as the ink will remain wet. -
Step 5
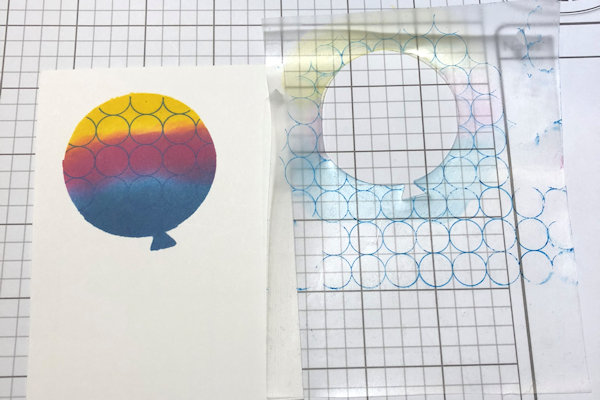
Carefully remove the adhesive paper. You can clean it off and reuse it a couple of times.
-
Step 6
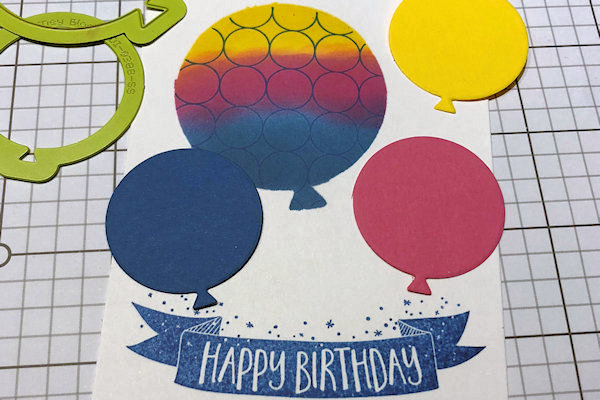
Embellish the panel as desired.
-
Step 7
Complete the project.

Your Turn
You've seen the tutorial, now you try it! We've got a section of the gallery set aside for Contact Paper Masking. Try this technique, then upload your artwork to the gallery. Show us your creations!
***Please note - Internet Explorer/Edge is not a supported browser, and will not allow you to see the videos. Please use Chrome, Firefox or Safari to view our tutorial videos.

Questions and Comments
We'd love to get your feedback or questions. Leave your comment below.
https://www.youtube.com/watch?v=z0aiLF3Sz7E
Page 1 of 1 pages