Coloring Fabric Folds
by Colleen Schaan
Learn coloring tips for adding depth and dimension to fabric folds.
Supplies
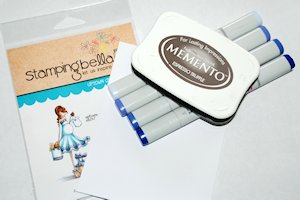
- Stamp or digital image that has fabric or petals with folds (Brynn has a Baby Shower by Stamping Bella used here)
- Stamping ink compatible with alcohol markers, dye or hybrid (Memento Espresso Truffle by Tsukineko used here)
- Smooth white cardstock (X-Press It Blending Card used here)
- Alcohol markers – light, medium and dark shade (Copic Markers B60, B63, and B66 used here)
- Other supplies as needed to complete the project
Step-by-Step
-
Step 1
Stamp the image onto white cardstock with compatible ink.
Begin by deciding where the light source is coming from. In this sample, the light will be coming from the upper right.
-
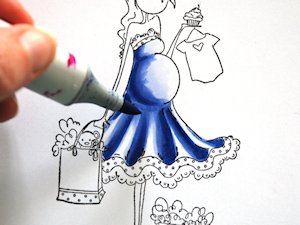
Step 2
Using the lightest shade marker (B60 here), plan out where the shadows will be. Add teardrop shaped flicks in either the “hill” areas or the “valley” areas of the skirt. (Here the shadows are added to the valley areas.)

-
Step 3
Using the darkest shade marker (B66 here), add ink to the planned shadows. Flick from the bottom of the skirt up towards the gathered waist.
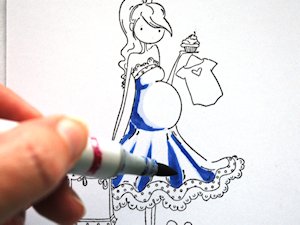
-
Step 4
Using the medium shade marker (B63 here), begin to widen and lengthen the dark shaded areas. Do not worry about blending yet; just think about color placement.
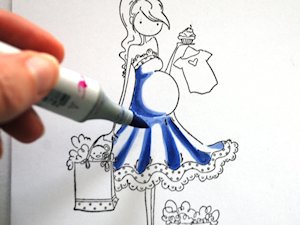
-
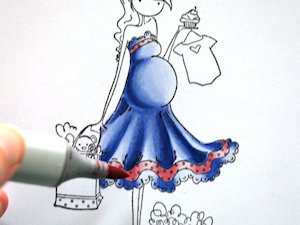
Step 5
Using the light shade marker again (B60), continue to widen and lengthen the shadow areas. Do not color all the way into the highlights.
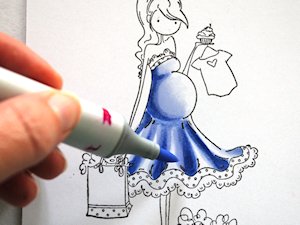
-
Step 6
The shadows have probably lightened a bit, so add a small amount of the darkest shade back into the deepest shadow area.
-
Step 7
Begin blending out towards the highlight with the medium shade.

-
Step 8
Continue blending with the lightest shade. Once the shades are blended, swipe the highlights once or twice with the lightest color.

-
Step 9
Color any stripes or underskirts using the same technique.
-
Step 10
Color the rest of the image as desired.

-
Step 11
Use the colored image to create a card.

Video!
Your Turn
You've seen the tutorial, now you try it! We've got a section of the gallery set aside for Coloring Fabric Folds. Try this technique, then upload your artwork to the gallery. Show us your creations!
***Please note - Internet Explorer/Edge is not a supported browser, and will not allow you to see the videos. Please use Chrome, Firefox or Safari to view our tutorial videos.

Questions and Comments
We'd love to get your feedback or questions. Leave your comment below.
Page 1 of 1 pages