Colored Glitter Inlay
by Dina Kowal
Color inside a glittered die-cut outline with alcohol markers for a classy inlaid look.
Supplies
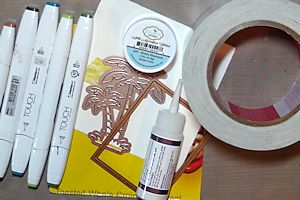
- White cardstock
- Chipboard (cereal box used here)
- Cutting die (Spellbinders Classic Rectangle and In'Spire Paradise Palms dies used here)
- Glue
- Craft knife or piercing tool
- Die cutting machine
- Wide double sided tape or adhesive sheet (2 1/2" wide Sookwang tape used here)
- Microfine or ultrafine glitter (Warm Diamond Silk Microfine Glitter from Elizabeth Craft Designs used here)
- Alcohol markers (Shinhan Touch Twin markers used here)
- Other supplies as needed to complete the card (Impression Obsession Warm Fuzzies clear stamp set, Scor-Pal, and adhesive pearls used here)
Step-by-Step
-
Step 1
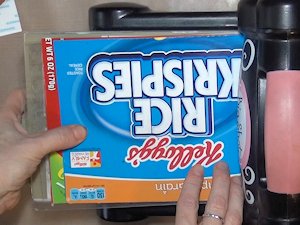
Create a card panel that is approximately 1/16" thick. (The intention is to create a thickness that cannot be cut clean through with a standard wafer die.)
First, prepare a layer of white cardstock by covering it with wide double-sided tape or an adhesive sheet. Die cut the prepared cardstock using a basic shaped die.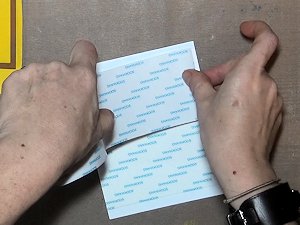
-
Use the same die to cut two pieces of chipboard. Glue the 3 pieces together, with the adhesive sheet on top.
HINTS:
*Allow the glue to dry completely before proceeding.
*Matboard can be used in place of the layered panels.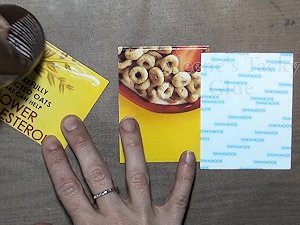
-
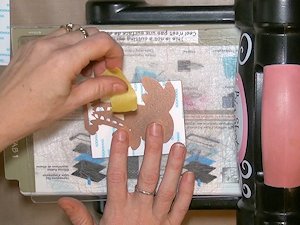
Step 2
Position a cutting die onto the panel and secure it with removable tape.
-
Step 3
Adjust the plates of your die cutting machine to accommodate the thicker sandwich.
For the Big Shot, turn the base plate to Tab 1. Layer a cutting plate, the thick panel with die on top, a second cutting plate, and 1-2 chipboard shims.
For the Cuttlebug, layer plates A and B, the die and panel to be cut, 2 to 4 chipboard shims, and plate B.
-
Adjust as needed to create a thickness that will allow the die to cut slightly into the surface of the panel, through the liner of the adhesive. Create the same pressure that is normally felt when cutting something of regular thickness – do not force the machine.
Run the panel through the die cutting machine. The die will cut through the liner of the adhesive, but not through the entire panel.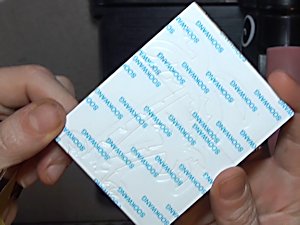
-
Step 4
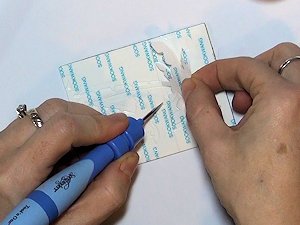
Using a craft knife or piercing tool, carefully remove the adhesive liner inside the die cut shape.
-
Step 5
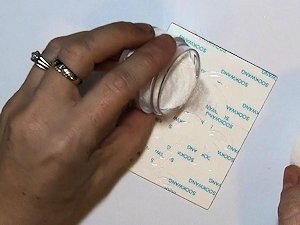
Coat the exposed area with clear microfine glitter.
-
Buff in a circular motion with your finger to smooth and press the glitter into the adhesive. Return excess glitter to the container and brush off any extra with a static cloth.

-
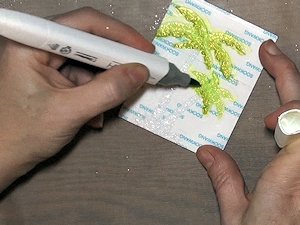
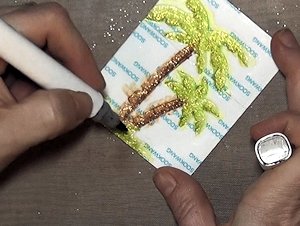
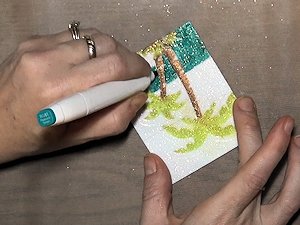
Step 6
Use alcohol markers to color the glitter inside the die cut outlines. Shade and blend as usual.
-
The remaining liner paper acts as a stencil to keep the coloring inside the outline.
-
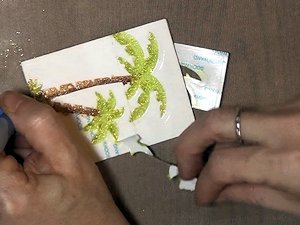
Step 7
Remove the remaining adhesive liner.
-
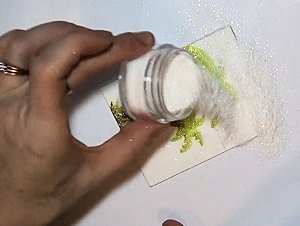
Step 8
Coat the exposed surface with glitter.
-
Again, buff in a circular motion with your finger to smooth and press the glitter into the adhesive. Return excess glitter to the container and brush off any extra with a static cloth.

-
Step 9
Color in the background if desired, taking care to preserve the coloring from previous steps.
-
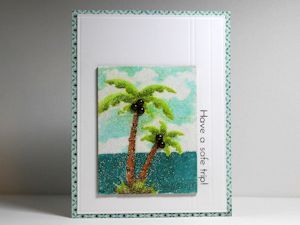
Step 10
Embellish and complete the project.
Video!
Variations
-
Instead of coloring clear microfine glitter, use colored glitters. When using different colored glitters, as opposed to coloring clear glitter with markers, begin with the background areas first, and work to the foreground.
Your Turn
You've seen the tutorial, now you try it! We've got a section of the gallery set aside for Colored Glitter Inlay. Try this technique, then upload your artwork to the gallery. Show us your creations!
***Please note - Internet Explorer/Edge is not a supported browser, and will not allow you to see the videos. Please use Chrome, Firefox or Safari to view our tutorial videos.

Questions and Comments
We'd love to get your feedback or questions. Leave your comment below.
Elaine
Elaine
Page 1 of 1 pages