Collage Stamping
by Shelly Kuck
Learn to layer images and embellishments to create collage cards.
Supplies

- Stamps Here, from Rubbernecker
- Inks
- Cardstock
- Embellishments
- Sponges
- Toothbrush
- Heat Tools
Step-by-Step
-
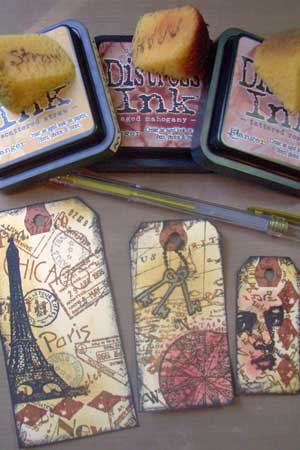
Step 1
Start by inking detailed/non solid or bold lines stamps for the background using a lighter color.
Optional:
For a bi-colored look, rock 'n roll the stamp in darker ink before stamping the image on cardstock or tags.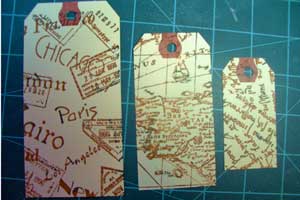
-
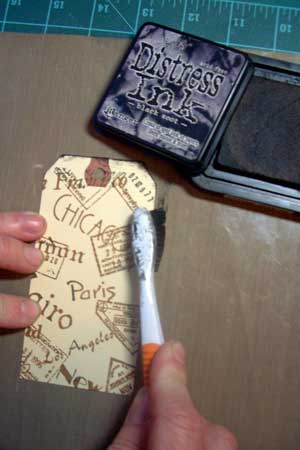
Step 2
Using an old toothbrush, scrape along the edges of the tags or layer using dark ink to define and distress the edges.
-
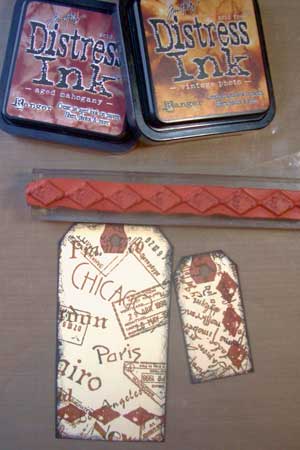
Step 3
Ink a more solid image stamp in a complimentary color and stamp over the first images.
-
Step 4
Stamp focal images onto tags using darkest ink and emboss with embossing powder. Be sure to stamp and apply powder to images 1 at a time so the embossing powder will stick to the ink.
After heat embossing main images, fill in empty spaces with additional small images with darkest ink, stamping some images off on scrap paper for added dimension.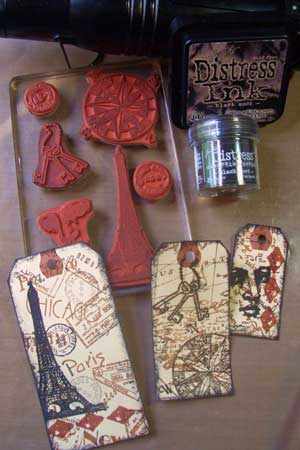
-
Step 5
Sponge inks over the embossed images to give them some definition, highlight using metallic gel pens if desired.
-
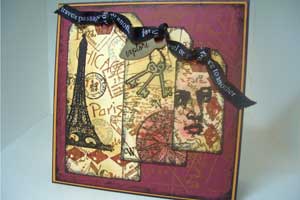
Step 6
Assemble your collage work onto a card base and embellish as desired.
Video!
Variations
-Stamp focal images over the lighter base images using darker ink and bolder stamps.
-Stamp some focal images on parchment, Designer paper or use ephemera, tear edges closely to the image and layer on your collage.
-Create dimension by stamping on Acetate or vellum with Stazon ink, cut out and layer over stamped images.
-Use glossy cardstock and VersaMark ink to stamp the base images, sponge or brayer on color and then stamp focal images over the top in a darker ink.
-Vintage images, flattened bottle caps, sewing notions, ticket stubs, clothing tags and even old jewelry pieces make excellent embellishments to add to your collage. Look around, check the junk drawer and just have fun!
Your Turn
You've seen the tutorial, now you try it! We've got a section of the gallery set aside for Collage Stamping. Try this technique, then upload your artwork to the gallery. Show us your creations!
***Please note - Internet Explorer/Edge is not a supported browser, and will not allow you to see the videos. Please use Chrome, Firefox or Safari to view our tutorial videos.

Questions and Comments
We'd love to get your feedback or questions. Leave your comment below.
Beautiful project!
Now to find some stamps in my stash I can create a collage with....hmmm....
Page 1 of 4 pages 1 2 3 > Last »