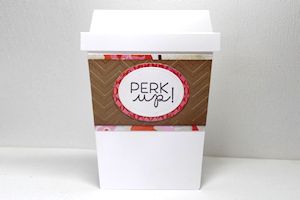
Coffee Gift Card
by Dina Kowal
This cup-shaped card opens to reveal a gift card in a sliding panel.
Supplies
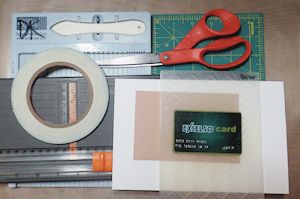
- Heavy cardstock for card base (110# Neenah Classic Crest used here)
- Kraft paper or cardstock
- Paper trimmer
- Scissors
- Embossing folder (optional)
- Score board and scoring tool or stylus
- Strong double-sided adhesive (Scor-Tape used here)
- Gift card
- Other supplies as needed to complete the project (used in sample: Crate Paper pad, Impression Obsession Perk Up B13249, The Cat's Pajamas clear stamp set (discontinued), Memento Espresso Truffle ink, MISTI, Touch Twin Markers, Spellbinders circle and oval dies)
Step-by-Step
-
Step 1
Cut cardstock base to 4" x 10".
NOTE:
It is important to use heavy cardstock for the base and insert pieces.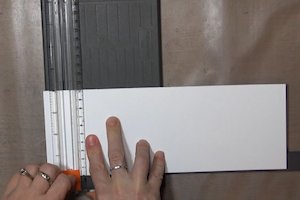
-
Score at 1 1/4" and 6".
-
Step 2
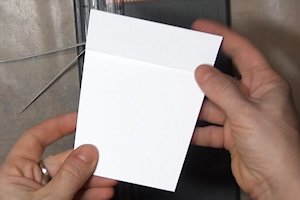
Fold the base like a matchbook, with the 1 1/4" flap at the top. Use a bone folder or other tool to crease the folds.
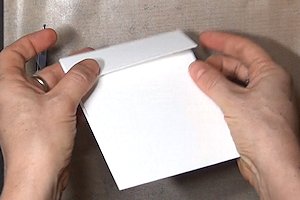
-
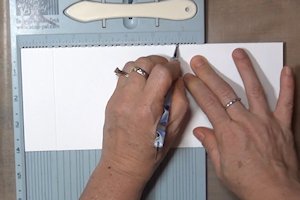
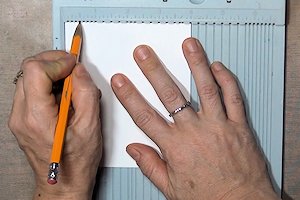
Step 3
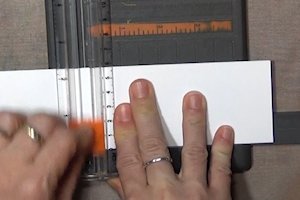
On the bottom fold, make a pencil mark at 1/2" and 3 1/2".

-
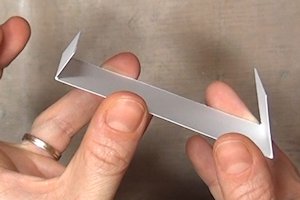
Cut from the pencil mark to the top corner on both sides to create the cup shape.
NOTE:
If using a paper trimmer, you may need to complete your cuts with scissors because of the thickness of the folded layers.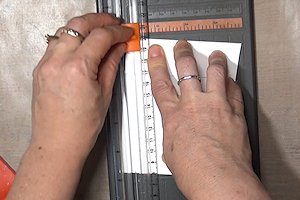
-
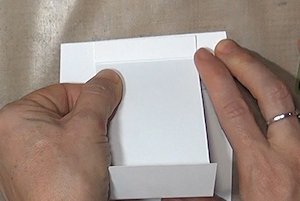
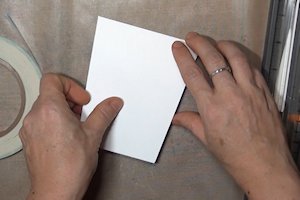
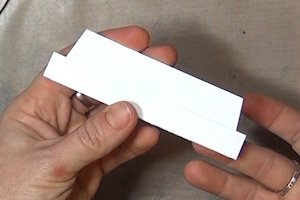
Step 4
When cut, the card base should look like this.
-
Step 5
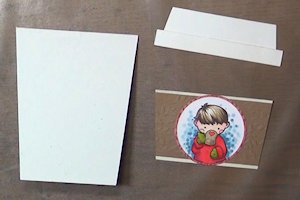
Cut another piece of heavy cardstock to 2 1/4" x 5".
-
Score at 1/2" and 4" and fold both tabs in. This will be the gift card insert.
-
Step 6
Using double sided tape, center and adhere the 1/2" flap of the insert piece onto the flap of the card base, aligning the edges.
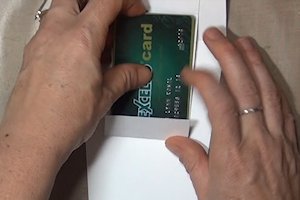
-
Lay a gift card onto the insert, and fold up the bottom flap.
-
Step 7
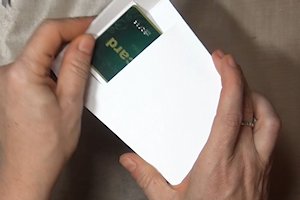
Use double sided tape to close the sides of the card, taking care to leave the insert free to slide up and down.
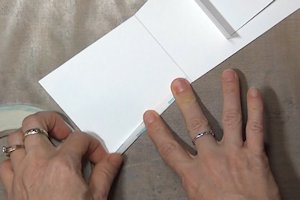
-
Once the sides are adhered, the gift card should pull up when the card is opened and push back down into the card when closed.
-
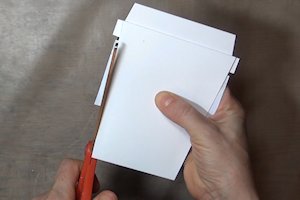
Step 8
Cut a card front, 4" x 4 3/4", from the same heavy cardstock. On the bottom edge, make a pencil mark at 1/2" and 3 1/2", then cut from the pencil mark to the top corner on both sides to create the cup shape, as above.
-
Cover the top flap of the card base with double sided tape. Align and adhere the front to the flap.
-
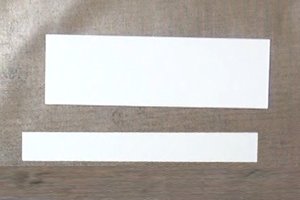
Step 9
For the lid, cut two strips of white cardstock, one 1/2" x 4 1/4", and the other 4" x 1 1/4".
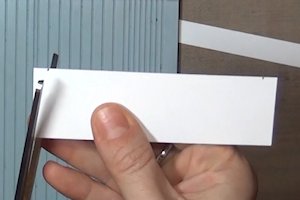
-
Make a pencil mark along the top edge of the wider strip at 1/4" from both corners. Cut from the mark to the corner below to angle the sides.
-
Step 10
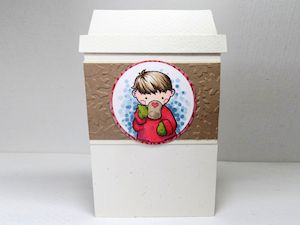
Center and adhere the 1/2" strip along the bottom edge of the angled piece to create the lid. Set aside.
-
Step 11
Cut a strip of kraft or decorative cardstock, about 2" x 4", for the cup sleeve. Add texture with an embossing folder.
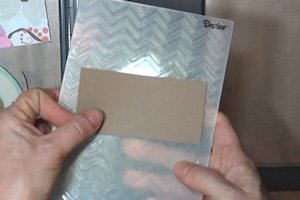
-
Decorate as desired, and layer onto another piece of coordinating cardstock, 2 1/4 x 4", to strengthen the panel.

-
Step 12
Center and adhere the lid to the cup. The top of the longer lid piece should align with the top fold of the card base.
TIP:
Use a ruled grid to ensure that the height of the card is no more than 5 1/2", so that it can be mailed in a standard A2 envelope.
-
Step 13
Apply double sided tape to the sleeve, and adhere it below the lid.
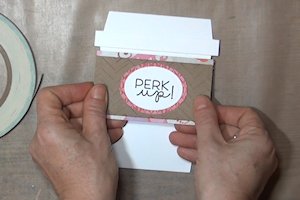
-
Turn over the card and trim the edges of the sleeve to the angle of the cup.
-
Step 14
Complete the card. Add a sentiment inside, if desired.
Video!
Variations
-
To make a top-folding cup card without the gift card feature, cut a base that is 4"x 9 1/2". Score at 4 3/4" and fold. On the bottom edge, make a pencil mark at 1/2" and 3 1/2" as above. Cut from the pencil mark to the top corner on both sides to create the cup shape.
-
Decorate as above.
Your Turn
You've seen the tutorial, now you try it! We've got a section of the gallery set aside for Coffee Gift Card. Try this technique, then upload your artwork to the gallery. Show us your creations!
***Please note - Internet Explorer/Edge is not a supported browser, and will not allow you to see the videos. Please use Chrome, Firefox or Safari to view our tutorial videos.

Questions and Comments
We'd love to get your feedback or questions. Leave your comment below.
PS. You should check out the NEW Fiskar's Orange colored trimmers--it can handle thicker card stock--plus it has this metal measurement line down the gally of the trimmer--so easy to measure layers!
Enjoyed making them.
Thanks for all your hard work.
Page 1 of 1 pages