Cling Wrap Background
by Lydia Fiedler
Create texture and depth using wet media and cling wrap.
Supplies
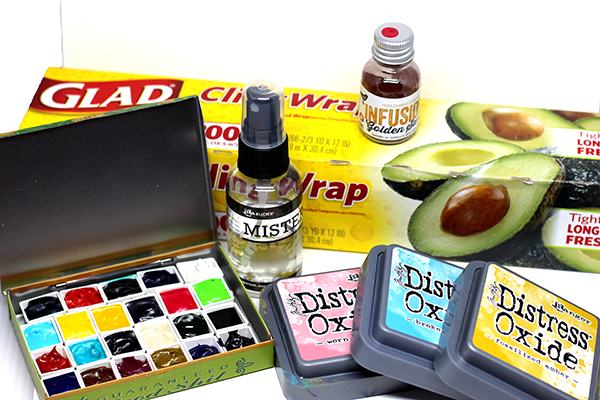
- Water-soluble medium (watercolor, ink and watercolor powders used here)
- Watercolor paper (Fabriano 90 lb. hot press paper used here - any water-friendly paper will work)
- Cling wrap
- Spray bottle
- Other supplies as needed to complete the project (used here: Simon Says Stamp Birch Tree Window Die, Paper Artsy Infusions Powdered Watercolor, Daniel Smith Bright Opera Watercolor, Distress Oxide Inks in Fossilized Amber, Worn Lipstick and Broken China, Stampin' Up! Large Letters Framelits, Concord & 9th Beautiful Words Dies, Stampin' Up! All Things Thanks stamp set, Stampin' Up! So Very Much Stamp Set, Hero Arts Unicorn White pigment Ink, Brutus Monroe Alabaster embossing powder)
Step-by-Step
-
Step 1
Put a piece of cling wrap onto your work surface - make sure that it's larger than the piece of paper that you'll be using.
-
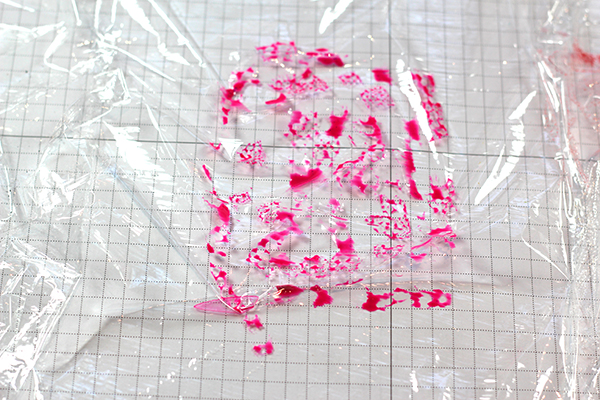
Step 2
Add a water-soluble medium to the cling wrap - my samples will show Distress Oxide Inks, Daniel Smith watercolor, and Paper Artsy Infusions. Shown here - Daniel Smith Watercolor - Opera Pink.
-
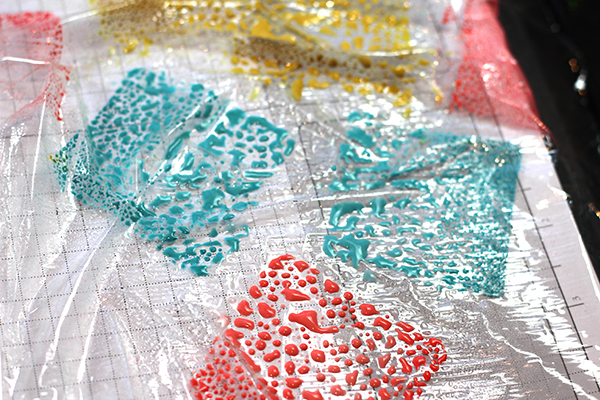
Step 3
Activate the medium on the cling wrap by using a spray bottle to spritz it with water, or water with a shimmery medium in it, an ink spray, etc. Shown here is Distress Oxide Ink sprayed with water.
-
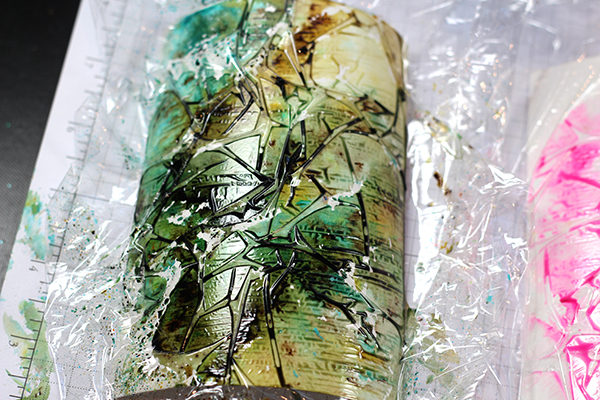
Step 4
Place watercolor paper onto cling wrap and flip it over. Scrunch up the cling wrap to make desired angles and patterns. Let this dry naturally - no heat gun. Do not remove cling wrap until pigment is dry. Shown here - Paper Artsy Infusions, sprayed with water.
-
Step 5
Remove the cling wrap and use background to complete a card. Shown here - the Infusions card.
-
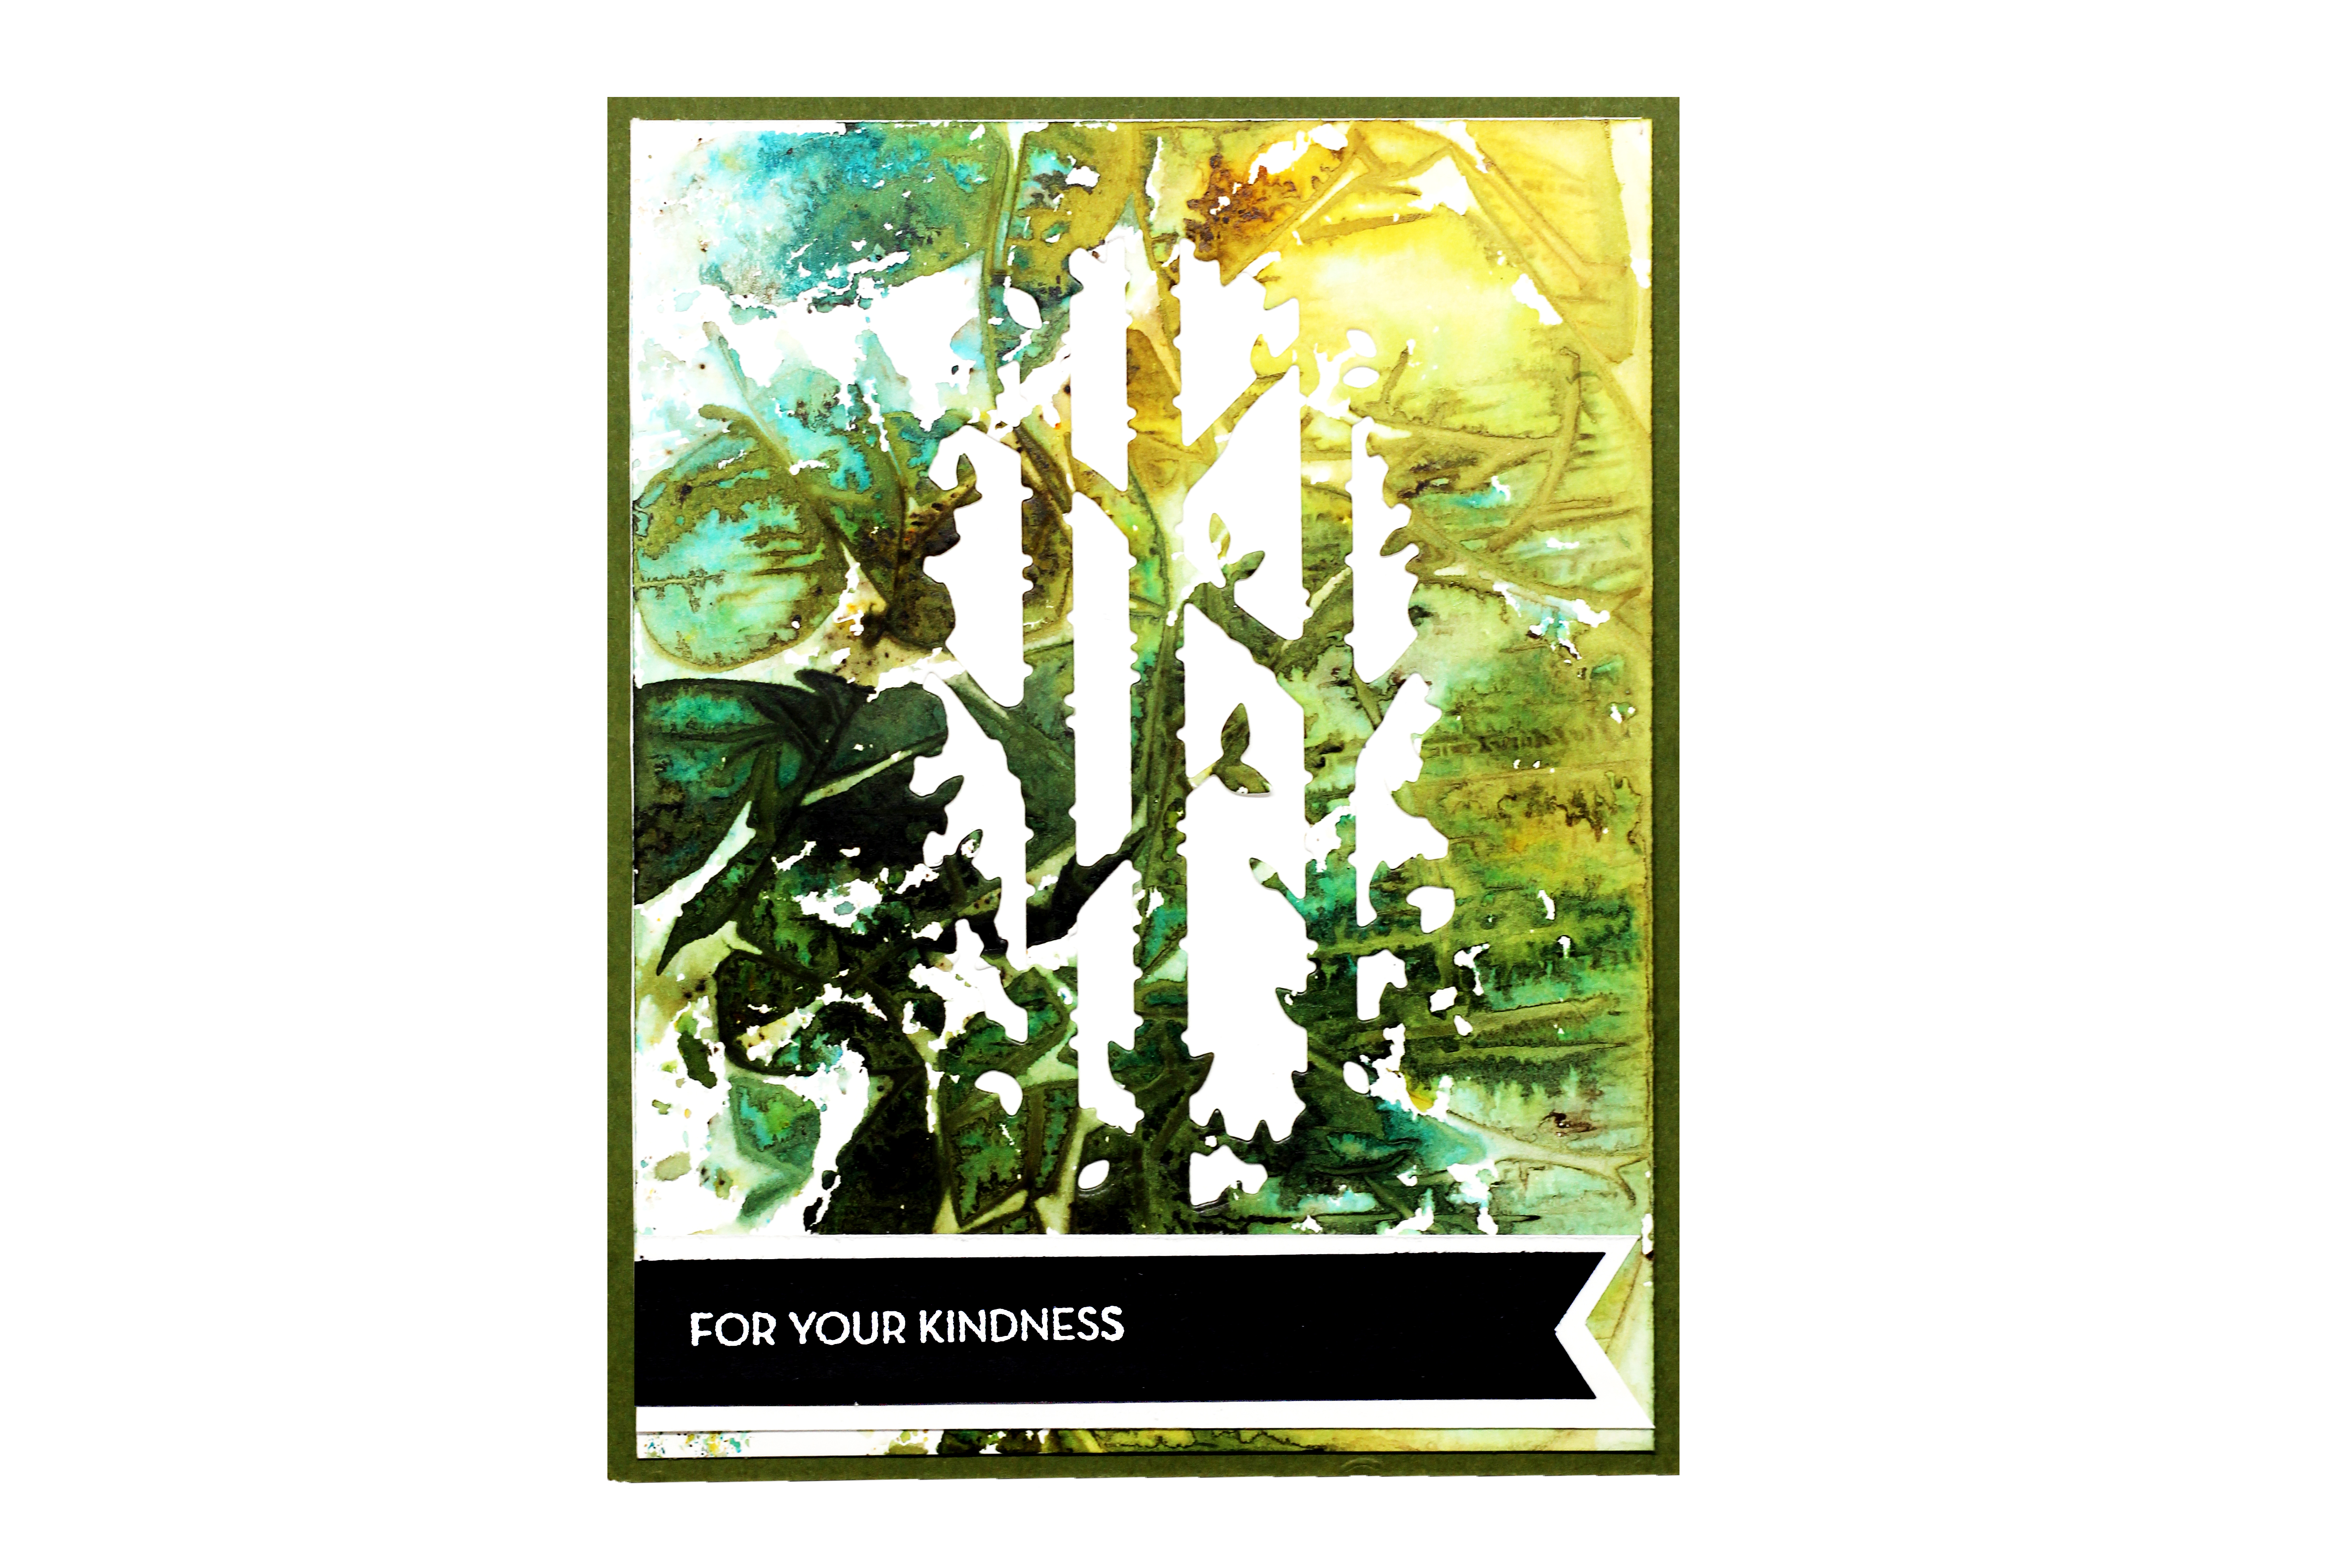
Step 6 (Optional)
Use dies to make these patterns shine. Daniel Smith watercolor sample shown.
-
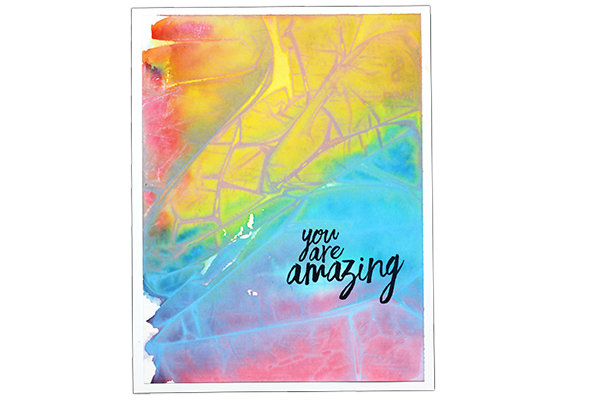
Step 7 (Optional)
Let the background shine with just a sentiment. Distress Oxide ink background shown here.


Video!
Your Turn
You've seen the tutorial, now you try it! We've got a section of the gallery set aside for Cling Wrap Background. Try this technique, then upload your artwork to the gallery. Show us your creations!
***Please note - Internet Explorer/Edge is not a supported browser, and will not allow you to see the videos. Please use Chrome, Firefox or Safari to view our tutorial videos.

Questions and Comments
We'd love to get your feedback or questions. Leave your comment below.
Can't wait for my oxide inks to arrive to try it!
Shirl
I am soooo going to try this tonight....
Page 1 of 2 pages 1 2 >