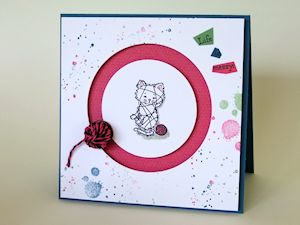
Circle Spinner
by Betty Traciak
Add a fun spinning element to your card front.
Supplies
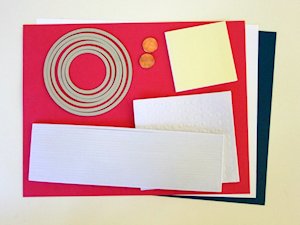
- Cardstock and/or Double-sided paper (Stampin' Up!® Dapper Denim and Whisper White cardstock and Festive Birthday Designer Series Paper used here)
- Nesting circle dies (SU Circle Framelits used here)
- Die cutting machine
- Post-it Notes
- Adhesive Foam Dots and Strips
- Adhesive
- Two pennies
- Other supplies as needed to complete the project (Stampin' Up! products used here: Pretty Kitty and Gorgeous Grunge stamp sets; Basic Black Archival Ink, Dapper Denim, Melon Mambo and Wild Wasabi Classic Ink; Pink Pirouette and Melon Mambo Stampin’ Write Markers; Thick Baker’s Twine
Step-by-Step
-
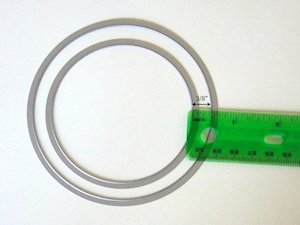
Step 1
Find two circle dies that measure approximately 3/8" from cutting edge to cutting edge when nested together.
-
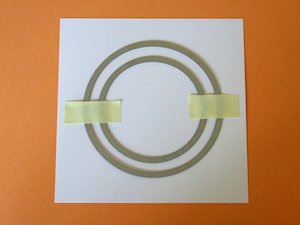
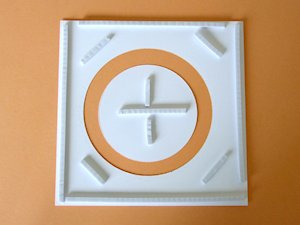
Step 2
Arrange the two dies on piece of cardstock cut 1/4” smaller than the chosen card front. Secure in place with Post-It Notes. Run through a die cutting machine to cut.
-
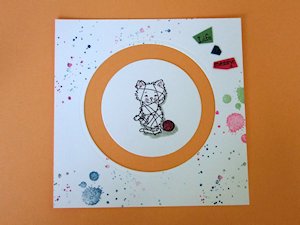
Step 3 (Optional)
Stamp as desired.
-
Step 4
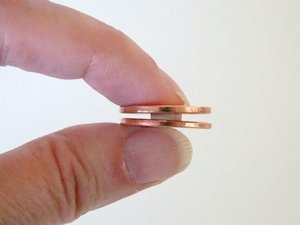
Sandwich an adhesive foam dot between two pennies.
-
Step 5
Apply adhesive foam strips to the backs of the cut cardstock pieces, making sure to leave space near the edges for the pennies to spin.
-
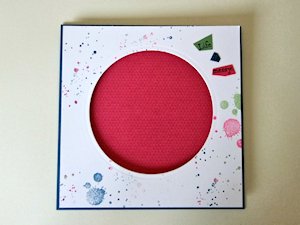
Step 6
Adhere a contrasting piece of paper cut smaller than the card front. Then adhere the top popped-up layer to the card base.
-
Step 7
Slip the penny over the edge of the outer circle. Center and adhere the inner circle to the card front.
-
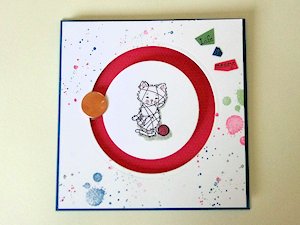
Step 8
Finish by adhering a stamped image or embellishment to the penny.
Video!
Variations
-
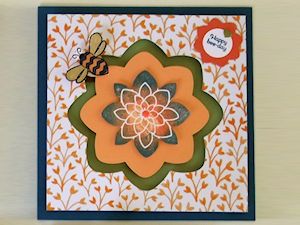
Try using other shapes for the spinner 'track'.
Your Turn
You've seen the tutorial, now you try it! We've got a section of the gallery set aside for Circle Spinner. Try this technique, then upload your artwork to the gallery. Show us your creations!
***Please note - Internet Explorer/Edge is not a supported browser, and will not allow you to see the videos. Please use Chrome, Firefox or Safari to view our tutorial videos.

Questions and Comments
We'd love to get your feedback or questions. Leave your comment below.
If your spinner is not moving freely there are a couple of things it could be.
The adhesive that elevates the cardstock layers needs to be taller than the penny. The adhesive strips that I used (made by Stampin' Up) are about twice the thickness of a Stampin' Dimensional. I have made spinner cards in the past by stacking two Dimensionals on top of each other. Also the adhesive dot in between the pennies should be fairly thin (like a dimensional).
If you are using Dimensionals trim the points off. I found a 1/4" round dot worked really well so you could cut more than just the points and see if that helps.
Let me know how it goes!
The pinwheel is a stamp from the Crazy About You set by Stampin' Up. I used markers to ink the sections of the stamp. After stamping I punched it with the now retired Scallop Circle Punch.
Buttons also will work. I used a 5/8" diameter (15mm) button for the flower card. I have used both plastic and metal buttons. Metal ones work especially nice because of the weight.
Thank you for your fantastic video tutorial, I have these dies and I will most definitely be making this cards.
I adore the one with the little kitty and the ball of yarn, how adorable is that?!!!!
Big Hugs,
Maria Rodriguez.
1cent coin which would probably be most like your penny. Maybe I could use a 5cent coin. Thank you very much for an easy to understand tutorial.
Page 1 of 1 pages