Christmas Tree Treat Holder
by Tiffany Johnson
Dress up a little treat holder with patterned paper to turn it into a Christmas tree.
Supplies
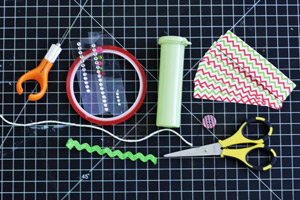
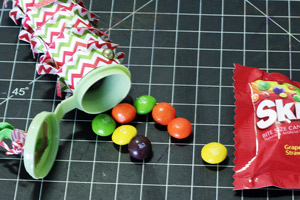
- Darice Bead Container, or test tube or other slim container
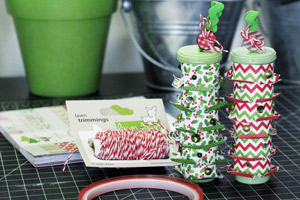
- Six 1" x 4" strips of double-sided patterned paper,Doodlebug’s North Pole paper used here
- 1/4' Terrifically Tacky Tape/Red Line Tape, or other strong adhesive
- Detail Scissors
- Craft Knife
- 4" Ric-Rac or other ribbon
- 8" bakers twineLawn Fawn’s Peppermint help twine used here
- button
- Assorted Adhesive Gems & Pearls, Prima E. used here
Step-by-Step
-
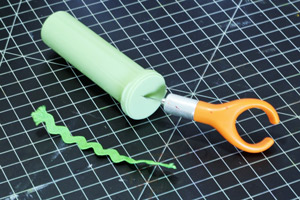
Step 1
Prep the bead container top by cutting a slot into the top with a craft knife.
-
Step 2
Using the tips of scissors or another small blunt object, push the end of the ric-rac loop into the slot and secure with a piece of tape.

-
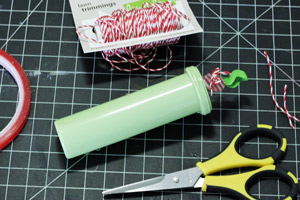
Step 3
Thread the button with the twine and wrap around the ribbon pull on the lid. Finish with a bow.
-
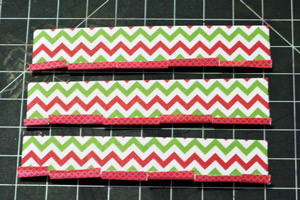
Step 4
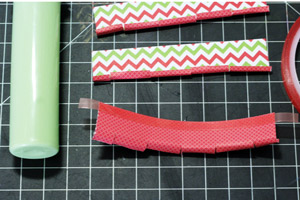
Cut small vertical slits into the 6 patterned paper strips. Do not make the slits at the same positions for every strip of patterned paper. For example, for one strip make the starting cut at 1/2" and then cut at every 3/4". Then for another strip make the starting cut at 1", cutting a slit every 1". Curl up the edges.
-
Step 5
Adhere a strip of Terrifically Tacky Tape to the uncurled side of the patterned paper strips.Leave a little excess tape on each side, this will allow you to tighten the strips as you wrap them around the container.
-
Step 6
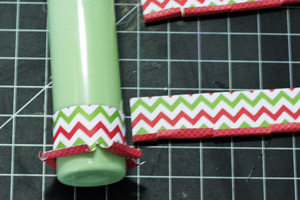
Starting at the bottom of the container in about 1/4", wrap the patterned paper strips around the container with the overlapping sides in the back of the container. Use the excess adhesive on each side to tighten and secure the strip.
-
Step 7
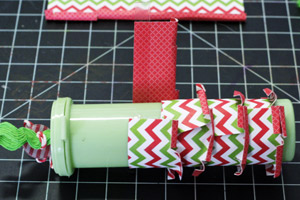
Continue to adhere the 5 remaining strips overlapping them about 1/8" - 1/4".
-
Step 8
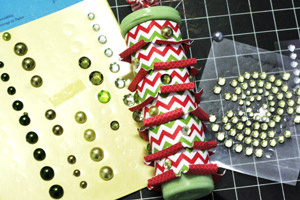
Once complete, add the adhesive rhinestones and pearls.
-
Step 9
Now, it’s ready to be filled and gifted!
-
Video!
Your Turn
You've seen the tutorial, now you try it! We've got a section of the gallery set aside for Christmas Tree Treat Holder. Try this technique, then upload your artwork to the gallery. Show us your creations!
***Please note - Internet Explorer/Edge is not a supported browser, and will not allow you to see the videos. Please use Chrome, Firefox or Safari to view our tutorial videos.

Questions and Comments
We'd love to get your feedback or questions. Leave your comment below.
love the idea of the Christmas tree. It is very hard to fine
the large M&M tubes that look like this here around here. I can
Find the small M&M tube. I have a ton of the Doodlebug North
Pole pattern paper.
Carole
Thanks so much for writing the tutorial for this darling project.
Carole,
Check Michaels, Hobby Lobby or JoAnn's Jewelery aisle. You could also use treat tubes if you can find them.
Page 1 of 1 pages