Chalkboard Technique
by Beate Johns
Use White craft ink and Chalks to highlight images on dark cardstock.
Supplies
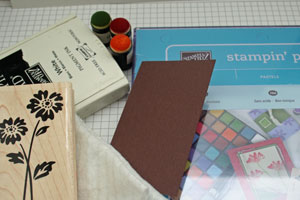
- White Craft ink
- Chalks
- Sponge Daubers, Q-tips™ or other applicator for chalks
- dark cardstock
- Swiffer™ towel or other paper towel
Step-by-Step
-
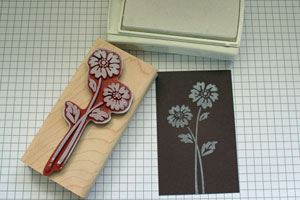
Step 1
Ink a solid image stamp with white pigment ink and stamp on dark cardstock.
-
Step 2
Twist a sponge dauber in the chalk color of choice and dab it over the stamped image.
I did not wait for the ink to dry.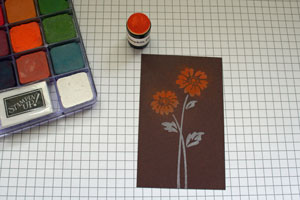
-
Step 3
Continue to add colors to the stamped image until all ink is covered in chalk.
-
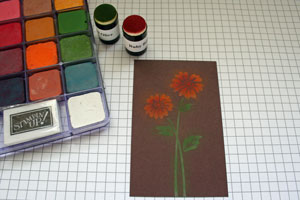
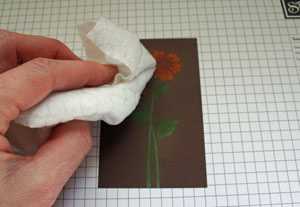
Step 4
Carefully wipe image with a Swiffer™ towel to remove excess chalk.
-
-
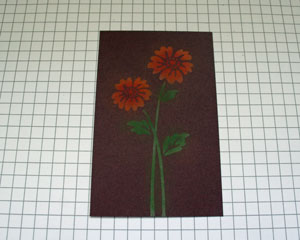
Step 5
Finished card.
The chalk seems to stick to the ink very well, so a sealant is optional.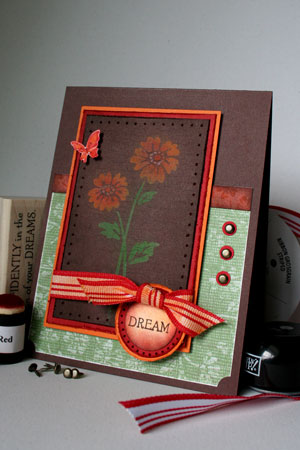
Variations
Basic Chalkboard look
Use black cardstock for your base for a true chalkboard look.
Pencils work too!
Stamp an image in white pigment ink and let dry. Then color over image with colored pencils.
Your Turn
You've seen the tutorial, now you try it! We've got a section of the gallery set aside for Chalkboard Technique. Try this technique, then upload your artwork to the gallery. Show us your creations!
***Please note - Internet Explorer/Edge is not a supported browser, and will not allow you to see the videos. Please use Chrome, Firefox or Safari to view our tutorial videos.
Questions and Comments
We'd love to get your feedback or questions. Leave your comment below.
Thanks
Thanks for another great Toot. Love your beautiful card!
Do you let the ink dry before applying the chalks?
I don't seal my chalks with this technique. They stay put pretty well. For other chalk techniques I use a matte acrylic sealer. I buy mine at Walmart.
Lacey and Sandy,
I did NOT let the ink dry. I am impatient. Just dab over your wet ink with the sponge dauber.
karen adams
Biggan
Page 1 of 4 pages 1 2 3 > Last »