CD Case
by Cindy Lyles
Transform a single sheet of cardstock into a custom CD case.
Supplies

- Glue dots
- Paper cutter & scoring blade
- Pencil
- One sheet of 8½" x 11" cardstock
- Scrap piece of cardstock
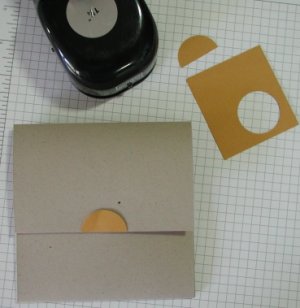
- 1¼" circle punch
- Half of a Velcro® dot
Step-by-Step
-
Step 1
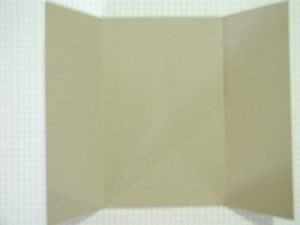
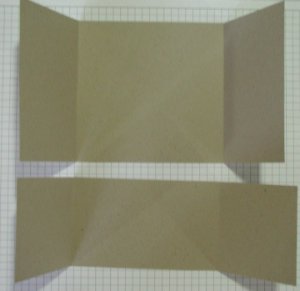
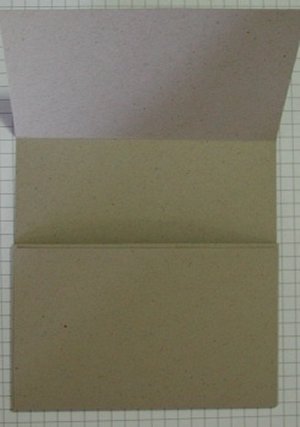
Trim your 8 1/2" x 11" cardstock to 7-7/8" x 11". Discard 5/8" x 11" section. Score along 11" side 3" in from each end.
-
Step 2
Cut cardstock along the 7-7/8" side at the 3" mark so you have two sections: 3" x 11" and 4-7/8" x 11".
-
Step 3
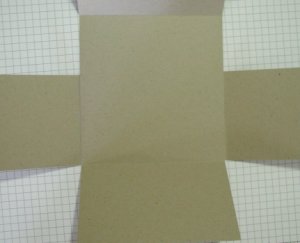
Turn 3" x 11" cardstock one quarter turn and adhere using glue dots.
-
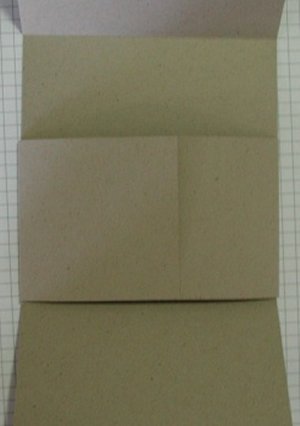
Fold in small flaps, adhering one over the other. Position glue dot toward bottom; step 7 will show why.
-
Step 4
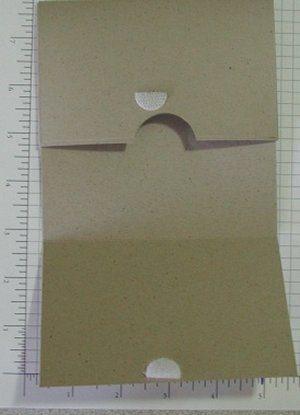
Fold up bottom flap, positioning one glue dot at each outer corner. Step 7 will show why. You have just created a pocket.
-
Step 5
Mark pocket opening at 2½" (center) with pencil. Center circle punch and punch a half circle in pocket using 1¼" circle punch.

-
Step 6
Add half of a Velcro™ dot for a closure.
-
Step 7
Add half of a circle punch for decoration on flap if desired.
-
Step 8
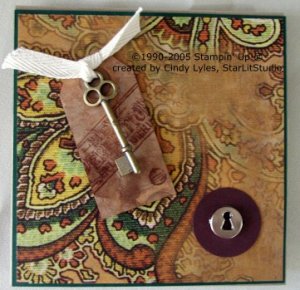
Decorate front.
Your Turn
You've seen the tutorial, now you try it! We've got a section of the gallery set aside for CD Case. Try this technique, then upload your artwork to the gallery. Show us your creations!
***Please note - Internet Explorer/Edge is not a supported browser, and will not allow you to see the videos. Please use Chrome, Firefox or Safari to view our tutorial videos.

Questions and Comments
We'd love to get your feedback or questions. Leave your comment below.
Thanks.
The 3"x11" piece is taped around the middle section of the bigger piece as shown in Step 3.
Yes, as shown in step 7, the folded down flap doesn't cover the entire pocket piece. Step 8 shows the other, solid side.
Thanks.
in sept. 2009 and I will be decorating the back side wth the letters of our high school and you will be able to see the smaller piece on the back. What am I doing wrong. Thanks . Anxiously awaiting your answer.
Page 1 of 1 pages