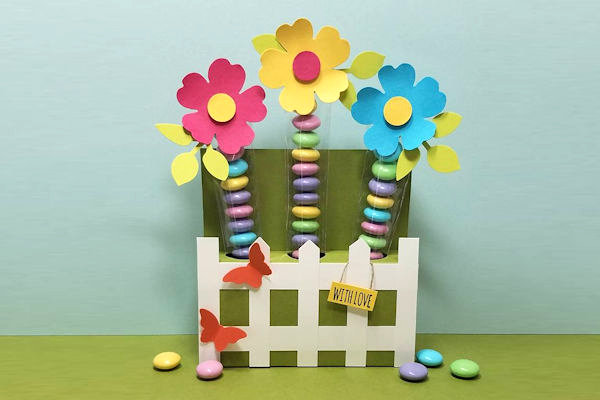
Candy Flower Garden
by Twila Davis
Welcome spring with a cute floral themed treat box.
Supplies
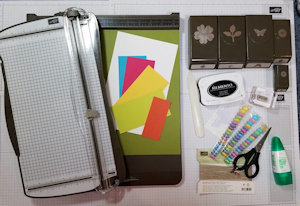
- Cardstock (Stampin' Up!® Old Olive, Whisper White, Scraps of Melon Mambo, Daffodil Delight, Tempting Turquoise, Lemon Lime Twist, Tangerine Tango used here)
- Paper trimmer
- Scoring tool
- Scissors
- Adhesive (Multipurpose Glue, Tear-and-Tape used here)
- Circle punch (3/4")
- Flower dies or punches (SU 1/2" Circle Punch, Pansy Punch, and Leaf Punch used here)
- 1" cello bags and candy filler
- Other supplies as needed to complete the project (Small Butterfly Punch, Black Memento Ink, You're So Sweet Stamp Set, Linen Thread, Scissors, Dimensionals)
Step-by-Step
-
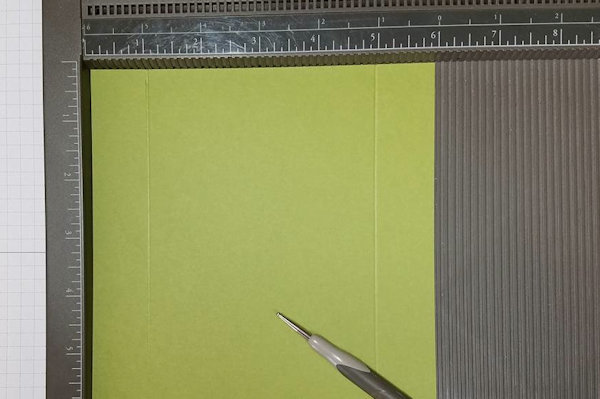
Step 1
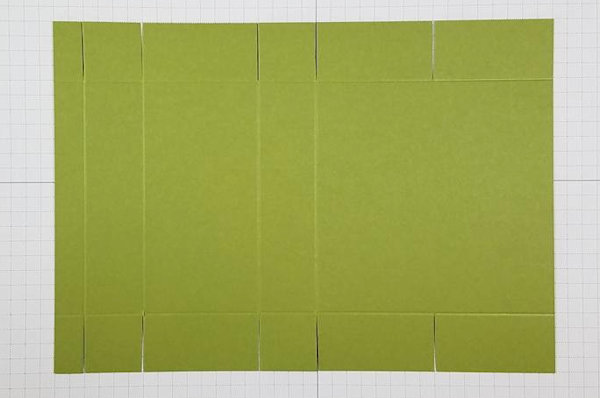
Cut green cardstock to 6" x 8 1/2" for the base. Score on the short side at 1" and 5".
-
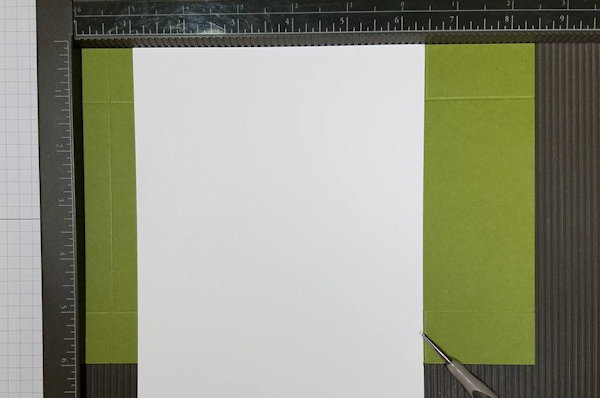
Step 2
Turn and score on the long side at 1/2", 1 1/2", 3 1/2", 4 1/2", and using a long scrap of paper or ruler as a guide, score only to the top line and bottom line at 6 1/2".
-
Step 3
Using a pair of scissors cut up to where the scorelines meet all around the piece of cardstock.
-
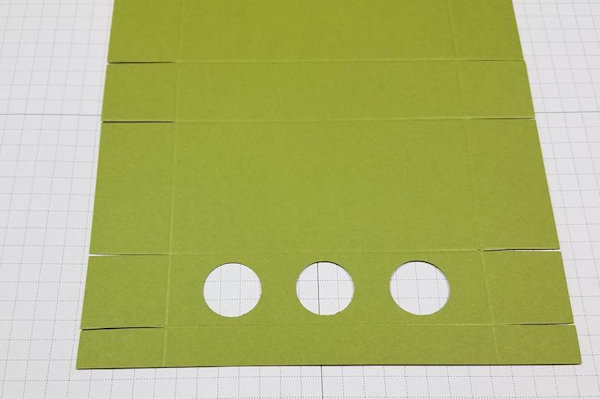
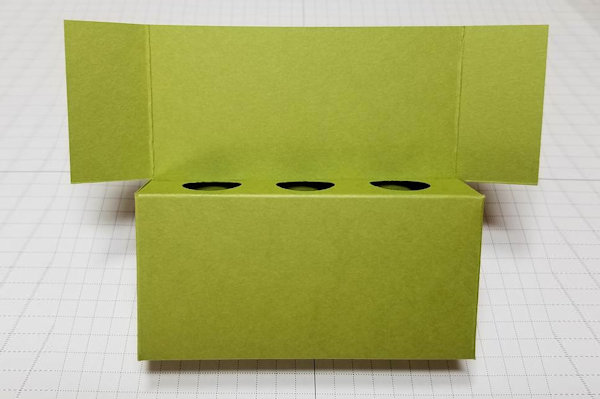
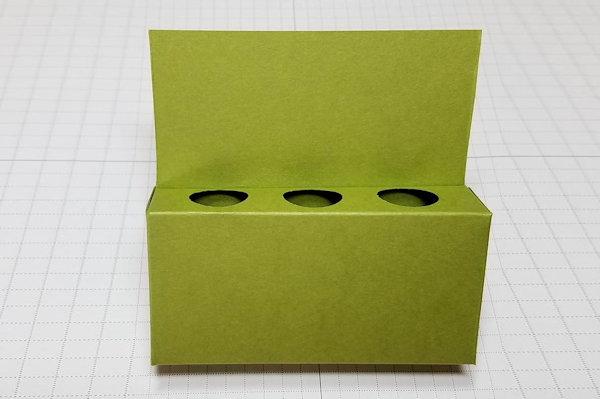
Step 4
Using a 3/4" circle punch, punch 3 holes in the first 1" section of cardstock.
-
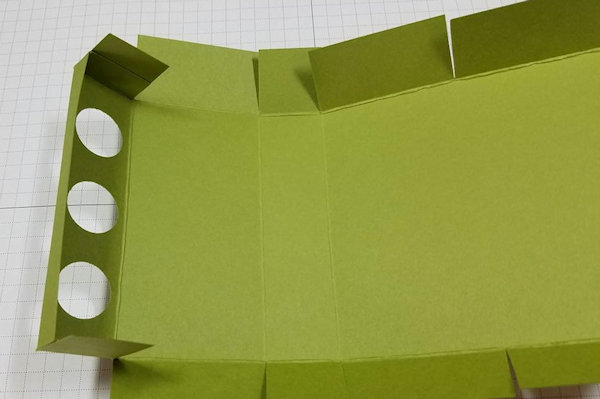
Step 5
Fold all scorelines and begin gluing the box together starting with the smallest tabs, gluing them under the first 1" tabs.
-
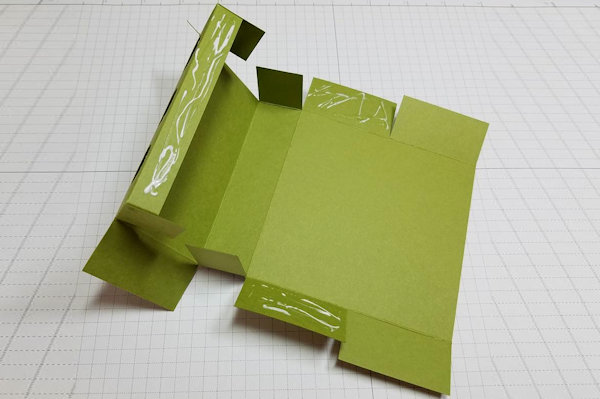
Step 6
Add glue to the 1/2" long tab and the bottom back side tabs. Fold and adhere.
-
Step 7
Add glue to the front tabs. Fold them back and adhere.
-
Step 8
You can either leave the two top flaps as is or cut them off at this time.
-
Step 9
To create a fence, cut two pieces of white cardstock at 1/2" x 4" and five at 3/8" x 2 1/2". Attach to the front of the box as shown. Add points to the middle three post by cutting them off at an angle from both sides.
-
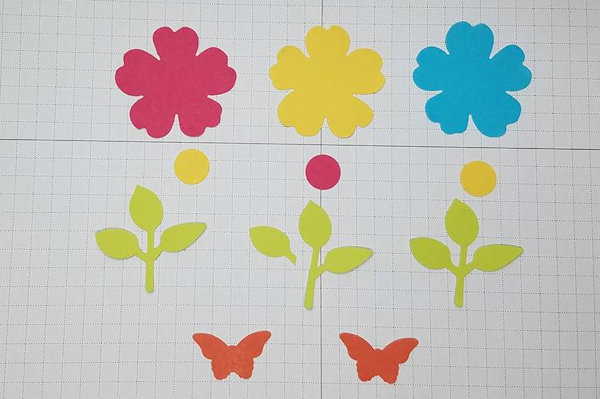
Step 10
Punch or die cut 3 flowers, 3 flower centers (1/2" circle punch used here), and 3 leaves.
-
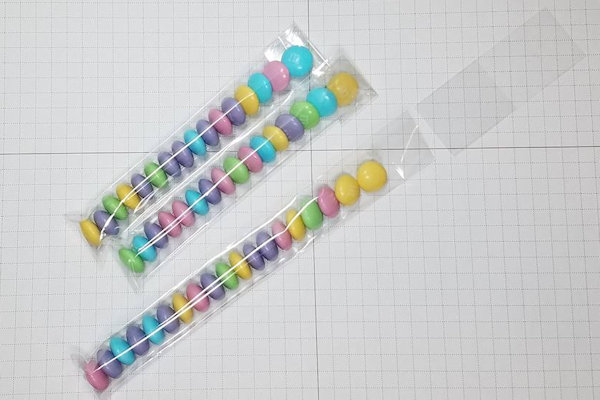
Step 11
Begin filling the 1" cello bags with candy of your choice until you have them as tall as you like. Cut off the excess, fold over the end, and fasten it down with double sided tape.
-
Step 12
Cut a 3/8" x 1" piece of the yellow cardstock. Stamp a sentiment on it, trimming as needed. Cut another backing piece a bit smaller and add double sided tape to it. Take a 1 1/2" piece of thread and attach to the piece, and then add the front with the saying.
-
Step 13
Add a dimensional to the back of each flower center and adhere to the middle of each flower. Using a bone folder shape the petals of the flowers. Add leaves to the backsides of the flowers and then adhere them at the top front of the cello bags.
-
Step 14
Slide the flower tubes into the 3/4" holes. Add other embellishments as desired to complete the project.


.jpg)
Video!
Your Turn
You've seen the tutorial, now you try it! We've got a section of the gallery set aside for Candy Flower Garden. Try this technique, then upload your artwork to the gallery. Show us your creations!
***Please note - Internet Explorer/Edge is not a supported browser, and will not allow you to see the videos. Please use Chrome, Firefox or Safari to view our tutorial videos.

Questions and Comments
We'd love to get your feedback or questions. Leave your comment below.
retired teacher luncheon group.
Thank you!!-Heather LaBudde
Page 1 of 1 pages