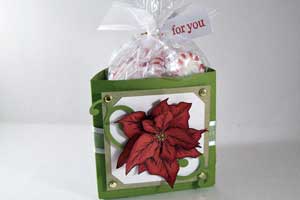
Cammie’s Triangle Treat Box
by Carolyn King
Create this fun treat box.
Supplies
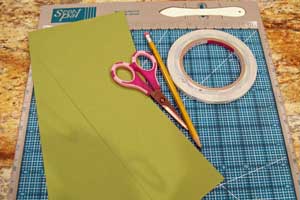
- One 3" by 11” piece of cardstock
- Scrap piece of cardstock
- Scor-Pal™ or similar scoring tool
- Scor-Tape™ or other double sided sticky tape
- Scissors
- Pencil
Step-by-Step
-
Step 1
Start with a 3" by 11” piece of cardstock.
Score at 3”, 6”, 9”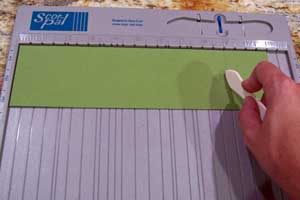
-
Step 2
Fold cardstock so that it forms a triangle shape. Do not adhere.
Trace around the perimeter of the shape with a pencil on the same colored piece of cardstock.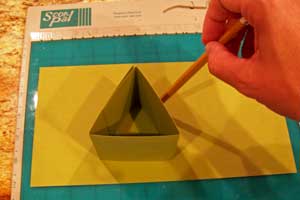
-
Step 3
Cut out triangle shape leaving about ¼ inch border around the pencil lines.
The pencil lines do not have to look good!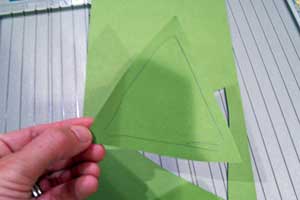
-
Step 4
Line the top and bottom of each line up on your Scor-Pal™ and score the line.
The scored line will not always follow the pencil line exactly, a close approximate is fine.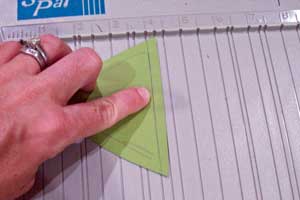
-
Step 5
Cut out the triangle areas where the score lines crossed (as shown in the picture).
Do this for every corner.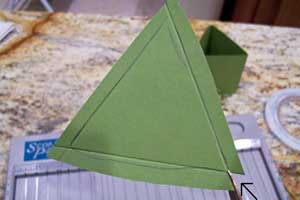
-
Step 6
Fold up the sides of the triangle bottom.
Apply Scor-Tape™ along each outer edge of the triangle.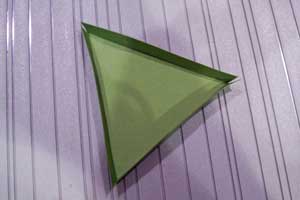
-
Step 7
One by one, take off the strip of sticky tape backing and adhere the bottom to the each side.
Follow the numbers to adhere them in the easiest order.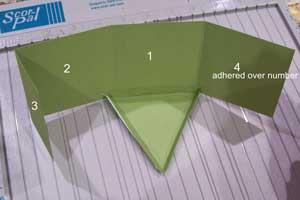
-
Step 8
On the final edge adhere the small flap to the bottom of the triangle bottom and then adhere the final large side over the smaller side.
This will make sense as you do it.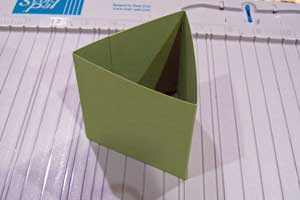
-
Step 9
Decorate as you wish. I find it easiest to create layers and then adhere them to the triangle box with foam mounting tape.
Video!
Your Turn
You've seen the tutorial, now you try it! We've got a section of the gallery set aside for Cammie’s Triangle Treat Box. Try this technique, then upload your artwork to the gallery. Show us your creations!
***Please note - Internet Explorer/Edge is not a supported browser, and will not allow you to see the videos. Please use Chrome, Firefox or Safari to view our tutorial videos.

 *
*
Questions and Comments
We'd love to get your feedback or questions. Leave your comment below.
it's beautiful, and very easy to follow!
hugs!!
What a fun, simple, cute treat box! Love your pointsetia too! Thanks for sharing!! Chris
Thanks
Reina
I found if I cut a 3 inch square of paper, it worked perfect. Measure 1-1/2" up on the right edge and put a little dot. Measure 1/2" in from the left edge and score it top to bottom at the 1/2" mark. To make your next score mark, turn your paper at an angle, lining up the top of the score mark on the left side with the dot on the right side. Score that line. To make the last score mark, turn the paper at an angle the other way, lining up the bottom of the score line on the left with the dot on the right side. Score that line and you will have a perfect triangle.
Fold up on the score lines. The 1/2" edge on the left is fine and doesn't need trimmed. Guesstimate about 1/2" outside the other 2 score lines and cut parallel with the score lines to trim the excess off. Attach your glue to the outside edges of the triangle and proceed as directed above.
Wanted you to know I posted a link to this tutorial.video today on my blog.
Nancy Ward
PaperFriendly
http://www.naancywardcrafts.com
Nancy Ward
PaperFriendly
http://www,nancywardcrafts.com
Page 1 of 1 pages