Business Card Easel
by Sue Allen
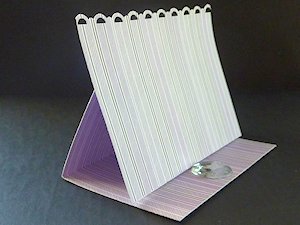
Turn an easel card into a business card holder.
Supplies
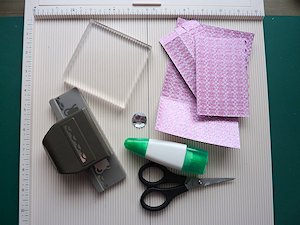
- Cardstock
- Scoring board
- Scissors
- Stopper (gem or button)
- Glue
- 1/2" acrylic block (optional)
- Border punch or die
Step-by-Step
-
Step 1
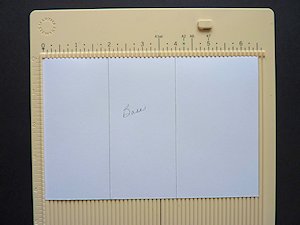
Cut a cardstock base for the holder measuring 4 1/4" x 6 1/2". Score at 2" and 4".
-
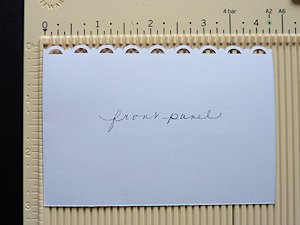
Cut the front panel of the holder to measure 4 1/4" x 3". Add extra height to allow for a punched or die cut decorative border, if desired.
-
Step 2
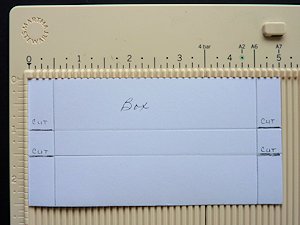
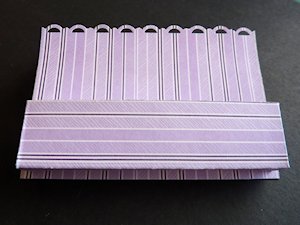
Cut cardstock to form the box, measuring 2 1/2" x 5". Score at 1/2" from each end on the long side, and 1" and 1 1/2" on the short side.
-
Step 3
Fold the base on the scored lines. Adhere the front panel and stopper (gem or button) as shown.
-
Step 4
To form the box, fold all score lines and cut tabs where indicated. Glue the ends, sandwiching the small middle tab between the top and bottom tabs. Repeat for opposite side.
HINT:
For uniform ends use an acrylic block to stabilize edges and keep them even while gluing.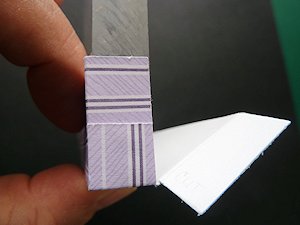
-
Step 5
Glue box to easel about 1/4" from the edge to leave enough room for the gem stopper.
-
Step 6
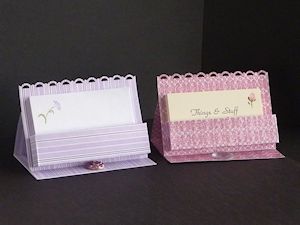
Decorate as desired and add business cards or small message papers to finish the project.
Video!
Your Turn
You've seen the tutorial, now you try it! We've got a section of the gallery set aside for Business Card Easel. Try this technique, then upload your artwork to the gallery. Show us your creations!
***Please note - Internet Explorer/Edge is not a supported browser, and will not allow you to see the videos. Please use Chrome, Firefox or Safari to view our tutorial videos.

Questions and Comments
We'd love to get your feedback or questions. Leave your comment below.
yet in the written directions, the base is listed at 4.25" x 6.5" and 4.5" x 3".
Which one is correct?
THAT is the part that confuses me. So are they supposed to be different widths, or are they supposed to both be 4.5" wide or both 4.25" wide?
I think it's a cute item, and plan to make a couple. Just the measurements issue is CONFUSING me.
Page 1 of 1 pages