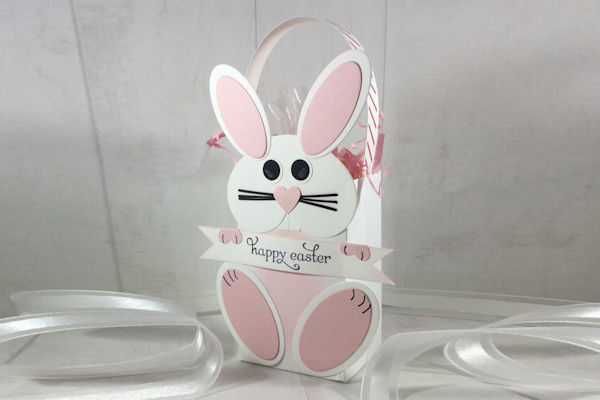
Bunny Bag-a-lope
by Shannon Cole
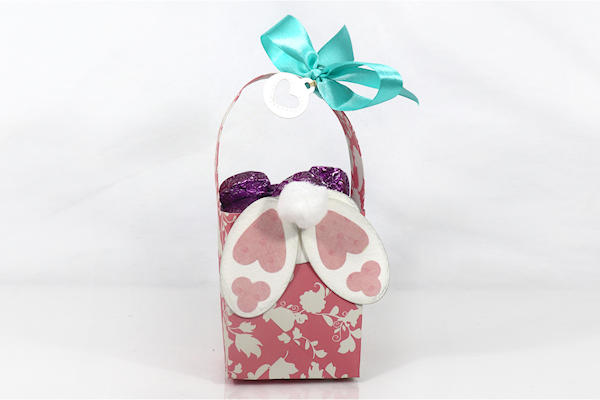
Use an envelope and die cuts to create a sweet Easter treat holder.
Supplies
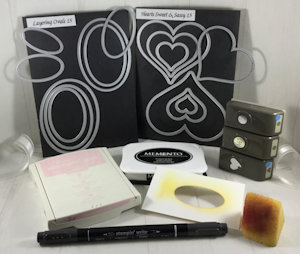
- Plain A2 size white envelope (Stampin’ Up!® Whisper White envelope used here)
- Cardstock (white, pink and black used here)
- Paper trimmer
- Scoring tool
- Adhesive (tape runner, liquid glue, tear & tape, and dimensionals used here)
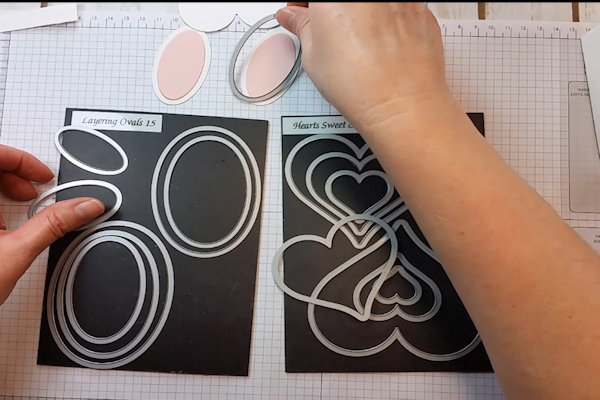
- Heart and oval nesting dies (SU! Layering Ovals Framelits & Sweet & Sassy Hearts used here)
- 3/8” and 1/2” circle punches
- Small heart punch
- Other supplies as needed to complete the project (cotton ball, Memento Black and Pink Pirouette inks, white chalk pen, sentiment stamp, fine tip black pen, sponge, pink washi tape for handle)
Step-by-Step
-
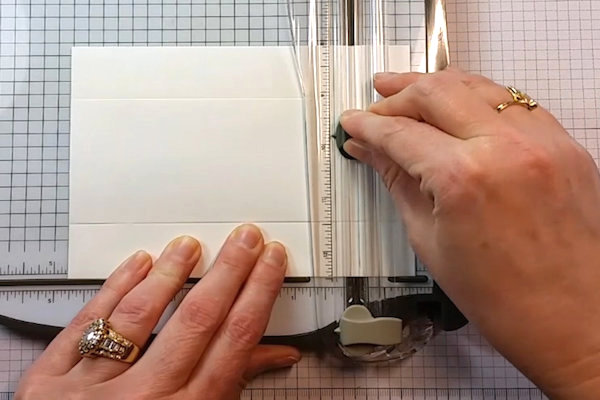
Step 1
To create the bag, score an A2 envelope 1” in on 3 sides (the top, the bottom, and the right side).
-
Step 2
Trim 1” off the left side.
-
Use strong adhesive to tape the envelope flap closed.
-
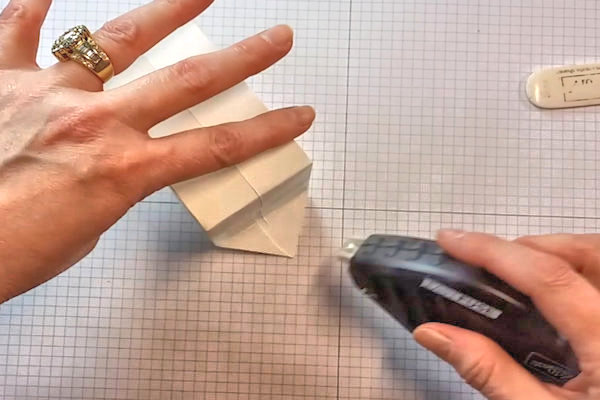
Step 3
Sponge or stamp onto the bag (bunny body) as desired.
For the sample, an oval cutout was used as a stencil to sponge a pink tummy. -
Step 4
Shape the envelope into a bag.
-
Adhere the 2 triangle flaps down on the bottom.
-
Step 5
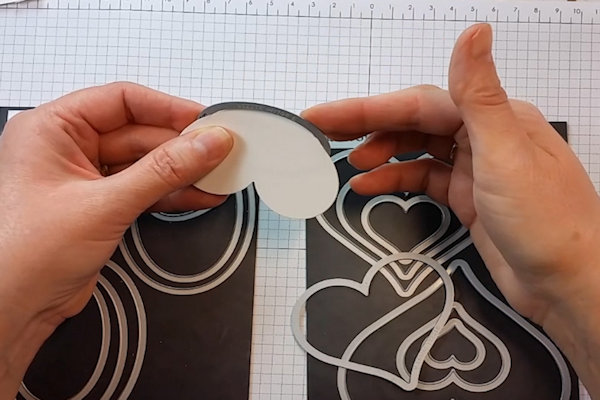
Die cut a heart for the bunny’s face ( 2 3/4” across) then use the medium oval die to cut the tip off the heart.
-
Step 6
To create the ears and feet, use 3 sizes of ovals. Approximate measurements are fine.
Cut 2 of the smallest size from pink cardstock for the inner ears (1 3/4” X 3.4”).
Cut 2 of the medium size from white cardstock for the outer ears (2” x 1”).
Cut 2 more of the medium size from pink cardstock for the inner bottom feet (2” x 1”).
Cut 2 of the large ovals from white cardstock for the outer bottom feet (2 1/4” x 1 1/4”). -
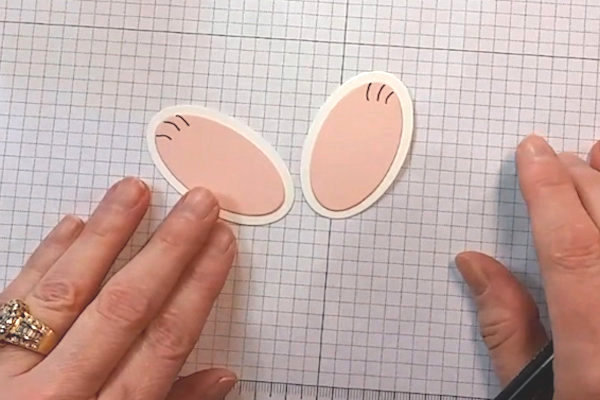
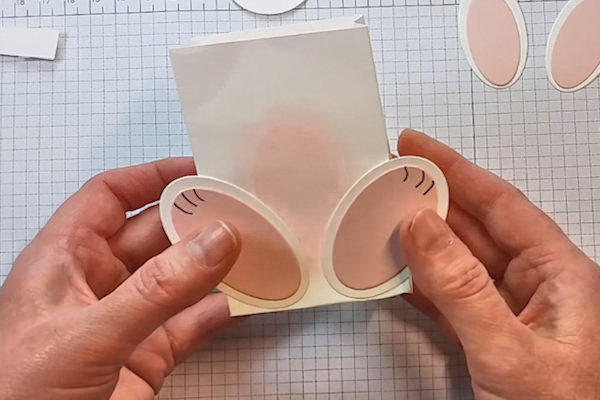
Step 7
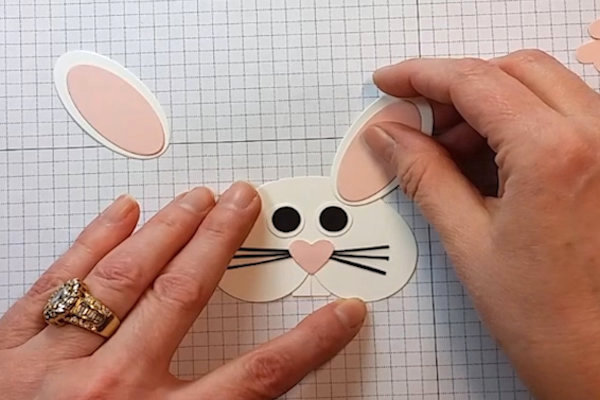
Glue the pink layers onto the white. The ears are offset, the feet are centered. Add details with a fine black pen as desired.
-
Glue the feet toward the bottom of the bag.
-
Step 8
Use a 1/2” x 3/4” piece of white cardstock to create the teeth. Cut a small sliver from the bottom center to create a small gap. Attach the piece to the back of the heart.
-
Step 9
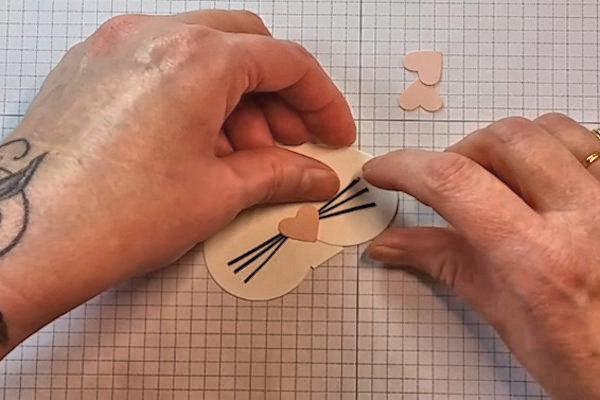
Punch a small pink heart for the nose.
Use two 1” long strips of black cardstock cut very finely into whiskers, and attach them behind the pink nose. Attach the nose and whiskers to the face. -
Step 10
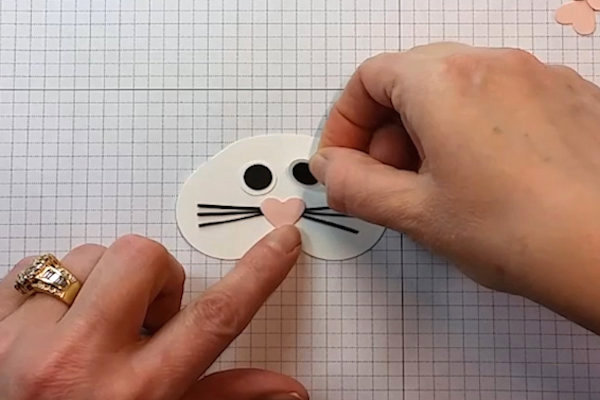
Punch two white 1/2” circles and two black 3/8” circles for the eyes. Use a chalk marker or gel pen to add white highlights to the eyes on the black cardstock.
-
Glue the nose on first, then the eyes, and finally the ears for correct spacing.
-
Step 11
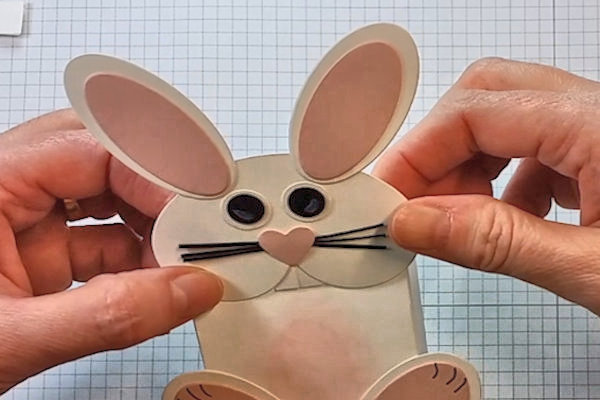
Glue the face onto the bag.
-
Step 12
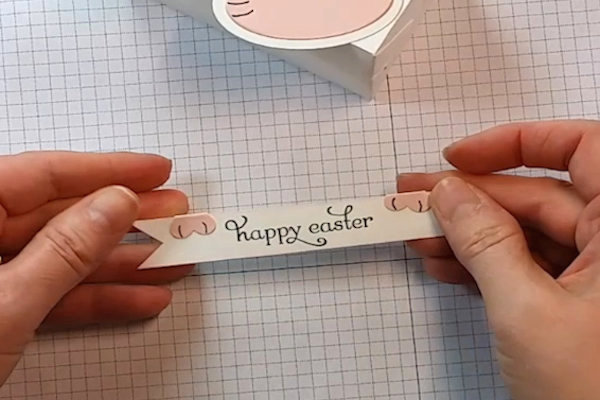
Stamp a greeting onto a 4 1/4” x 5/8” strip of white cardstock.
Punch 2 more small pink hearts for the paws. Fold the heart paws and glue them to the banner. -
Curve the banner slightly. Use a dimensional and adhesive to attach the piece just above the feet.
-
Step 13
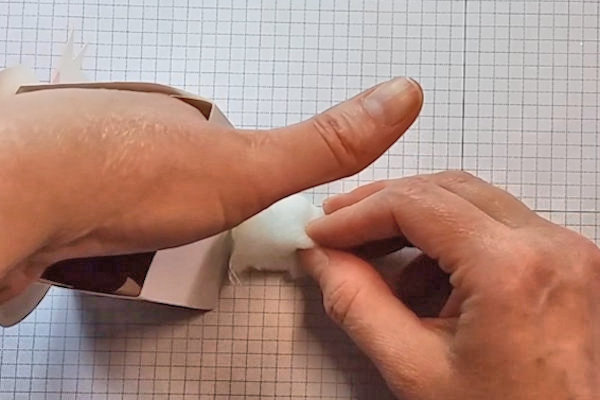
Glue a cotton ball on the back for a tail.
-
Step 14
Create a handle from a strip of paper measuring 8 1/2" x 3/4". Decorate as desired (washi tape was used in the sample). Attach the handle to the inside of the bag at the sides.
-
Step 15
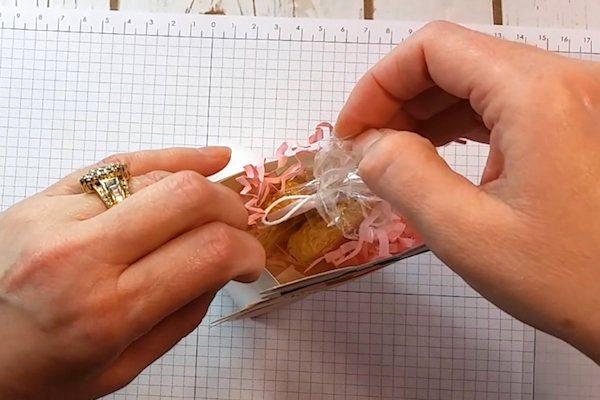
Tuck a treat and some filler inside.
-
Step 16
Complete the project.


Video!
Variations
-
Instead of a front view, use die cut shapes to make it look like a bunny is climbing into the bag! Pop up the pieces with foam tape and add a 1" pompom for the tail.
Dies used:
Nellie Snellen oval die - 1 1/2" x 2 1/2" (cut 3)
MFT Jumbo Christmas Stocking holly berry die (small circles could also be used for toes)
SSS Large Hearts die set (about 1 1/4" tall - ovals could also be used)
Your Turn
You've seen the tutorial, now you try it! We've got a section of the gallery set aside for Bunny Bag-a-lope. Try this technique, then upload your artwork to the gallery. Show us your creations!
***Please note - Internet Explorer/Edge is not a supported browser, and will not allow you to see the videos. Please use Chrome, Firefox or Safari to view our tutorial videos.

Questions and Comments
We'd love to get your feedback or questions. Leave your comment below.
Page 1 of 1 pages