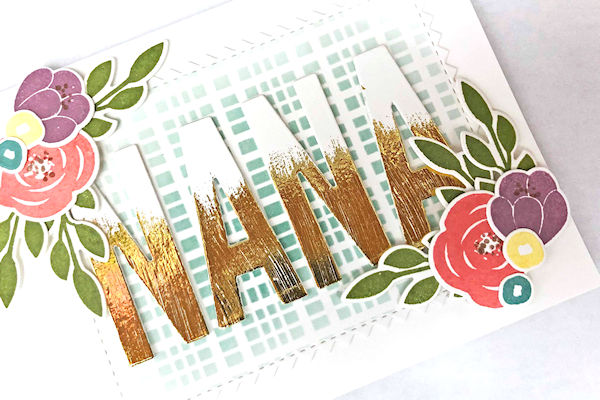
Brush Stroke Foiling
by Lindsay Adreon
Use a tacky adhesive or medium to add foil to die cuts for a modern look.
Supplies
- Die cuts (Kat Scrappiness Uppercase Condensed Alphabet Dies and Heffy Doodle Thanks Die used here)
- The Crafter’s Workshop Hot Foil Gel (for laminator technique) or
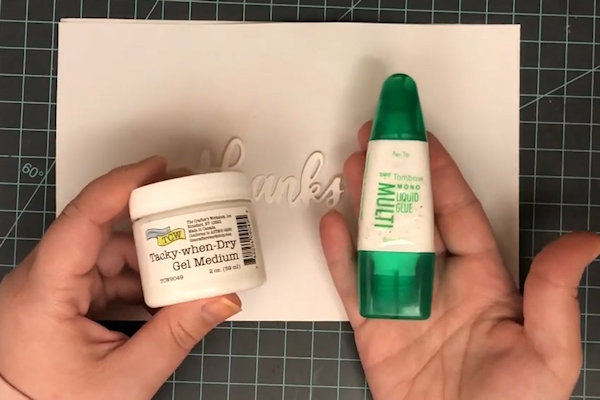
- Adhesive or medium that dries tacky (Tombow Mono Multi Glue used here, The Crafter’s Workshop Tacky-When-Dry Gel Medium is another option)
- Foam Brush or paintbrush
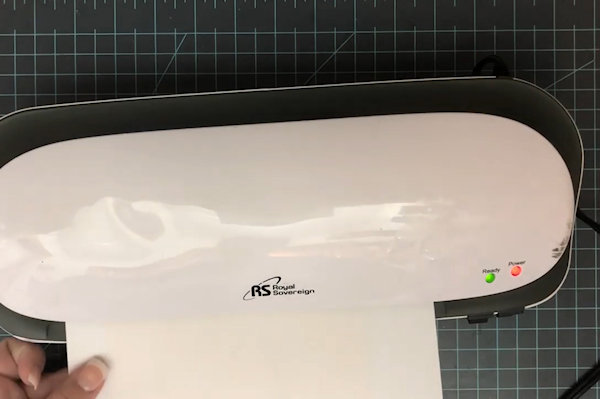
- Laminator (9" Royal Sovereign Desktop Laminating Machine used here)
- Toner reactive foil (Therm O Web - iCraft - Deco Foil - 6 x 12 Transfer Sheet – Gold and Copper used here) – heat reactive foil will work for the second technique
- Other supplies as needed to complete the project (used here: Altenew Floral Elements Stamp Set, The Crafter's Workshop - 6 x 6 Doodling Templates - Plaid Fringe, Makeup Brush, Zig Zag Rectangle Dies, Catherine Pooler inks)
Step-by-Step
-
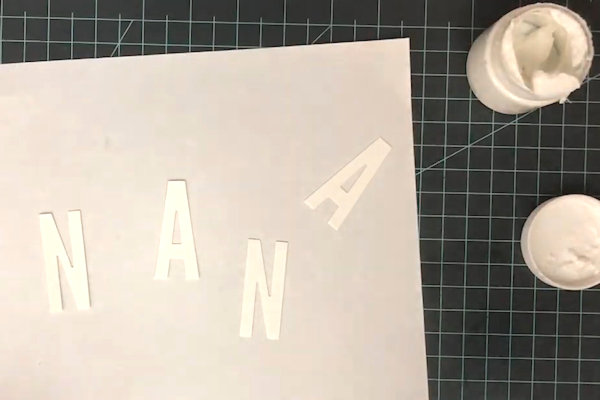
Step 1
To foil with a laminator:
Prepare die cuts using dies and cardstock of your choice. -
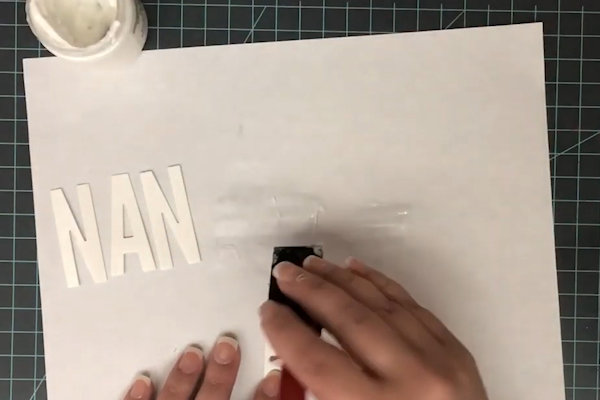
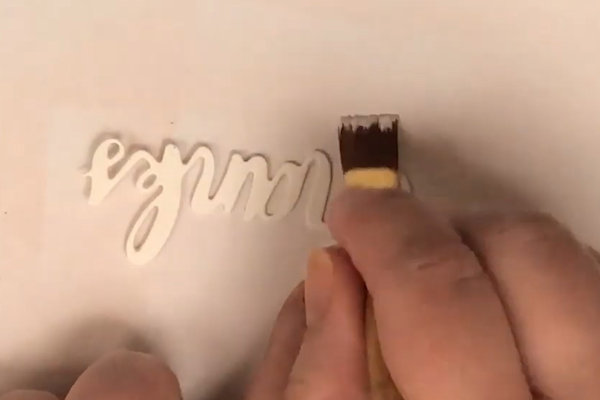
Step 2
Use a foam brush (preferred) or paint brush, brush hot foil gel from the bottom of the die cut toward the center with a lifting motion.
TIPS:
Pick up the medium just on the tip of the brush. Start brushing off the die cut on a scrap piece of paper.
Allow the gel to dry before proceeding. (The gel goes on white and will dry clear.) -
Step 3
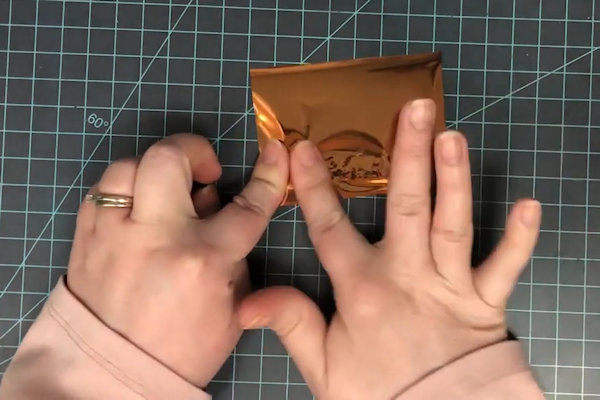
Heat up the laminator according to manufacturer’s instructions.
Prepare the die cuts for foiling. In a typing paper folder, lay down the die cuts with the gel facing up. Cover them with the foil (shiny side up). Close the folder. -
Step 4
Run the folder through the laminator according to manufacturer’s instructions.
-
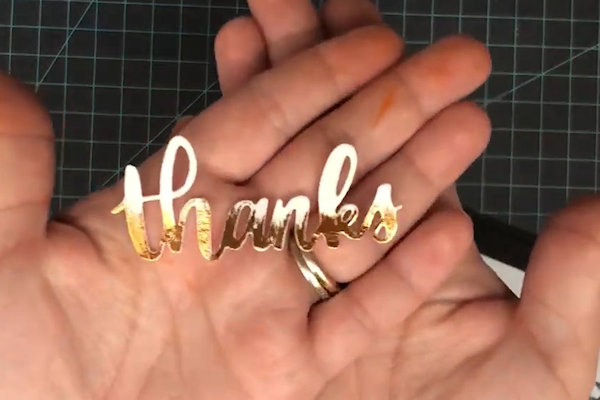
Allow the paper to cool, and remove the foil to reveal your results. Remove the die cuts from the paper gently as some sticking may occur.
-
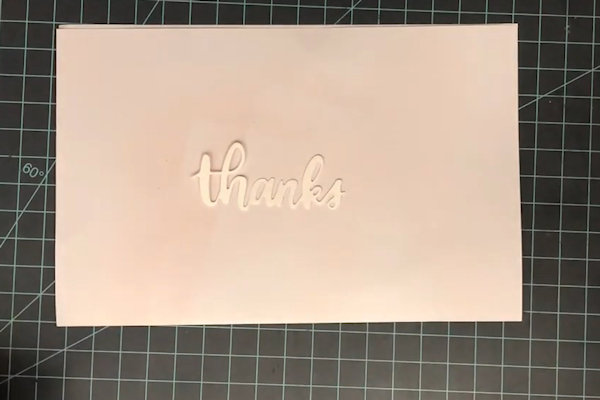
Step 5
Use the foiled die cuts to complete a card or other project.
-
Step 6
To foil without a laminator:
Prepare die cuts using dies and cardstock of your choice. -
Step 7
Choose a glue that remains tacky when dry.
-
Apply the glue as before, and allow it to dry.
-
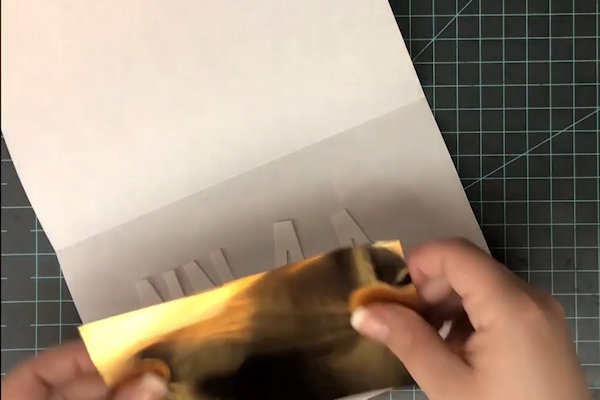
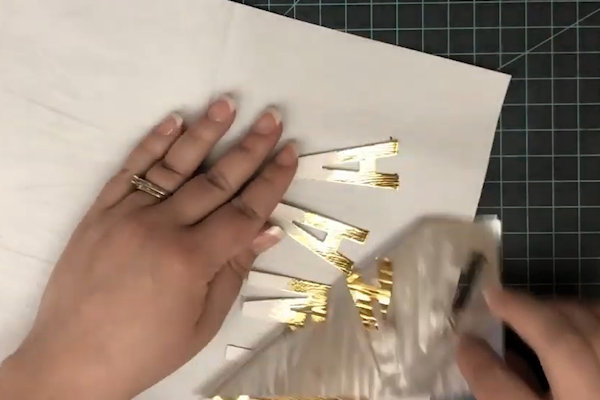
Step 8
Lay foil over the sticky die cut and press it down with your fingers or a tool (Deco Foil is used here, but heat transfer foil will also work).
NOTE:
A plastic burnishing tool will dull the foil slightly. -
Step 9
Remove the foil to reveal your results.
-
Step 10
Use the foiled die cut to complete a card or other project.

Video!
Your Turn
You've seen the tutorial, now you try it! We've got a section of the gallery set aside for Brush Stroke Foiling. Try this technique, then upload your artwork to the gallery. Show us your creations!
***Please note - Internet Explorer/Edge is not a supported browser, and will not allow you to see the videos. Please use Chrome, Firefox or Safari to view our tutorial videos.

Questions and Comments
We'd love to get your feedback or questions. Leave your comment below.
Page 1 of 1 pages