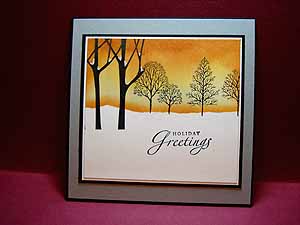
Brayered Sky
by Michelle Zindorf
Create stunning backgrounds with your brayer.
Supplies
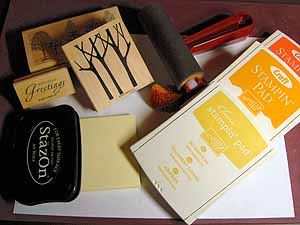
- Whisper White Cardstock
- Post-It™ Notes
- Rubber Brayer
- Sponge
- Several Coordinating Dye Inks (here So Saffron, More Mustard and Really Rust)
- Black Ink
- Stamps
- White Gel Pen
- Additional Card Stock for layering (here Whisper White, Basic Black & Going Gray)
Step-by-Step
-
Step 1
Tear Post-It™ Notes and adhere to white cardstock to mask the snow area.

-
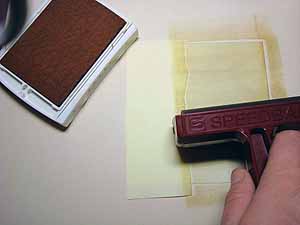
Step 2
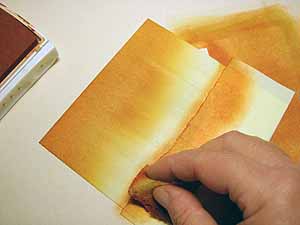
Ink brayer with the lightest color of dye ink by rolling it across the ink pad. Using a back and forth motion, roll inked brayer across the sky area of the masked cardstock until all of the ink is off the roller. Roll some more to blend it further.
-
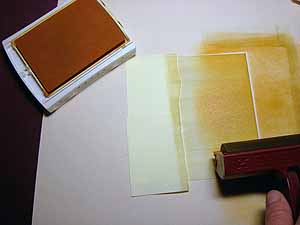
Step 3
Repeat previous step using the second lightest color of dye ink (here More Mustard) and covering only part of the previously inked (So Saffron) area.
-
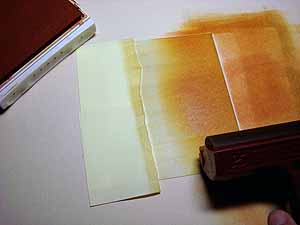
Step 4
Repeat previous step with the darkest color dye ink (here Really Rust) and covering only part of the previously inked (More Mustard) area.
-
Step 5
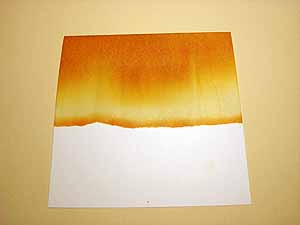
Sponge along the Post-It™ Note horizon line with the darkest colored dye ink (Really Rust).
-
Step 6
Remove Post-It™ Notes.
-
Step 7
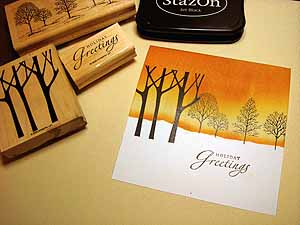
Stamp images with Black ink.
-
Step 8
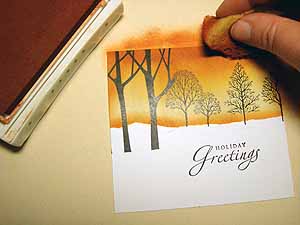
Crop image if needed, then sponge the darkest color ink along the top and sides of sky area.
-
Step 10
Finish card.
Variations
-
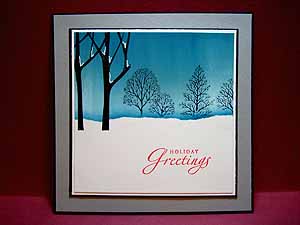
Try different color combinations:
Colors used for sky, Pretty In Pink, Going Gray & Not Quite Navy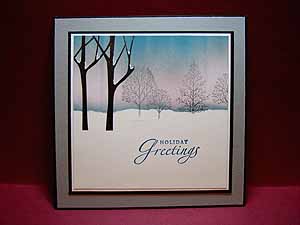
-
Colors used for sky, Soft Sky, Blue Bayou & Not Quite Navy
Your Turn
You've seen the tutorial, now you try it! We've got a section of the gallery set aside for Brayered Sky. Try this technique, then upload your artwork to the gallery. Show us your creations!
***Please note - Internet Explorer/Edge is not a supported browser, and will not allow you to see the videos. Please use Chrome, Firefox or Safari to view our tutorial videos.

Questions and Comments
We'd love to get your feedback or questions. Leave your comment below.
Your tutorial and your cards are amazing! Thanks so much! I love your work!
I have always wonder how you made those beautiful cards. Thanks for sharing your amazing talent with us!
Hugs~
Christyne
Chris
Hugs,
Betsy
Page 1 of 7 pages 1 2 3 > Last »