Bench Fold Card
by Tanya de Roy
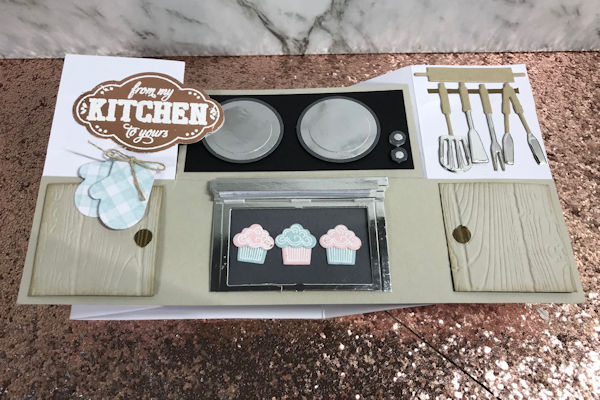
Make a standing card with a central counter top, then transform it into a workbench, kitchen counter, dresser, desk, or table!

Supplies
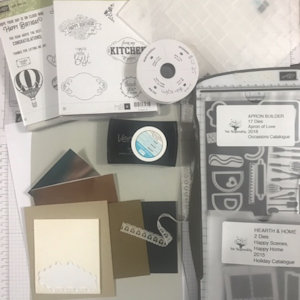
- Cardstock: Card base cut to 4 1/4” x 11 3/4”; coordinating cardstock cut to 2” x 8”, 3 7/8” x 3 7/8”, and 4 7/8” x 3/4” (Stampin’ Up!® Sahara Sand used here for counter top and front)
- Trimmer
- Scoring tool
- Die cutting machine
- Strong adhesive
- Brick or wood panel embossing folder
- Themed stamps or dies of your choice (used here: Apron Builder and Hearth and Home Thinlits)
- Other supplies as needed to complete the project (Circle punches 1 3/8”, 1 ¼”, 1”, Stamps (Label Me Pretty, Diagonal Stripe, and Lift Me Up sets used here), Pretty Label Punch, Lift Me Up die set, Powder Pink ink, Dimensionals, Vanilla lace trim, linen thread, cardstock scraps (3” x 3” Soft Suede, 1 5/8” x 3 5/8” black, 3” x 3” grey, 5” x 5” silver foil, 2 1/2" x 2” copper foil), window sheet 1 3/8” x 2 1/2”)
Step-by-Step
-
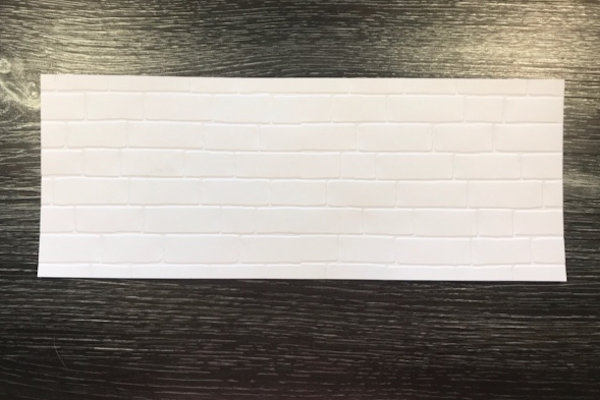
Step 1
Emboss a 4 1/4" x 11 3/4" card base with an embossing folder that matches your card theme (brick folder used here).
-
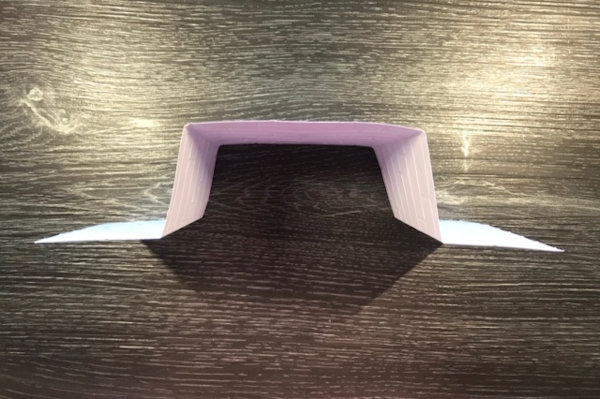
Step 2
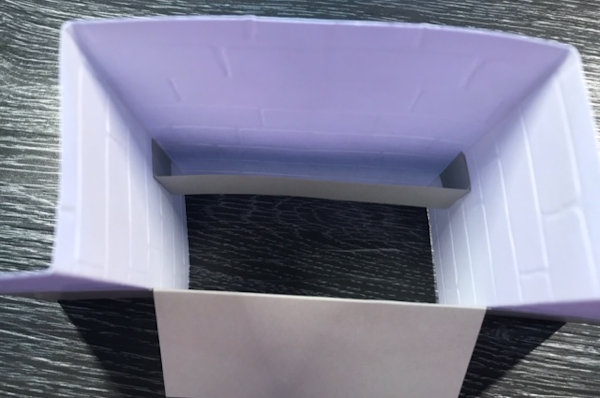
Score the panel on the long side at 2”, then flip the panel to the back side and score at 3 7/8”. Repeat this scoring pattern for the right side of the card base. Fold along score lines to create a U shape as shown.
-
Step 3
Score the 3 7/8” x 3 7/8” piece of cardstock at 2”. Fold and burnish on the score line.
-
Step 4
Adhere the long 2” x 8” strip to the bottom left of the card base by putting adhesive on bottom left and on the 2” side of the piece scored in step 3 (this is the “bench”).
-
Adhere the front piece to the right side of the card base.
-
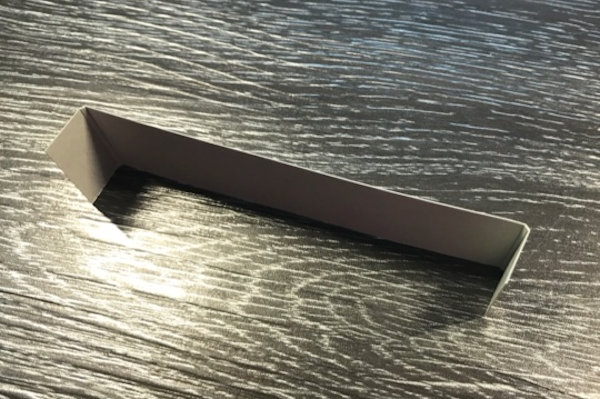
Step 5
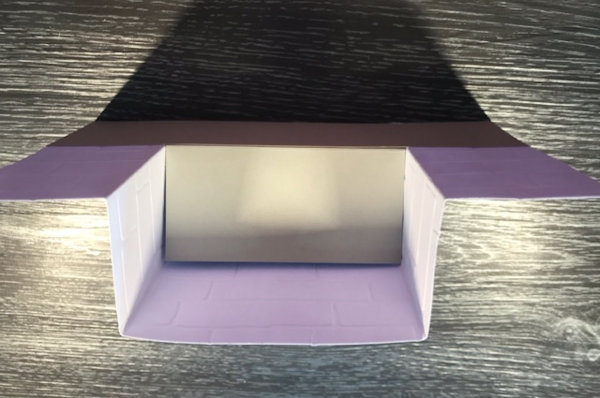
Score the 4 7/8” x 3/4” piece at 1/2” from each end.
-
Step 6
Adhere the ends of the scored piece into the rear of the card, level with the top of the front panel.
-
This strip will support the bench when the card is open.
-
Step 7
Decorate the card as desired.
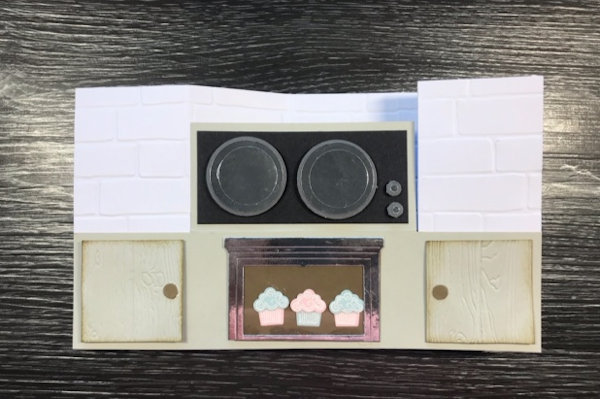
For a kitchen themed card, adhere the black cardstock piece to the top of the bench to create a stovetop. Punch out 1 3/8” circles from leftover grey cardstock, then punch and layer 1 1/4” and 1” silver foil circles for the burners. -
Step 8
Create knobs for the oven and stovetop using 1/4" and 1/8” punches.
-
Step 9
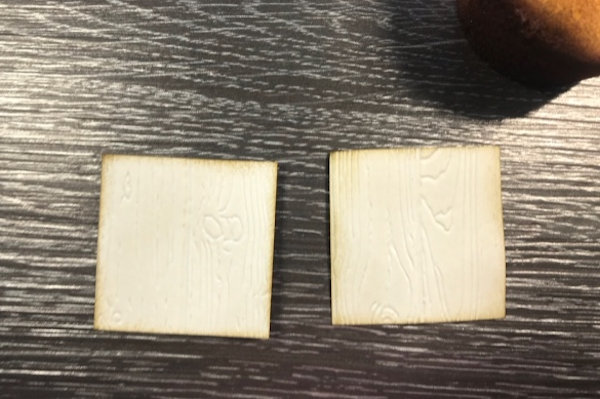
Emboss tan cardstock with a wood grain embossing folder. Trim two pieces to 1 3/4” x 1 3/4” to create cabinet doors. Sponge around edges if desired. Adhere the doors to the left and right of the oven using dimensionals.
-
Step 10
To make an oven, die cut a window shape out of silver foil cardstock. Trim the window below the middle rail to create the oven shape. Place the bottom of the window onto the top to create the oven handle. Adhere acetate in the opening. On a grey cardstock backing (1 3/8” x 1/2), adhere some stamped or die cut cupcakes. Adhere the oven to the center of the card base.
-
Step 11
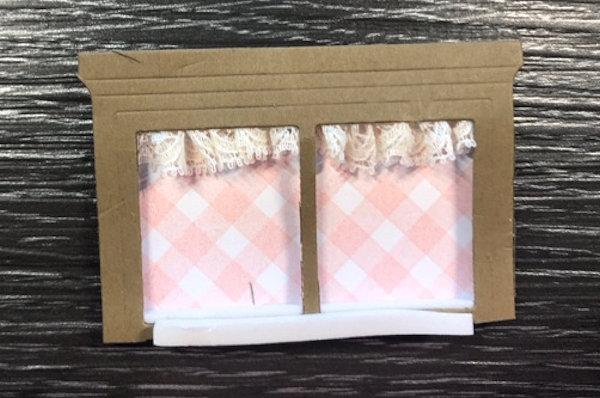
Trim a window die cut for the upper window. Decorate with trim and stamped curtains.
-
Step 12
Embellish with other die cuts as desired.
-
Step 13
Complete the card.
-
This finished card is 4-1/4” x 8, and will fold flat for mailing.


Video!
Your Turn
You've seen the tutorial, now you try it! We've got a section of the gallery set aside for Bench Fold Card. Try this technique, then upload your artwork to the gallery. Show us your creations!
***Please note - Internet Explorer/Edge is not a supported browser, and will not allow you to see the videos. Please use Chrome, Firefox or Safari to view our tutorial videos.

Questions and Comments
We'd love to get your feedback or questions. Leave your comment below.
Does it fold flat to go in an envelope?
Modified dimensions for starting with 8 1/2 x 11 paper:
Card base: 4 1/4 x 11
Coordinating Color for Wainscoting: 2 x 7 1/4
Counter Top: 3 1/4 x 3 7/8
Brace: 4 1/4 x 3/4 (doesn't show, but is mounted to the base)
Finished and closed the card measures: 4 1/4 x 5 1/4 (so it's 1/4 inch shorter than a normal A2.)
Page 1 of 2 pages 1 2 >