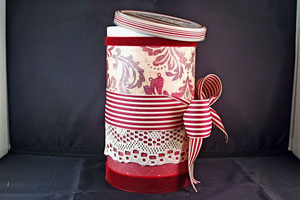
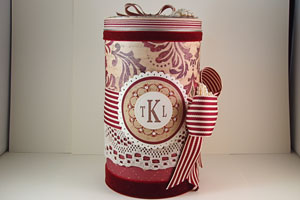
Altered Tin
by Sharon Johnson
Recycle a tin into a gorgeous gift package.
Supplies
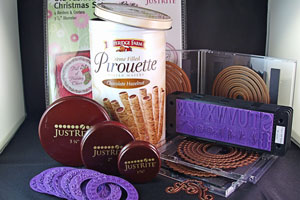
- Tin with Lid
- Stamps, JustRite stamps used here
- Patterned Paper
- Cardstock
- Ink
- Red Liner Tape, or other strong adhesive
- Aleene’s Fast Grab Tacky Glue
- Dimensional Foam Adhesive
- Ribbon and Other Accessories
Step-by-Step
-
Step 1
Measure bottom of tin tin and cut patterned paper to fit. If the tin's circumference is bigger then 12", add a strip of paper underneath the gap as shown.
Wrap and adhere patterned paper first to the can top, then the can bottom, making sure to not cover the metal ridge where the top and bottom meet.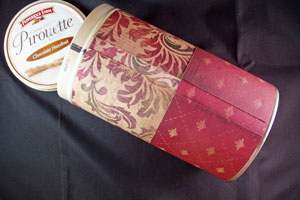
-
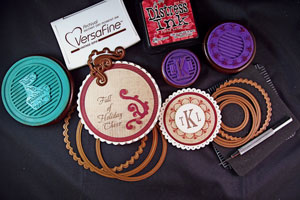
Step 2
Stamp the images for the lid and tin and cut them to the size you need.
-
Step 3
Use red liner tape to adhere ribbons.
Tip: Place lid securely on container before applying tape and ribbon just BENEATH the can lid, allowing the lid to slide on and off the can without interference.
When adhering the bottom ribbon, cover the metal rim, going right to the bottom of the can.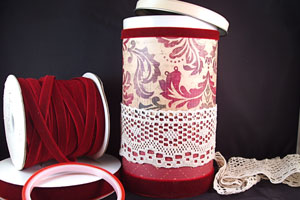
-
Step 4
Add more ribbon and tie it around the lace if needed.
-
Step 5 (Optional)
Adhere satin flowers over the knot.
Tip: Using Aleene’s Fast Grab Tacky Glue will insure a very strong hold. Liberally apply glue to flower back, place on can/bow, and PRESS AND HOLD FIRMLY until the glue takes. It may take 30 seconds or so per flower.
-
Step 6
Gently curve the image that will grace the tin front in your hands so it will fit around the can.
Use Aleene’s Fast Grab Tacky glue to apply the image to the can, pressing it firmly with your thumbs on the sides and holding down tightly until the glue sets. This could take 30 seconds or more – be patient. Once it takes hold, it will never pop up. Once firmly adhered, add additional embellishments as needed.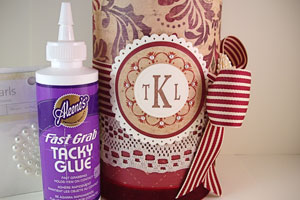
-
Step 7
Use dimensional foam adhesive to fill in the indent in the lid and to adhere the prepared image to the tin top.
Further embellish the lid as needed.
-
Your can is finished.
Video!
Your Turn
You've seen the tutorial, now you try it! We've got a section of the gallery set aside for Altered Tin. Try this technique, then upload your artwork to the gallery. Show us your creations!
***Please note - Internet Explorer/Edge is not a supported browser, and will not allow you to see the videos. Please use Chrome, Firefox or Safari to view our tutorial videos.

 *
*
Questions and Comments
We'd love to get your feedback or questions. Leave your comment below.
Eveline.
Beate, another awesome video!
http://notimetostamp.blogs.splitcoaststampers.com/2009/12/03/altered-cookie-tins/
HOW TO DO A CRAFT. AND HAVE FOR MOTHERS DAY.
detailed embellishments make it such a special
piece.
Thanks for the inspiration!
Page 1 of 1 pages