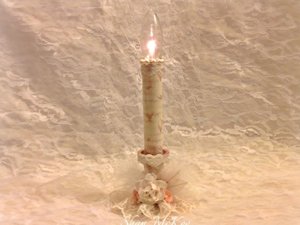
Altered Candlestick
by Shannin McKee
Customize a battery-powered candle for the holidays.
Supplies

- Battery-operated candle light
- Paint
- Patterned paper
- Paper trimmer
- Hot glue gun
- Border punch
- Mod Podge or other adhesive/gel medium
- Foam brush or old paint brush
- Other supplies as needed to embellish the project (Glossy Accents, ribbon, artificial flowers, feathers, flatback pearls, and pearl stamens used here)
Step-by-Step
-
Step 1
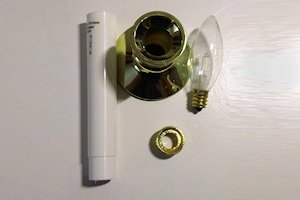
Take apart the candle light as shown and set aside the bulb and the stick.
-
Step 2
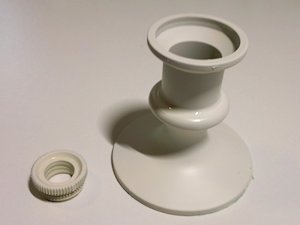
Paint the base and the ring that the light bulb screws into. Set these aside to dry.
-
Step 3
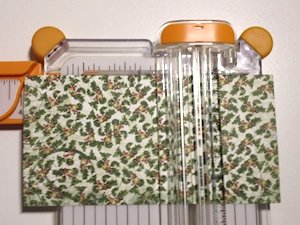
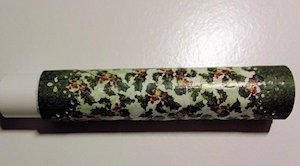
Measure height of candle and trim patterned paper to same height, with width enough to wrap candle stick.
-
Using a paintbrush, apply a layer of Mod Podge or gel medium to the back of the patterned paper and adhere it to the candlestick. Brush on another layer to seal.
TIP:
Applying the Mod Podge to the back of the paper helps it to wrap around the candle stick better.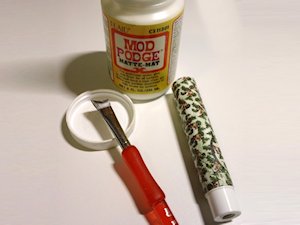
-
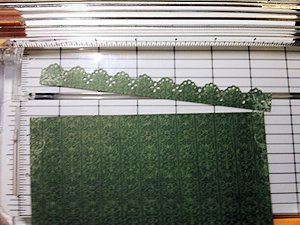
Step 4
Punch a 6" border from coordinating paper, then cut the border in half.
-
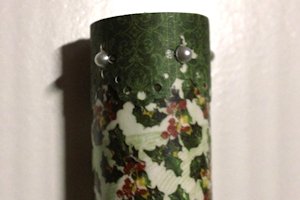
Step 5
Adhere the first strip to the top of the stick and the remaining piece to the bottom using Mod Podge or Glossy Accents.
-
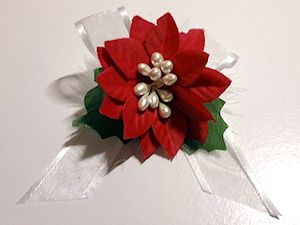
Embellish the border strip with flat-backed pearls if desired.
-
Step 6 (Optional)
Cut a strip of paper measuring 5/8" by 2 7/8". Adhere this strip around the top part of the candle base.
-
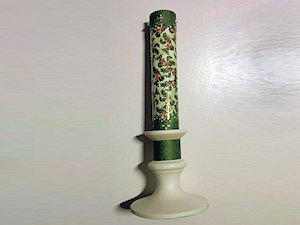
Step 7
Embellish the candle as desired, adhering silk or die cut flowers, ribbon, feathers, greenery, etc. to the candle and/or base with a hot glue gun. Insert batteries, and reassemble the candlestick.
-
TIP:
To fancy up artificial flowers for decoration, remove the plastic piece off the back of your flower along with the center. Bundle 4-5 double-ended pearl stamens, twist them in half, and thread through the flower center. Secure with hot glue and cut off excess wire to the back.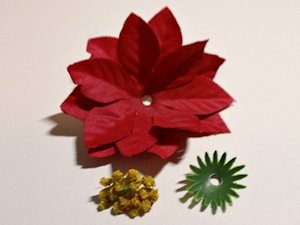
-
Step 8
Complete and display the candle in a window or other area decorated for the holidays.

Video!
Variations
-
Decorated candles can be suited to any décor or holiday setting.

Your Turn
You've seen the tutorial, now you try it! We've got a section of the gallery set aside for Altered Candlestick. Try this technique, then upload your artwork to the gallery. Show us your creations!
***Please note - Internet Explorer/Edge is not a supported browser, and will not allow you to see the videos. Please use Chrome, Firefox or Safari to view our tutorial videos.

Questions and Comments
We'd love to get your feedback or questions. Leave your comment below.
Page 1 of 1 pages