Altered Picture Frame
by Emily Giovanni
Decorate a picture frame for the perfect room accent or gift.
Supplies
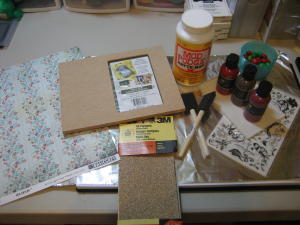
- Wood or particle board frame (can be purchased at most craft stores)
- Sandpaper
- Mod Podge™
- Foam brushes
- Acrylic paint
- Patterned paper
- Scissors
- Pencil
- Aluminum foil or waxed paper
- Embellishments (optional)
Step-by-Step
-
Step 1
Guard against sticking by covering the work area with aluminum foil or waxed paper.
Remove glass insert and set aside.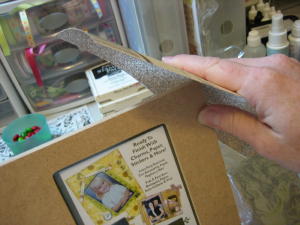
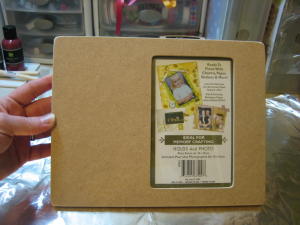
-
Sand corners and front edges of frame until rounded.
-
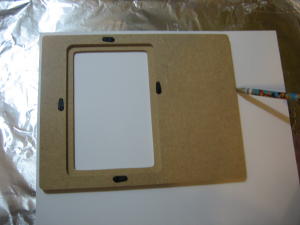
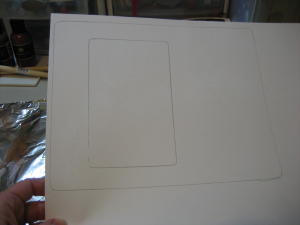
Step 2
Place frame face down on the reverse side of the patterned paper. Trace around the frame opening and outside edges.
-
Step 3
Use scissors to cut frame shape from paper. For the frame outside, cut inside the lines. For the frame opening, cut outside the lines. The patterned paper frame will be slightly smaller than the actual frame.
-

-
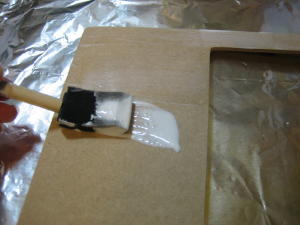
Step 4
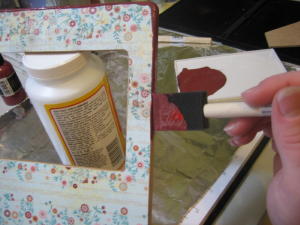
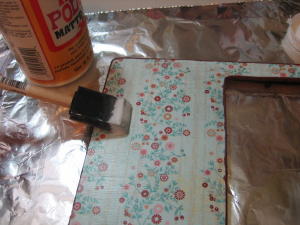
Use a foam brush to apply Mod Podge™ to the frame. Apply an even coat. Too little will cause bubbles under the paper.
-
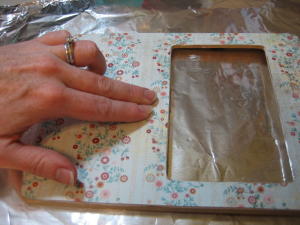
Step 5
Place paper onto Mod Podged frame. Smooth any bubbles away with your fingers.
-
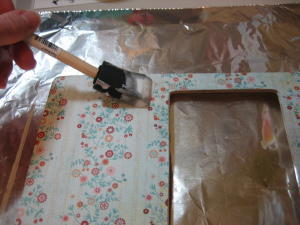
Step 6
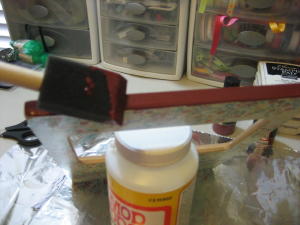
Use the foam brush to coat the frame with Mod Podge™, making sure to apply to all the edges. This will assure there are no bubbles at the edges. Set aside, and allow to dry..
-
Step 7
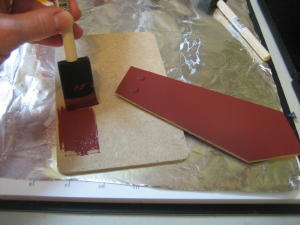
Prepare paint for the frame.
Tip: I mix colors together to get the shade I want.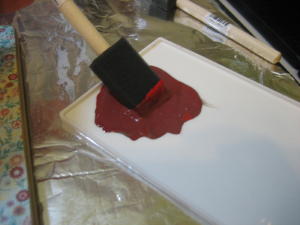
-
Step 8
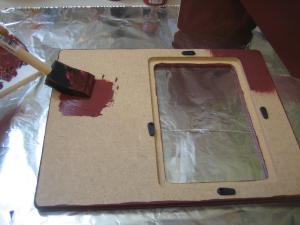
Use foam brush to paint the sides of frame. Slightly squish the brush along the front edge of the frame until the paint meets the paper. This will cover any part of the frame that shows around the paper. Paint the inside of the frame opening the same way. Let paint dry.
-
-
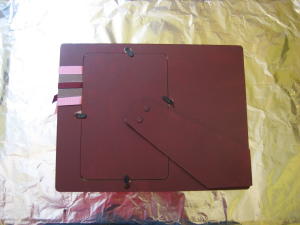
Step 9 (Optional)
Finish the frame by painting the back as well as the support with a foam brush. Let dry.
-
-
Step 10
Protect the painted edges by applying more Mod Podge to edges with a foam brush.
-
Step 11
Replace glass insert and embellish as desired.
Tip: If using ribbons, it is easiest to lay them out and then replace the glass before tying. Otherwise it will be difficult to replace the frame back.
Try adding stamped embellishments or rub-ons to finish the frame. Make sure to apply an addtional coat of Mod Podge for protection.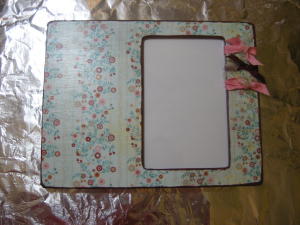
-
-
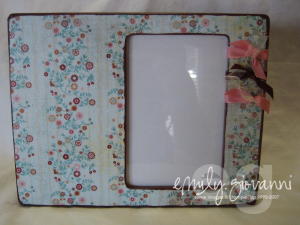
Step 12
Finished project!
-
Your Turn
You've seen the tutorial, now you try it! We've got a section of the gallery set aside for Altered Picture Frame. Try this technique, then upload your artwork to the gallery. Show us your creations!
***Please note - Internet Explorer/Edge is not a supported browser, and will not allow you to see the videos. Please use Chrome, Firefox or Safari to view our tutorial videos.

Questions and Comments
We'd love to get your feedback or questions. Leave your comment below.
hugs- Trish
Page 1 of 1 pages