Alcohol Marker Marbling

by Audrie Magno-Gordon

Use alcohol markers to create a marbled background on glossy cardstock.

Supplies
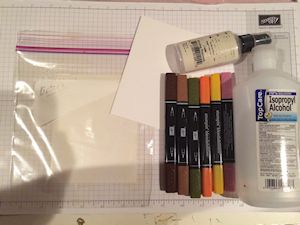
  • Alcohol markers (Blendabilities Markers by Stampin' Up! used here)

  • Rubbing alcohol or colorless blending ink intended for alcohol markers in a spray bottle (safety note: Ranger Blending Solution and alcohol inks contain resins and should not be sprayed)

  • Glossy cardstock cut to 4 1/4" x 5 1/2"

  • Quarter sheet of text weight paper for a template

  • Ziploc-type plastic bag (empty and sealed closed) or other non-porous surface, such as a craft sheet or ceramic tile

Step-by-Step

  1. Step 1

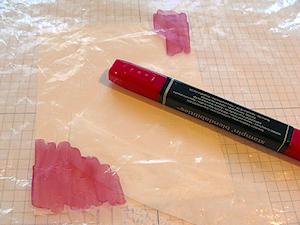
    Using a tiny bit of removable tape, secure a quarter sheet of paper to your work surface. This will serve as a template. Cover the template with a Ziploc bag. Use removable tape to secure the bag so it doesn't move.

    Begin coloring with alcohol markers directly onto the bag, covering a space equal to the size of the template.
  2. Step 2

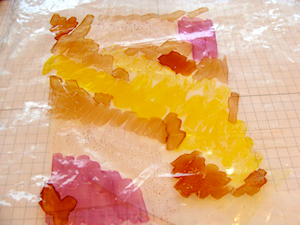
    Use a variety of markers randomly on the bag. No need to blend them, just scribble them on side-by-side very randomly.
  3. Step 3

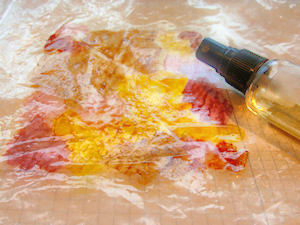
    Spritz the bag with rubbing alcohol until the inks appears to be wet, and droplets of the liquid are visible on top. You will notice that the edges of the colors will start to blend.
  4. Step 4

    Place glossy cardstock glossy side down onto the wet ink. Press the cardstock onto the ink for a few seconds then lift it up to reveal your background.
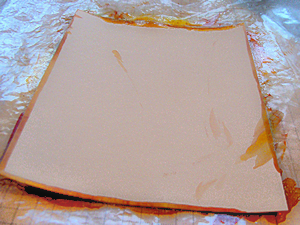
  5. Use the print as is or repeat this step to add layers of color or fill in missed areas. Mist the inked work surface as needed to revive colors with alcohol.
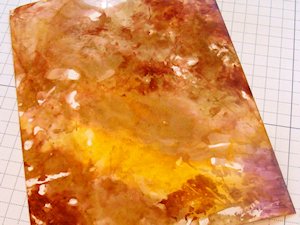
  6. Step 5

    Use the background to complete a card front or scrapbook page.
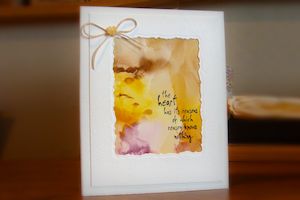
Video!

Variations

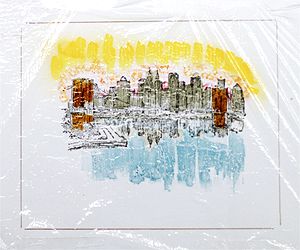
  1. Plan your coloring to complete a scene. For an impressionistic look to any favorite landscape or nature image, stamp the image onto your work surface underneath the plastic, use that image as a guide for color placement.
  2. Spritz a large stamp with rubbing alcohol and lay a completed background panel onto the stamp. An impression of the stamp will appear in your marbled background. Wash the stamp promptly to remove alcohol residue.

    A similar look can be achieved by spritzing alcohol through a stencil over a completed background.
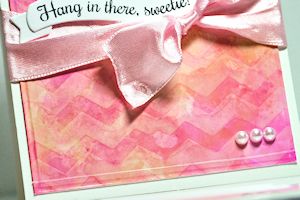
Your Turn

You've seen the tutorial, now you try it! We've got a section of the gallery set aside for Alcohol Marker Marbling. Try this technique, then upload your artwork to the gallery. Show us your creations!

***Please note - Internet Explorer/Edge is not a supported browser, and will not allow you to see the videos. Please use Chrome, Firefox or Safari to view our tutorial videos.

Questions and Comments

We'd love to get your feedback or questions. Leave your comment below.

Wow, cool technique!
Lisa Lara  |  Wed Sep 24, 2014 at 3:08 AM
love seeing a new way to use the blendabilities. thanks!
Meg McAlister  |  Wed Sep 24, 2014 at 3:32 AM
Audrie, you do an amazing job with video's, it just flows beautifully and with a fabulous, informative take on the technique! Thank you!
Bridget Finlay  |  Wed Sep 24, 2014 at 3:37 AM
Wow, what a great video. I love your method of teaching, it just flows quickly and adds tips along the way. Thanks for showing this technique.
Edie  |  Wed Sep 24, 2014 at 3:56 AM
Hi love the technique, thanks for sharing. Did you use a card template or a die to cut the window panel. If you used a die could you tell me what it is called.

thanks again.

Sue
Sue Dean  |  Wed Sep 24, 2014 at 4:37 AM
WOW, I just love this effect. Thanks for the technique.
Heide Dronchi  |  Wed Sep 24, 2014 at 4:54 AM
What glossy card stock do you all use? I usually work with SU products, but they don't carry one. Thanks, everyone!
Lynn Wynn  |  Wed Sep 24, 2014 at 5:17 AM
Audrie, WOW thanks so much for this great video, it is so much easier than other background methods I've seen done, can't wait to have a go.
Margaret Jenks  |  Wed Sep 24, 2014 at 5:35 AM
Love this technique! Quite timely as I have so many cards to make. Excellent video, too. TFS
Dorothy  |  Wed Sep 24, 2014 at 5:50 AM
Can't wait to try this! What a fantastic video!
Bonnie  |  Wed Sep 24, 2014 at 6:05 AM
I have a lot of glossy photo paper (for printing photos with my HP printer). Can I use that for this technique?
Kathy Marsh  |  Wed Sep 24, 2014 at 6:15 AM
I really like this technique and was hoping someone would show how to use the blendies with alcohol. I have several birth days coming up in October and was looking for something very different. Thank you so very much. I'd like to also say you did a terrific job explaining the technique. You didn't rush through it and you were very clear. Did I say Thank You?
Thanks
Brenda  |  Wed Sep 24, 2014 at 6:17 AM
Thanks for this wonderful tutorial, Audrie! I can't wait to try this! How fun!!
Nancy Stislow  |  Wed Sep 24, 2014 at 6:27 AM
Thanks for the great tutorial Audrie! I love your art work as well as your teaching. I can't wait to try this!
Suzanne  |  Wed Sep 24, 2014 at 6:56 AM
This is awesome . You are the greatest .thanks so much
Janice Stone  |  Wed Sep 24, 2014 at 7:01 AM
great technique, I'm just starting to learn how to make cards and truly enjoy watching all the ideas that everyone has. I will try this one. Thank you
Helen Thompson  |  Wed Sep 24, 2014 at 7:14 AM
the tutorial suggested that alcohol blending solution can be used to spritz the colours on the plastic wrap. Please be aware that Tim Holtz has stated that the Ranger Blending Solution should NOT BE SPRAYED. One of the ingredients in the blending solution can be harmful if inhaled.
Also, to answer Kathy Marsh, PHOTO PAPER should not be used. It's a beautiful and tempting surface, but it gets gummy if you try to do this with alcohol inks. It does not like to be wet.
Linda Standart  |  Wed Sep 24, 2014 at 7:52 AM
Oh, Audrie, thank you for a wonderful video tutorial! You were delightful and really took the mystery out of this beautiful technique!! Hugs!
CherylQuilts  |  Wed Sep 24, 2014 at 7:56 AM
Thanks Audrie for the great tutorial. Love how you presented this and hope you will do more videos to share with us. Just got my SU order with some Blendabilities and now have a new method of using them. Can't wait to try this. Thanks, Linda Standart for the comment about NOT using Photo Paper! I have alot of Glossy Paper that I've had for YEARS, so now have a wonderful use for it!
marie0112  |  Wed Sep 24, 2014 at 8:12 AM
WOW! The technic is wonderful and your video was fabulous. I very much appreciate ALL the extra tips in the video. I am giving this a try.
kab  |  Wed Sep 24, 2014 at 8:14 AM

Page 1 of 4 pages  1 2 3 >  Last »

You need to be logged in to comment

GET OUR NEWSLETTER


Splitcoaststampers's privacy policy