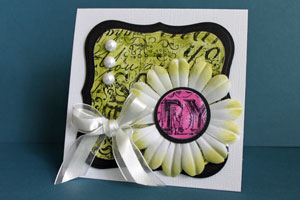
Acrylic Smash

by Beate Johns

Use acrylic paint on acetate to create a unique background.

Supplies
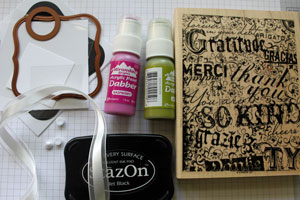
Step-by-Step

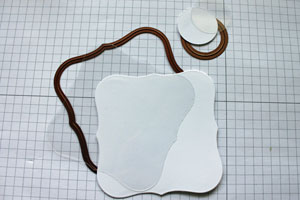
  1. Step 1

    Use die templates to cut white cardstock and acetate to the shape and size needed.

    Alternative:
    Cut white cardstock and acetate with a paper cutter or circular cutting system.
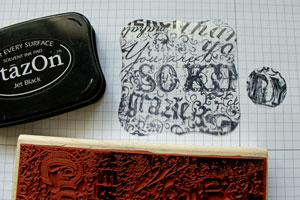
  2. Step 2

    Stamp image in StazOn on acetate piece.
  3. Step 3

    Apply acrylic paint to the "wrong" side of the stamped acetate.

    Hint:
    Try a light coat first. You can always repeat this and the next step to add more color.
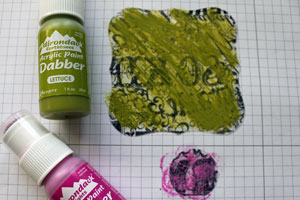
  4. Step 4

    Press your white cardstock piece over acetate.
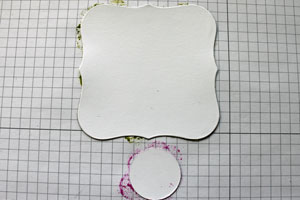
  5. Step 5

    Flip the acetate/cardstock piece over. You can move the acetate piece around to spread the paint, or lift the acetate piece up and add more paint.

    Make sure the pieces are lined up straight.

    Hint:
    When the ink is dry, the pieces will stick together. No need for adhesive.
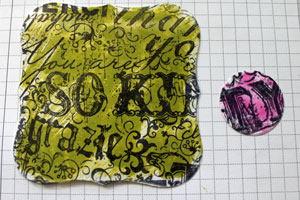
  6. Step 6

    Finish your card.

Video!

Variations

  1. Multicolored
    Add more then one color to your Acetate.
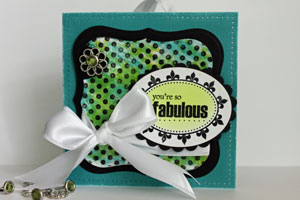
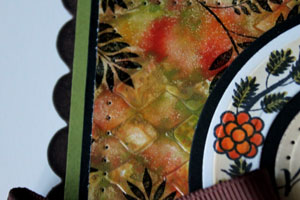
  2. Add more texture
    Run your Acetate piece through your die cut machine with an embossing folder before creating the background.
    You will need to cover the acetate completely with paint to make the now textured acetate stick to your cardstock.
Your Turn

You've seen the tutorial, now you try it! We've got a section of the gallery set aside for Acrylic Smash. Try this technique, then upload your artwork to the gallery. Show us your creations!

***Please note - Internet Explorer/Edge is not a supported browser, and will not allow you to see the videos. Please use Chrome, Firefox or Safari to view our tutorial videos.

Questions and Comments

We'd love to get your feedback or questions. Leave your comment below.

This is fabulous Beate!! Thanks so much for sharing this lovely technique!!
Smiles,
Deena
Deena  |  Wed Sep 30, 2009 at 9:59 AM
This is really cool! Now I gotta get some acetate! Can you use regular transparencies like I would use at school?
Judy Rozema  |  Wed Sep 30, 2009 at 10:29 AM
once again you've WOW'd me...you are so talented and you make it easy for those of us not as talented....thank you!
Jan D.  |  Wed Sep 30, 2009 at 10:32 AM
Cool! Oh, and I thought I was the only one who loved the smell of StazOn ink! Now, off to make a card like these. Thanks!
Debra  |  Wed Sep 30, 2009 at 10:47 AM
Another WONDERFUL tutorial! I will try this (:
julie Crossley  |  Wed Sep 30, 2009 at 11:04 AM
This is beautiful! And I love the idea of using an embossing folder. I am so going to try this after lunch!! (and I like the smell of Staz-on, too!)
musicmarth  |  Wed Sep 30, 2009 at 11:29 AM
That is so cool! Thanks for sharing, and I am glad that I am not the only Stazon "sniffer" too!!
DIane Cooper  |  Wed Sep 30, 2009 at 12:07 PM
Great technique! I didn't realize it, but I was using this a while ago. Paint is a great way to attach those sheer layers to campus without brads or other fasteners/tape. I have used transparencies from an overhead projector for this technique before. I'm not sure if they're identical to acetate, but they will work.
Deb Charlesworth  |  Wed Sep 30, 2009 at 12:29 PM
Please can someone tell me where to get acetate not transparencies. I've put off other projects with acetate because transparencies are too flimsy. thank you
Tracey  |  Wed Sep 30, 2009 at 1:20 PM
Tracey and Judy,
You can use Transparencies. That's what I use! They work fine for techniques where you just use them as an overlay. For thicker acetate, check Flourishes and Gina K. I think they both carry that.
Hugs and smiles
beate  |  Wed Sep 30, 2009 at 1:22 PM
OH WOW!! Love the card you made with this technique. I think I need to find my desk top so that I can try this!!
Starla (star)  |  Wed Sep 30, 2009 at 3:34 PM
Tracey, there's a place called SheetLoad of Short Cuts where you can get the acetate and you cn also buy the frosted stuff!!
http://shortcuts.sheetloadofcards.net/shop/
I bought from them a couple of times now, great service and great prices too!
Cheers.
Viviana  |  Wed Sep 30, 2009 at 3:54 PM
Your videos are so fabulous (I love hearing your voice - love your accent :D)!!

Videos are always so helpful for us visual learners - thank you Beate!!!
Michele  |  Wed Sep 30, 2009 at 6:42 PM
Fabulous! Love the look of this!
Julie - justwritedesigns  |  Wed Sep 30, 2009 at 11:08 PM
I just love your videos. Another awesome project...will have to try it soon!
Shari  |  Thu Oct 1, 2009 at 6:22 AM
WOW!!!! I loved it!!!
Michelle  |  Thu Oct 1, 2009 at 7:16 AM
Thank you so much for sharing this awesome tutorial! I really appreciate all of the attention to details and information! Keep it up! You are very talented!
Dawn-dawnsview  |  Thu Oct 1, 2009 at 8:32 AM
Love this look!!! Will have to try it as soon as I get a free minute.
GarnetJ  |  Thu Oct 1, 2009 at 2:49 PM
WOW! I love it. Thank you for sharing this Beate, and your turorials are brillant. I know what I'm gonna be doing on Saturday.
Jenny
Jenny  |  Fri Oct 2, 2009 at 2:29 AM
Thanks for the tutorial, it was so quick and easy. Will be uploading my sample to the gallery soon.
Cheers From Oz
Danielle Sheehan  |  Fri Oct 2, 2009 at 6:40 AM

Page 1 of 3 pages  1 2 3 >

You need to be logged in to comment

GET OUR NEWSLETTER


Splitcoaststampers's privacy policy