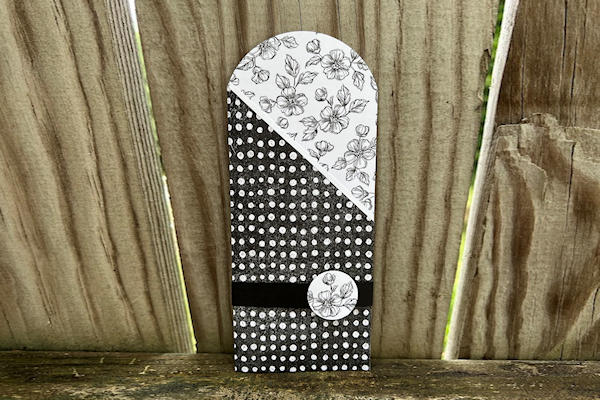
Partial Die Cut Slimline Card
by Betty Traciak
Add a decorative touch to your slimline design.
Supplies
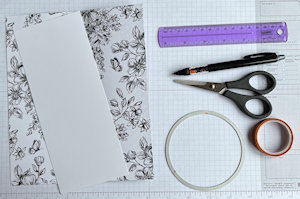
- Cardstock (Stampin’ Up!® Basic White and Basic Black Cardstock used here)
- Scoring tool
- 3 1/2” circle die
- Die cutting machine
- Ruler and pencil
- Scissors or trimmer
- Other supplies as needed to complete the project (SU products used here: Butterfly Brilliance stamp set, Perfectly Penciled Designer Series Paper, Stampin’ Blends Alcohol Markers, Momento Ink Tuxedo Black, washi tape, 1 1/4” Circle Punch)
Step-by-Step
-
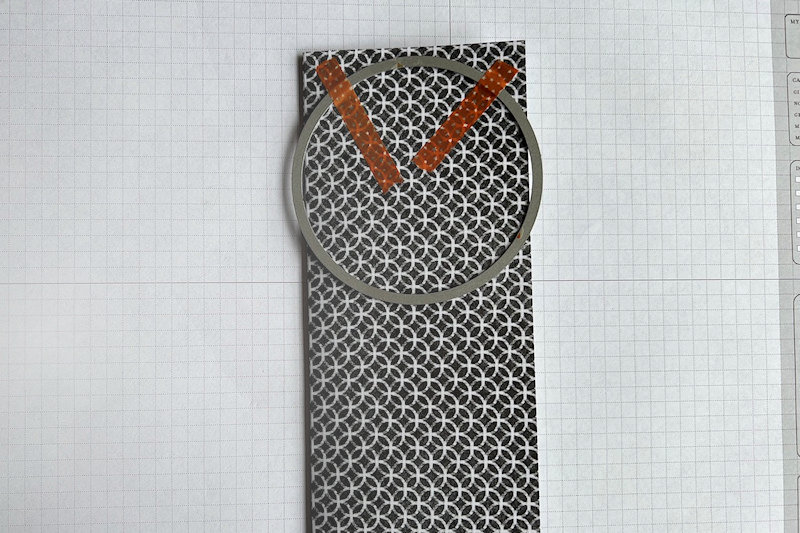
Step 1
Cut a card base to 7” X 8 1/2”. Score in half at 3 1/2”. Fold on the score line.
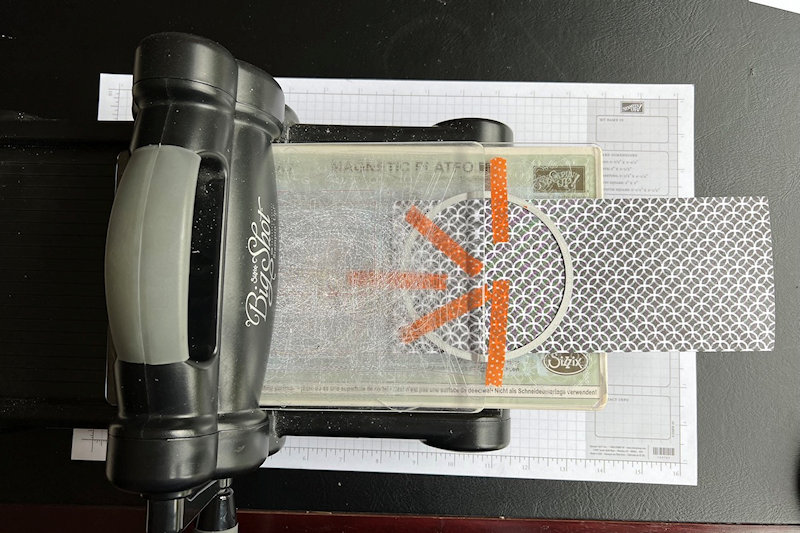
Select a circle die that is slightly larger than the width of the card base (3 1/2” circle used here.) Position the die on the card base as shown and secure with washi tape.
-
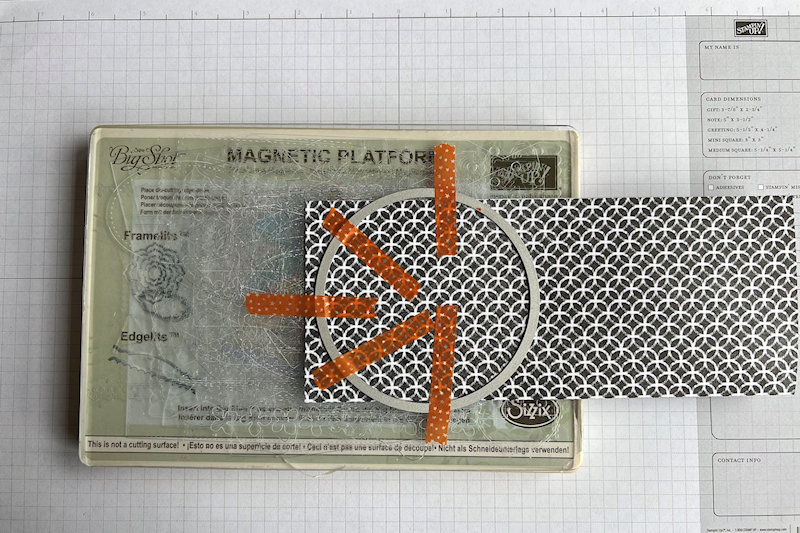
Step 2
Place the card base and die on your die cutting machine with the base plate and cutting plate. Secure with washi tape.
-
Step 3
Place the die cutting plate on the top portion of the card base covering 1/2 of the circle die. Run the stack through the die cutting machine.
-
Step 4
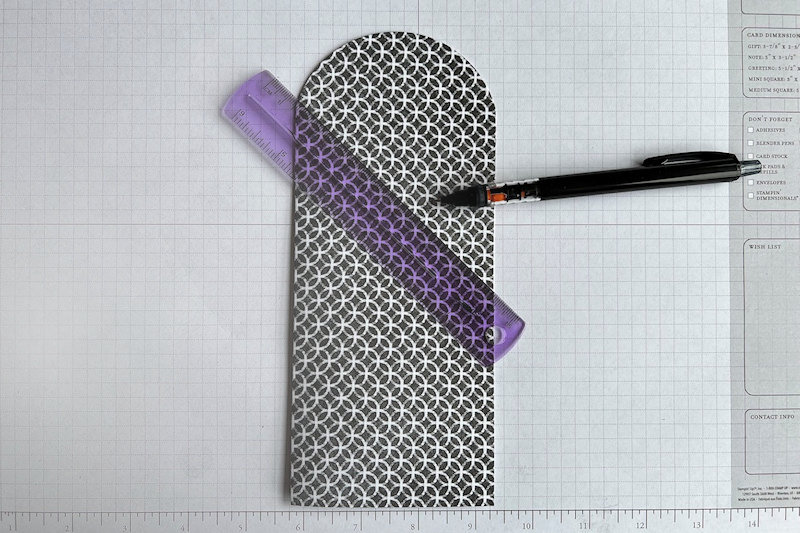
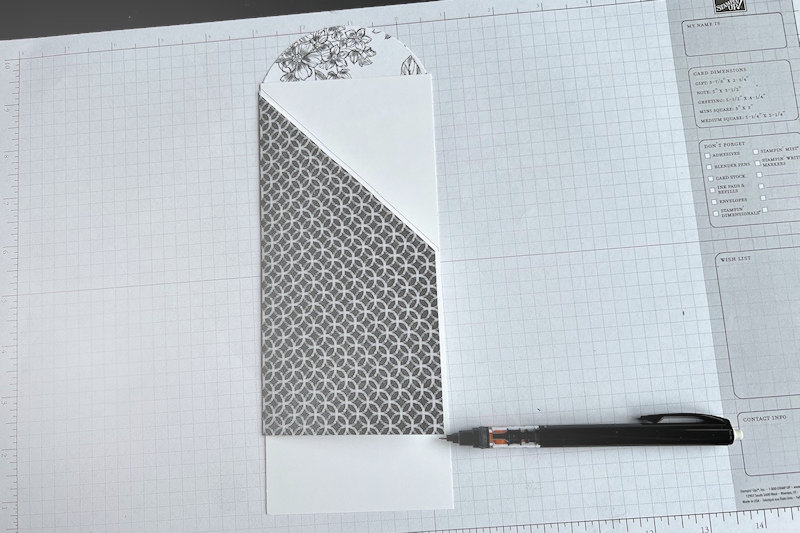
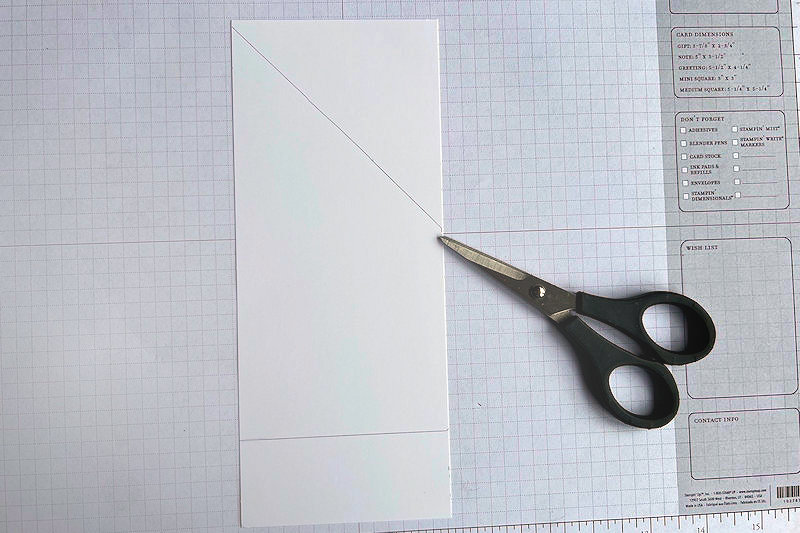
Draw an angled line from the corner of the arch to the opposite side of the card.
TIP:
Choose the desired angle based on the pattern of the paper. -
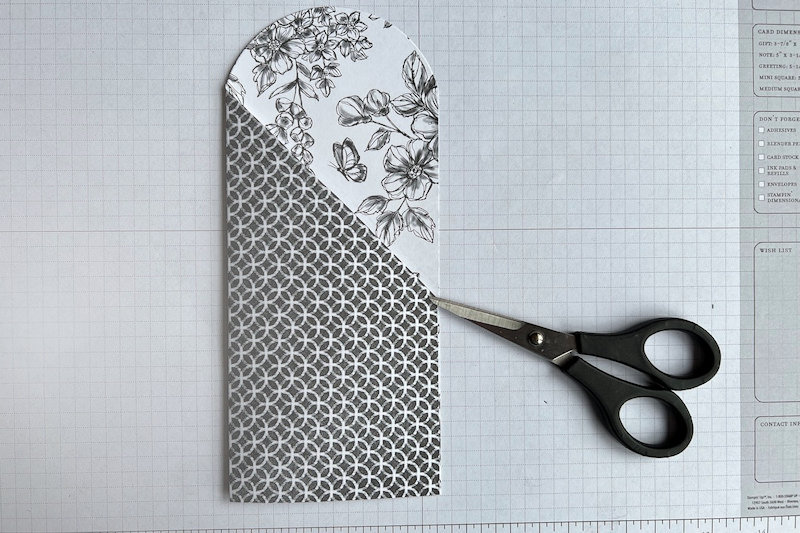
Cut on the drawn line.
-
Step 5
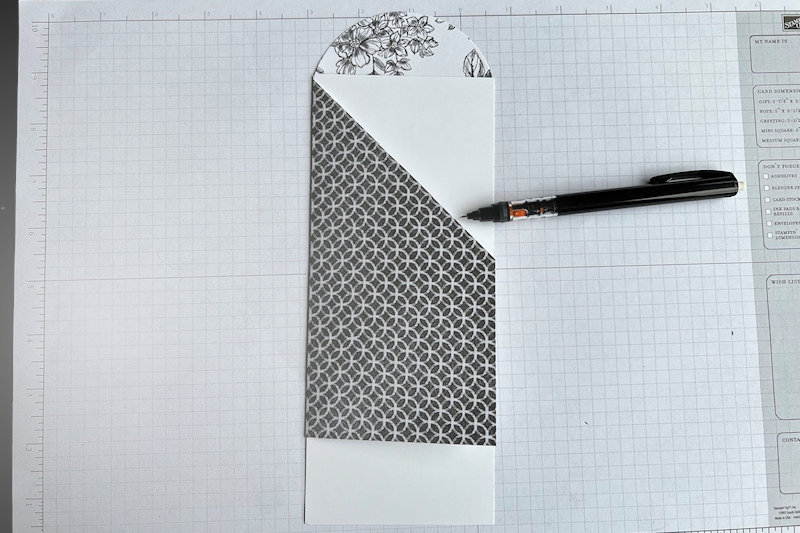
Cut a piece of cardstock to 3 1/2” X 8 1/2”. Place it inside the folded card with a tiny bit peeking out. Draw a line.
-
Move the cardstock up 1/8”. Draw a line at the bottom of the card.
-
Step 6
Cut the cardstock on the lines.
-
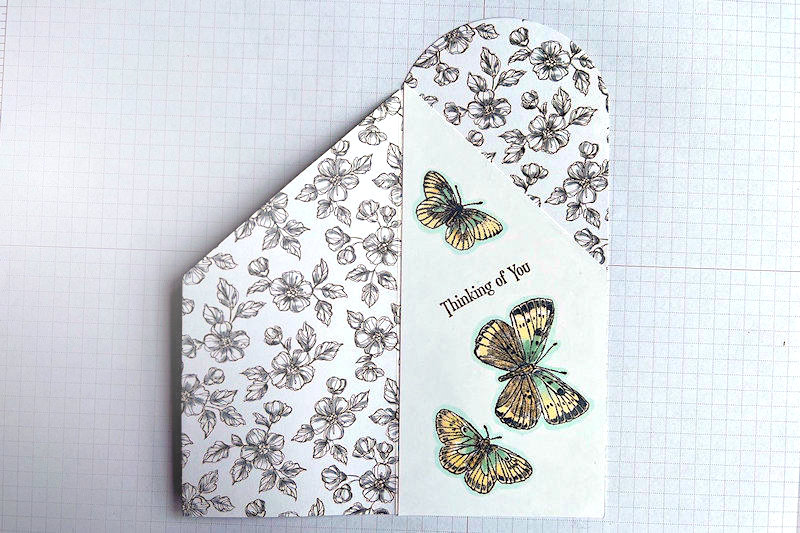
Step 7
If desired, stamp and color the insert before adhering it to the inside of the card.
-
Step 8
Embellish and complete the card.
Video!
Your Turn
You've seen the tutorial, now you try it! We've got a section of the gallery set aside for Partial Die Cut Slimline Card. Try this technique, then upload your artwork to the gallery. Show us your creations!
***Please note - Internet Explorer/Edge is not a supported browser, and will not allow you to see the videos. Please use Chrome, Firefox or Safari to view our tutorial videos.

Questions and Comments
We'd love to get your feedback or questions. Leave your comment below.
Page 1 of 1 pages