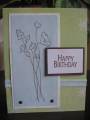
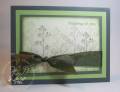
-The blocked background is colored with the polished stone technique, stamped with the images, heat embossed with clear powder using the Aida background.
-The image panel is stamped first and colored in using Prismacolor pencils. I used a VersaMark pen to go over each image and heat embossed with clear powder to act as a resist.
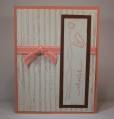
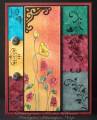
-The background color is stamped with the grid pattern from the Oh So Lovely set multiple times first in yellow making sure to turn the image when stamping over the same spot –a complete 180 turn.
-Next drag sponge on the Tea Dye distress ink to tone down the yellow but not over the entire panel and at different levels of ink coverage.
-Next step is to sponge on the Baroque Burgundy ink but do this step in a straight up and down motion.
-Now use the grid image again and stamp on some burgundy only in its own color areas. Then do the same with the Tea Dye on the yellow area. I wiped over the entire panel with a paper towel to remove any ink on the heat embossed areas.
-The Cuttlebug die cut is tacky glued in place. The smaller die cut flourishes are attached with Diamond Glaze to the heat embossing.
I really like the finished look, hope you do too! It sounds like a lot of steps but it really doesnÂ’t take but about an hour to complete this card and I have all the time in the world when IÂ’m creating! And once again it isnÂ’t workÂ…its play!
Date: Friday, March 14, 2008 GMT Views: 1305
Favorited:13