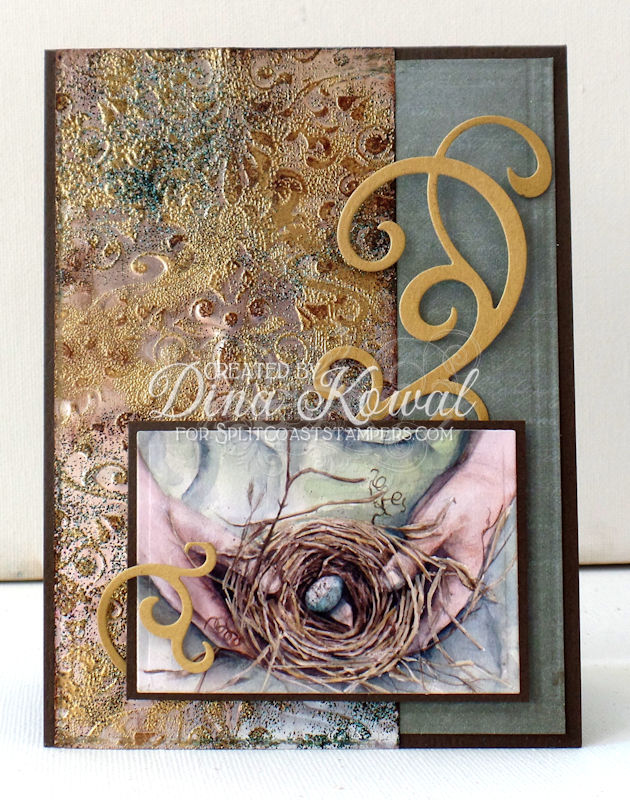
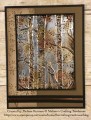
The tutorial recommends using black StazOn ink, but I used Timber Brown on mine and I liked the results better. My base is a silver label sheet from Silhouette - these are adhesive on the back, which was really handy. I embossed the sheet with a folder from Darice, then added gold and verdigris embossing powders. After the heat embossing, the final step is to rub ink over the raised areas to make them look tarnished. Lots of steps, but such a great effect! The focal piece is a mini print of one of my watercolor paintings.
Date: Tuesday, April 11, 2017 GMT Views: 7143
Favorited:14
Accessories: Foil sheet (Silhouette), embossing folder from Darice, die from Impression Obsession, mini art print (Dina Kowal Creative), gold and verdigris embossing powder, heat tool
Registered: April 5, 2009 Location: Alberta, Canada Posts: 1223
Sun, Jan 07, 2018 @ 4:05 PM
WOW!!! WOW!!! WOW!!! This is stunning Dina!
Hugs
------------------------------ Patricia "You have brains in your head. You have feet in your shoes. You can steer yourself any direction you choose."
~ Dr. Seuss
I love the tarnished look. I see so many ones on here. Good work to all you ladies and hopefully I can post something 'post-worthy'. Hugs & have a good rest of your week.
FlowerBird Creations
Kim Brown-Coon
------------------------------ Kim Brown-Coon South Carolina