This is a simple design using the aluminum foil and alcohol inks, wrinkling the aluminum, glue to light weight paper then daub with various alcohol inks. The trees are left over scraps from a previous project. The real fun was making ink. I gathered walnuts and rotted them in the garage for several weeks in water. When the time came to cook them this was the ugliest thing I ever saw complete with mold and rot! I attempted to remove the outer shell before cooking since that is the part that makes the ink but it was like removing the outside of a tennis ball. I decided to cook them and worry about that later. As it cooked everything turned a black color, far preferable than actually seeing what was in there since beetle larva can survive the boiling. Beady eyes in a boiling pot would have ended this very quickly. As the water boiled, I used my thickest gloves to stick my hands in it and start breaking up the ugly mess. I cooked for 5 hours but I believe I should have let it go longer. I then took an old pair of support hose which will never be worn again to strain the sludge. With the help of my guest and craft buddy, we started scooping the sludge into the panty hose. I hoped my legs didn't look as bad in the hose as the nasty, lumpy sludge did! After straining we strained again since a lot of sludge pieces got into the ink. After it cooled we poured it in jars and added 20% alcohol to prevent molding. This did thin out the ink but I was thrilled with the color. It was then used in a mister, sprayed on a craft sheet and any dye reinker or alcohol ink worked beautifully for blending colors.
Thanks for stopping by and I'd love to know if anyone else tried this.
Date: Friday, October 31, 2014 GMT Views: 2757
Favorited:18
Registered: February 5, 2007 Location: St. Louis, MO Posts: 92424
Fri, Oct 31, 2014 @ 6:12 PM
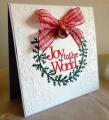
MARVELOUS card with the metallic sheen and shine. From the photo(and it could be the photo), there is a mother-of-pearl glow on your bg......totally STUNNING!!
Registered: June 13, 2008 Location: Vancouver, Canada Posts: 23675
Fri, Oct 31, 2014 @ 9:32 PM
I am so impressed by the amount of work you put into this!! The results were sure worth it! Gorgeous card - love the background with the foil, love the gold trees.
------------------------------ Susan
My SCS gallery is here should you care to look! Or please visit my blog, Cardmaker's Garret.
Splitcoast Dirty Dozen Splitcoast Challenge Hostess Teapot Tuesday TEAm
Registered: January 19, 2014 Location: Central Indiana Posts: 90216
Sat, Nov 01, 2014 @ 6:12 PM
Oh my goodness you made your own ink!! Wow that is fantastic! I would never have thought to do this - I have to say reading your description I am probably not likely to try any time soon but it sure sounds like a great story of making your own ink. Thanks for sharing your technique.
Splitcoast Dirty Dozen Alumni Proud Fan Club Member Splitcoast Challenge Hostess Teapot Tuesday TEAm
Registered: April 18, 2011 Location: Melbourne, Aus Posts: 51844
Sat, Nov 01, 2014 @ 8:40 PM
You made your own ink!!!!!! Oh my gosh Nancy how amazing are you. I was in raptures reading the process, bet it was lots of fun. For obvious reasons I am not allowed to play with anything that boils. Nancy everything about this is stunning my friend.
------------------------------ Susie
Please don't take your organs to heaven - heaven knows we need them here.
Registered: January 8, 2011 Location: Sydney, Australia Posts: 40327
Sat, Nov 01, 2014 @ 11:49 PM
I wouldn't even think about making home made ink, Nancy LOL!!! Good on you, though, it sounds like it was a lot of work to do, your amusing story made for interesting reading, too!! You have made the most beautiful card with this gorgeous aluminium foil bg and gold trees, a REAL beauty!!!!
------------------------------ Sue
Fan Club Member QFTD143 FS420