Registered: February 5, 2004 Location: Southeastern Ohio Posts: 99
Sat, Jan 22, 2005 @ 12:11 PM
Okay, I'm in the process of uploading two photos of a template I made for these books. I don't have the capability of putting the file into a format everyone can use, so I hope the photo works. They should show up in my gallery soon.
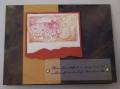
Directions for the cover: the basic size of the cover is 4" x 11", (finished folded it will end up a 4"x4"). You will leave some tabs on the long side to use to adhere the ends for pockets to hold the inside pages (see photo of template). Score and fold in the center and at 1.5" from each end. You'll cut a slit in the fold for the pockets to hold a piece of ribbon. Most of the ribbon will run through the inside of the minibook, but the ends will come out and you can tie the book shut with them (see photo of my minibook cover and the template photo).
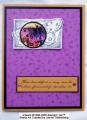
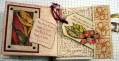
Directions for pages: The pages are from a piece of 3.75" x 7.5" paper (finished size will be 3.75 x 3.75). Just fold in the center and sew all the inside pages together with your sewing machine. Make at least 2 of these inside pages (or more if you want them). The first and last page will get slipped into the pockets of your cover and that's what holds the whole thing together, so you'll want at least another set of pages to have something to decorate. Then just stamp and decorate to your heart's content. I went with a basic 3 color scheme and used lots of inspirational sayings and vintage brads, and a bit of sponging for an antique effect.
Registered: July 14, 2004 Location: Living imperfectly with great delight! AB, Canada Posts: 3325
Sat, Jan 22, 2005 @ 8:11 PM
This is stunning, I LOVE IT!
------------------------------ Smiles and laughter, Laurie
Finally I have a Blog..come visit and lend me a hand decorating with some of the nifty sidebar thingys! LOL http://www.actofstamping.blogspot.com/