Registered: April 1, 2008 Location: central pa, usa Posts: 41
Thu, Apr 03, 2008 @ 5:24 PM
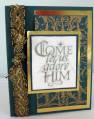
beautiful, do i detect a little oragami? its lovely!
------------------------------ Imperfection is Beauty, Madness is Genius, and it is better to be absolutely ridiculous than absolutely stupid ≈ Marilyn Monroe
~Tonya
Registered: October 5, 2004 Location: Las Vegas,Nevada Posts: 28
Thu, Apr 03, 2008 @ 10:53 PM
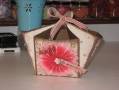
I would be happy to share!!!! Here are the instructions. Enjoy and happy crafting!!!!
DESK CADDY
SUPPLIES
(1) 12x12 cardstock
(1) each 12x12 B&T Duo paper, two patterns
(2) 18 inch strips of ribbon
INSTRUCTIONS
Score the 12x12 cardstock at 4 inches and 8 inches. Turn and score again the opposite direction at 4 inches and 8 inches. Your cardstock is now scored into 9 squares.
Score the corner squares diagonally, from point towards center of paper.
Cut four 3� inch squares of B&T Duo paper. Mount on each of the four solid squares.
Cut four 3� inch squares of (contrast or, optionally, same pattern) B&T Duo paper. Cut each diagonally to form triangles. Mount on the diagonally-scored squares.
Punch holes in each of the four points.
Center square leave plain.
Embellish as desired.
Fold on all score lines.
Fold up, folding diagonally-scored squares with crease toward center.
Thread one length of ribbon through two points diagonally across caddy. Thread other the opposite direction. Hold together and tie in bow.
Fill and enjoy!
Note 1: you may choose to spray with craft sealer before adding ribbon to give the caddy some protection
Note 2: placing something heavy in the bottom can help keep the caddy from tipping over when filled unevenly -or- about 3/4 inch deep of dried beans or peas can help pens stand upright in the openings
+++
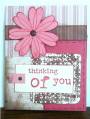
Cover small notepads as desired with B&T. Insert each pattern of B&T into RSVP Pentel pen barrels to coordinate.
________________________________________