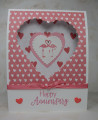
I used the same layout as Marilyn with different colors and no punches, and a sticker birthday sentiment rather than a stamped label thanksgiving one.
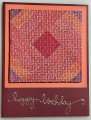
I found some coordinating scraps of paper in the giant scrap pile on my deskâ¦did not even need to go to the bin. I cut a 3.5 inch square of white cardstock and actually measured out the center point instead of winging it this time! I punched a square of red cardstock and glued it in the middle, then built outward with 1/2 inch wide strips. The process of making the the quilt with the strips was so relaxing and I completely fell into that âflowâ zone.
I ran the finished quilt through my big shot with the Cuttlebug embossing folder that is one of my favorites for a quilt look. Itâs also a pretty fierce embossed so sometimes leaves a whitish surface as it wears away the very top layer, and that combined with the dense embossing left me a little disappointed, as the contrast between the strips became muted. But I am actually liking it a lot better this morning, as it gives the strips the look of hand dyed fabrics.
I backed the quilt piece onto some light orange cardstock with foam tape, and glued the finished piece to a burgundy card. I finished with a sentiment sticker from Stampendous.
USEIT2022: paper scraps that I used before they made it into the scrap bin. Also the Stampendous sentiment stickers are an ancient part of my stash and had never been used! I love how this one looks so suspect that the others will be used much faster now.
Date: Sunday, January 30, 2022 GMT Views: 434
Favorited:2
Splitcoast Dirty Dozen Alumni Creative Crew SU Design Team Alumni
Registered: October 5, 2006 Location: Maryland Posts: 15773
Sun, Jan 30, 2022 @ 4:08 PM
Wow, love your quilt card! So glad that you were able to use your scraps as well as that great sentiment sticker! Thanks for the inspiration and sharing with all of us!